Learning how to wash and cure resin prints safely is two jobs, not one. Washing strips liquid uncured photopolymer resin off the surface and out of every recess, then curing with UV light finishes the polymerisation your printer only started. Skip the wash and you get a tacky part that traps uncured resin against your skin. Rush the cure and you get a brittle, unstable piece that was never fully hardened.
The whole post-processing cycle takes roughly 20 to 40 minutes of attention per batch of prints, and most of that is waiting for things to dry and cure. It is not difficult work. It is just work you do the same way every time, and the safety side is simpler than most forums make it sound: nitrile gloves, a ventilated space, and following the safety data sheet that shipped with your resin.
Below is the workflow I would hand a friend on their first month of SLA printing, including the wash media trade-offs, the timing ranges that actually work, and the mistakes that quietly ruin prints. Your resin maker’s technical data sheet always beats any number you read online, including mine.
Table of Contents
- What You Need to Wash and Cure Resin Prints Safely
- Required gear
- Nice to have, not required
- Step-by-Step: The Wash and Cure Workflow
- How to Wash a Resin Print
- How to Cure a Resin Print
- Common Wash and Cure Mistakes
- Frequently Asked Questions
- How long does it take to wash and cure resin prints?
- Can you overcure resin prints?
- How do I know a resin print is clean before curing?
- Do I need a wash and cure station to start resin printing?
- Can I cure resin prints in sunlight?
- Can water-washable resin just be rinsed under the tap?
- Conclusion: Start With the Wash, Not the Cure
What You Need to Wash and Cure Resin Prints Safely
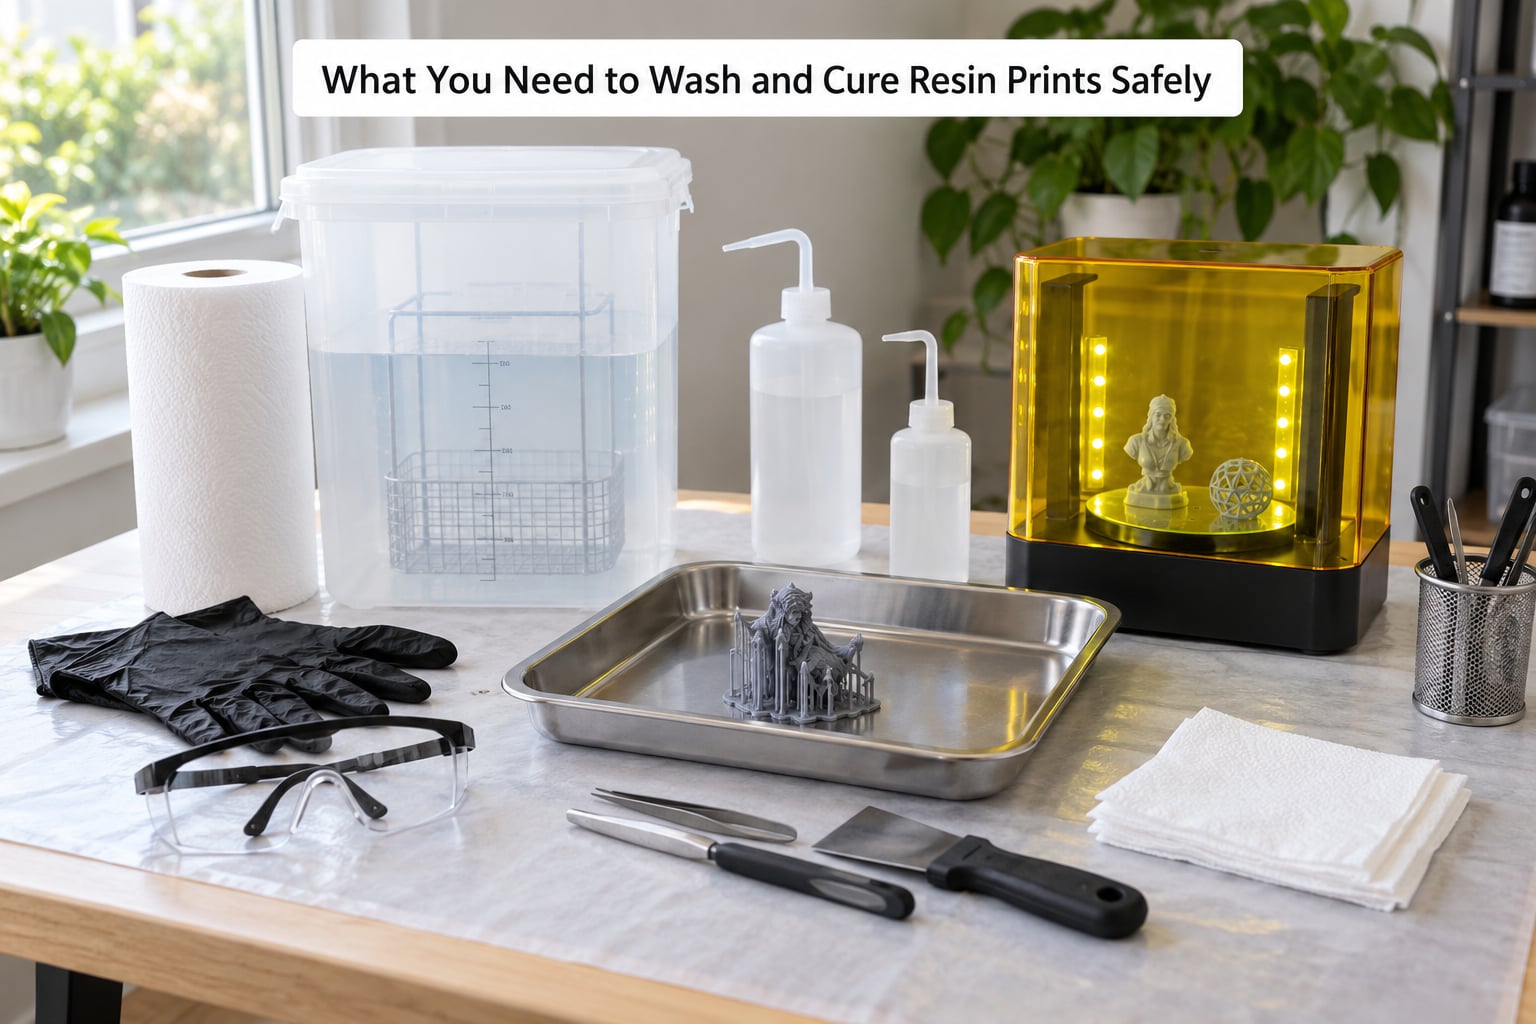
Most of the required gear costs less than a single failed print, and none of it is exotic. The list below separates what you genuinely cannot skip from what is only a convenience.
Required gear
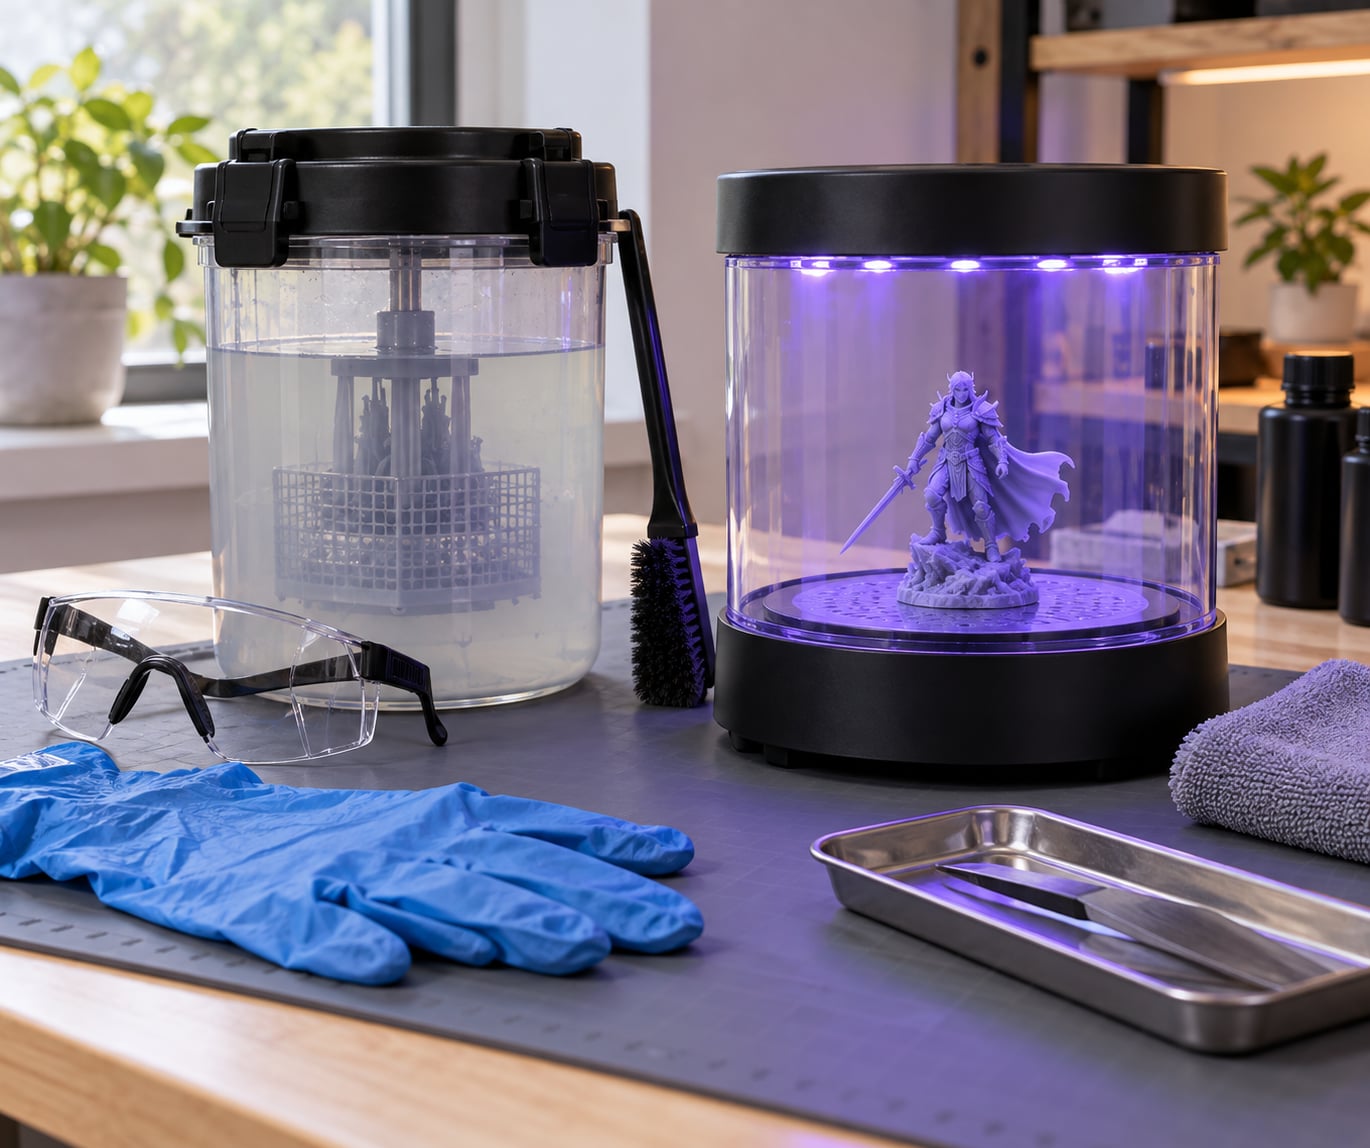
- Nitrile gloves. Uncured photopolymer resin reacts with bare skin and can trigger irritation or sensitisation with repeated contact. Nitrile is the right material, and you keep them on from the moment you open the vat until the print is dry.
- Safety glasses or a face shield. Resin splashes off a build plate more than people expect, and a thin skin of resin on your eye is a genuinely bad afternoon.
- A silicone mat or tray. It catches drips and lets you peel a cured-on print off a surface later instead of chiselling it out of one.
- A plastic scraper, putty knife, or a purpose-built metal spatula. This is how you get the print off the build plate without snapping a support or dragging resin across your bench.
- A sealed wash container with a lid. A pickle jar, a food-safe tub, or a dedicated wash jar all work. The lid matters because it stops solvent evaporating into the room while you work on something else.
- A wash medium matched to your resin. Isopropyl alcohol for standard alcohol-washable resin, or clean water for a resin labelled water-washable. Check the bottle.
- A soft brush. An old toothbrush does the job. You need it for recesses, undercuts, and the inside of hollow parts where a liquid bath cannot reach.
- Forced air for drying. A blower, a fan, or a food dehydrator. Air trapped in a cavity keeps the surface wet long after the outside looks dry.
- UV light of a known wavelength. A dedicated curing station, a UV nail lamp box, or direct sunlight. Check your resin’s data sheet; most modern 405 nm resins need 405 nm light.
- A ventilated work area. An open window with a fan, an extractor fan ducted outside, or a grow tent with ducting. Somewhere air moves out, not just around.
Nice to have, not required
A wash and cure station is the most common upgrade, and it is genuinely convenient. It is not capability. A bottle of IPA, a bucket, a toothbrush, and a sunny windowsill is a complete setup, and plenty of experienced printers still run jars because jars are cheap and easy to replace. An ultrasonic cleaner helps on dense miniatures with tight detail, though brushing and agitation get you most of the way. A larger second container lets you run two baths instead of one. Silicone work gloves, a dedicated resin-safe bench, and a spare filter or two make a busy week smoother.
If you are building a dedicated bench, decide early whether it lives in a garage, a spare room, or a closet. It changes the ventilation you need, and ventilation is the one item in this list that is not really a shopping decision.
Step-by-Step: The Wash and Cure Workflow
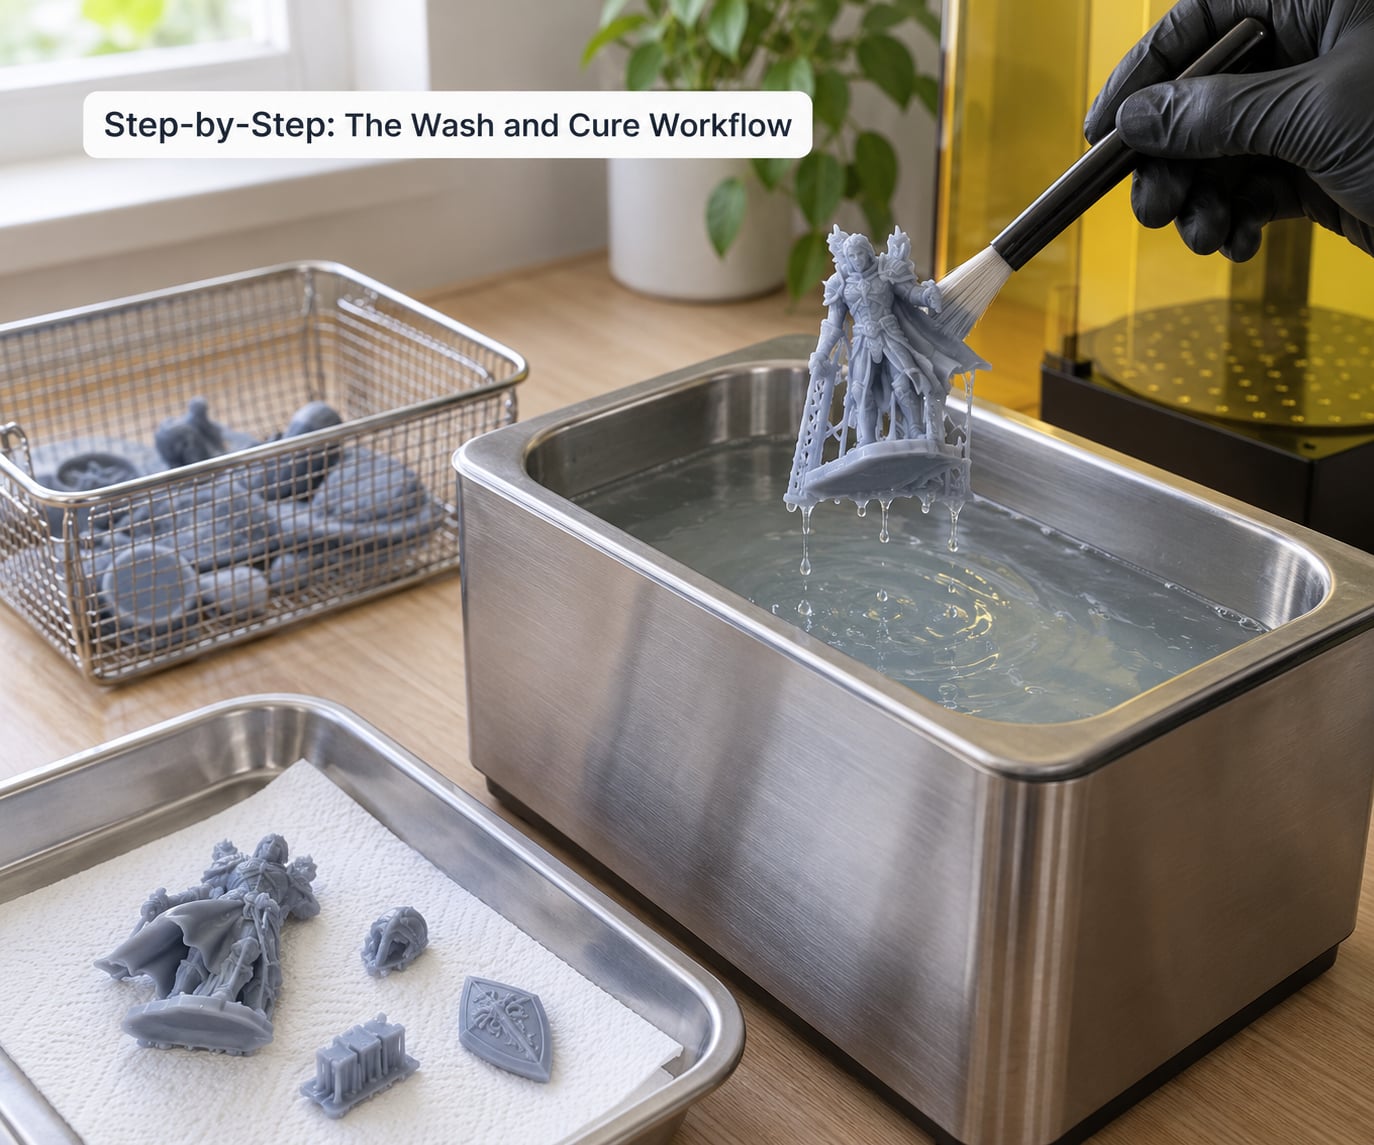
Run these steps in order every time. The order matters more than the exact minutes, because each step exists to make the next one work.
- Set up before you open the vat. Put the silicone mat down, stage your containers, lid, brush, and scraper within reach, and turn on the ventilation. Gloves on now, not halfway through. If you are handling several models, set them all out at once; the setup cost is per session, not per print.
- Drip and squeegee the print off the build plate. Let it hang and drain, then scrape the excess resin back toward the plate and off the edge. Every millilitre you catch here is a millilitre you do not dilute later, and it is the single biggest reduction in how dirty your first bath becomes. Score the build surface with the spatula, press under one corner, and lift slowly. A print popped off by force usually breaks at a support.
- Pre-wash, only for standard resin. If the resin is alcohol-washable, use a little warm water and a rinse in a separate container before any solvent touches it, because water and alcohol do not mix. Water-washable resin skips this step entirely. Pre-washing is about stripping the bulk of that resin away cheaply so your solvent bath stays useful longer.
- Wash in two baths. Put the print in bath one and agitate it: swirl the container, slosh it, or use an ultrasonic cleaner for 2 to 3 minutes. Move it to bath two and repeat. The first bath does the dirty work and gets discarded; the second does the fine cleaning and stays cleaner for the next print. One bath used repeatedly turns to cloudy sludge, and that sludge is the most common cause of a print that cures tacky.
- Brush out the recesses. While the print is still wet, work the soft brush into every undercut, recess, support contact point, and the inside of any hollow section. Ten careful seconds with a brush does more than an extra ten minutes soaking. Hollow prints need drain holes so liquid enters and leaves; if you are printing them hollow, plan those holes in the model before you slice.
- Blow out and dry completely. Use a blower or fan, then give the cavities and drain holes time. A print that looks dry on the outside can still hold solvent inside, and that trapped liquid is what cures into a hard plug or a weak spot.
- Inspect before you cure. A clean, dry print has an even matte finish with no glossy patches, no tackiness under a fingernail, and no liquid visible in any hollow section. If you see wet or shiny spots, wash and dry again. This check takes 30 seconds and saves a part.
- Cure with even exposure. Place the print so light reaches it from all sides, not just the top. Turn it halfway through the cycle. Follow the resin’s recommended time rather than a forum’s number, and resist the urge to cure for an hour because you read somewhere that longer is safer.
- Post-wash after curing. Some resins leave a waxy or tacky skin after cure. A quick rinse and brush, then a short second cure, cleans it up. Skip this if your resin does not need it.
- Dispose of everything resin-contaminated correctly. Never pour resin, wash liquid, or rinse water down a drain. Household hazardous waste is the usual route; the disposal section below covers it.
How to Wash a Resin Print
Washing removes liquid resin. That resin is not merely sticky, it is chemically active: it is the same liquid photopolymer you print with, and left on a part it stays capable of skin contact and off-gassing indefinitely. Washing also clears the dust and skin you handled the part with, so you can work on it bare-handed after curing instead of gloving through every downstream step.
The medium depends entirely on what you printed with.
| Wash medium | Use it with | Strengths | Watch out for |
|---|---|---|---|
| Isopropyl alcohol (99% is typical) | Standard alcohol-washable photopolymer resin | Widely available, effective, well understood | Degrades into a cloudy, oily sludge; baths need replacing often, and water contamination ruins it |
| Industrial-grade odourless methylated spirits | Standard alcohol-washable resin | Stays clear far longer, so bath one actually stays bath one | Strong solvent odour, so ventilation matters more, not less |
| Clean water, warm | Resin labelled water-washable | No solvent fumes, cheap, gentle on some resins | Only for the right resin. Water-washable resin absorbs water, so dry it thoroughly, and disposal rules still apply |
| Resin maker’s own cleaner | Whatever the data sheet specifies | Exactly what the manufacturer tested | Narrower choice, usually a specific consumable |
The single most common washing error is not the solvent. It is reusing one bath until it turns grey. Once a bath is cloudy, it is no longer removing resin, it is spreading a thin film of it back onto your print, and the part comes out of the cure station tacky for reasons that have nothing to do with cure time. Dump bath one, keep bath two, and swap both out when they stop being clear.
Agitation matters more than soak time. Twenty minutes of still soaking and three minutes of movement break up far more residue, because the goal is moving solvent across the surface, not soaking it. Ultrasonic cleaning is excellent for fine miniatures; for large hollow prints, brush work and a shower of clean solvent beats a bath the print will not fit in.
For large prints, skip the jar. Put the print on a silicone mat, keep flooding it with solvent from a bottle or sprayer, and work the recesses with a brush. That is slower than an immersion wash but it handles a bust the size of your forearm, and it is exactly what people running big displays end up doing.
How to Cure a Resin Print
Curing is how you finish the chemical reaction. UV light hits the photo-initiator left in the resin and starts a chain reaction that crosslinks the monomers into a solid polymer. The printer’s exposure only starts that reaction; it cannot finish it, because light does not reach the inside of your part. Post-curing is how you complete it.
An under-cured part stays soft, deforms under a light touch, smells, and can shrink or crack later as it slowly continues reacting. That is the part you do not want to hold, sand, or store next to anything you care about.
| Cure method | Typical time | Consistency | Notes |
|---|---|---|---|
| Dedicated wash and cure station | 10 to 20 minutes for most parts | High | Even exposure from all sides, repeatable, the usual choice once you print regularly |
| DIY box with a UV nail lamp or strip | 10 to 20 minutes | Medium | Works well with reflective tape and a rotating platform; check the lamp wavelength matches your resin |
| Direct sunlight | 30 minutes to 2 hours | Low | Free and genuinely effective on a bright day, but season, cloud cover, window glass, and latitude all change the result |
| Grow tent with UV strips | 15 to 30 minutes | Medium | Useful if you already grow plants; the tent also doubles as a ventilated enclosure |
UV light at the wrong wavelength will not do the job properly, so check that before you trust a timer. Exposure also needs to reach every surface. Rotate the print halfway through, and on hollow parts confirm you can see clean light coming out of the drain holes. Warm conditions help, and the reason is simple chemistry: the crosslinking reaction runs faster when it is warm, which is why people chasing a more complete cure on a still-tacky part sometimes warm the cure area to roughly 35 to 40C before running another cycle.
Finally, drying and curing are separate. A print that still holds solvent can seal that solvent against the surface while the outside looks cured, and you get a tacky print with no explanation. Among the residue complaints you will read in resin printing forums, the most common thread is simple: the part went into the cure station before the alcohol had fully evaporated. Force-drying fixes it every time.
Common Wash and Cure Mistakes
Curing a wet print. This is the most common cause of a tacky result, and users almost always respond by curing longer, which changes nothing. Fix: wash and dry again, force the air through cavities, then cure. Judge dryness by the matte, even finish rather than by touch alone.
Reusing a dirty bath until it clouds. Sludge in bath one spreads resin back onto the part. Fix: two baths, and swap them out when the liquid stops being clear. Forum users running single-bath setups are constantly fighting this and blaming the resin.
Pouring alcohol into a puddle of water, or rinsing standard resin under a tap. Water and alcohol do not mix, and contaminated IPA stops working. Fix: pre-rinse with a small amount of water in a separate container if your resin’s instructions call for it, and keep the solvent bath anhydrous.
Soaking a hollow print without drain holes. Liquid goes in and does not come out, then cures inside the cavity as a hard plug or a brittle void, and the part fails later at a place you never inspected. Fix: add drain holes in the model before slicing, then confirm the cavity drains during the wash. A sealed cavity left sitting in a curing unit can come out solid inside, and you will only find out when the part snaps in your hand.
Over-curing. Yes, you can overcure, and it is worth understanding before you do it. Excess UV exposure embrittles the part, can shift its colour, and gradually erodes fine detail, so crisp features soften and the surface goes chalky. A badly over-cured part is usually salvageable for a sturdy display piece, but the lost detail is not coming back. And it will not fix a tacky print, because under-cure and over-cure are not opposite ends of the same dial. Re-wash and re-dry instead.
Forgetting the cavities. Resin trapped behind a shield, under a base, or inside a pose that folds inward is invisible until the print is finished and breaks. Fix: brush and flush every recess while the part is still wet, and check hollow sections by looking for liquid with a flashlight.
Treating ventilation as optional. The honest framing is that the long-term health data on hobby resin printing is thin, so nobody can give you a settled risk number. What is not in dispute is that IPA and methylated spirits off-gas volatile organic compounds, and that both the washing liquid and the curing step produce fumes. People who monitor their air with a cheap VOC monitor tend to find the cleaning fluid is the bigger spike, not the cured resin. Fix: air moving out of the room, not circling in it. A window and a fan is a real answer; an extractor ducted outside is a better one; a grow tent with ducting is what a lot of people in small apartments end up using.
Not changing gloves between baths and between prints. Cross-contamination puts resin back onto a part you just cleaned. Fix: change gloves between the dirty bath and the clean bath, and between the wash area and anything else. Cheap nitrile boxes make this easy to do without thinking about it.
Disposing of the liquid. Uncured resin and solvent-contaminated wash liquid must never go down a drain, and neither should the water you rinsed water-washable prints with. Fix: follow your local rules for chemical and solvent waste, which usually means taking it to a household hazardous waste facility. Never mix batches. Cured solid resin is chemically inert and can generally go in normal waste, which is the argument for curing leftovers before you throw them away.
Skin and eye contact. If resin touches skin, remove contaminated clothing, wash with soap and plenty of water, and follow the first-aid section of your resin’s safety data sheet. If it reaches your eyes, flush with clean water for at least 15 minutes and seek medical attention. Get the SDS before you start, not after an accident; it defines the PPE, ventilation, and first aid for your specific resin, and it is the document that outranks anything in this article.
Two more worth naming: keeping children and pets out of the wash and cure area, since uncured resin is genuinely attractive-looking and genuinely dangerous; and washing multiple models in one session rather than one at a time, because the setup and glove changes cost the same for a batch of six as for a single print.
Frequently Asked Questions
How long does it take to wash and cure resin prints?
For a standard miniature, expect 5 minutes in the dirty bath, 5 in the clean bath, 10 to 20 minutes of drying, and 10 to 20 minutes of UV curing. A bust or large hollow print needs closer to 15 minutes per bath, longer forced drying, and 20 to 30 minutes of curing. Sunlight curing takes two to four times longer than a UV station. Always check your resin’s data sheet before trusting any of these ranges.
Can you overcure resin prints?
You can, and it is a real failure mode rather than a myth. Too much UV exposure embrittles the part, can shift its colour, and erodes fine detail so crisp features soften and the surface turns chalky. An over-cured part is often still usable for a sturdy display piece, but the detail loss is permanent. Over-curing will not fix a tacky print either, because that is a washing or drying problem, not a cure-time problem.
How do I know a resin print is clean before curing?
Let it dry fully, then look for an even matte finish with no glossy or wet-looking patches and no sticky feeling under a fingernail. Check hollow sections and drain holes for trapped liquid with a flashlight. One more sign: if liquid beads on the surface when you blow on it, there is still solvent in there. A print that fails the visual test gets washed and dried again, not cured longer.
Do I need a wash and cure station to start resin printing?
No. Nitrile gloves, safety glasses, a silicone mat, a scraper, two sealed jars, a brush, the right solvent, somewhere to dry, and access to UV light or sunlight are a complete setup. A wash and cure station adds convenience and repeatability, not capability. People on r/resinprinting run jars for years without regretting it, and the money is better spent on ventilation first.
Can I cure resin prints in sunlight?
Yes, and it genuinely works on a bright day. Expect 30 minutes to 2 hours depending on how strong the light is. The catch is consistency: cloud cover, season, window glass, and your latitude all change the result, so sunlight is fine for learning and unreliable for production work. A UV nail lamp box or a dedicated station gives you the same resin a repeatable dose, which is why most printers move to one eventually.
Can water-washable resin just be rinsed under the tap?
Only if the bottle says water-washable, and even then rinse in a container you can empty safely rather than down the drain. Water-washable resin absorbs water, which can make an under-cured part go soft or cloudy, so it still needs thorough drying and a full cure afterwards. Standard alcohol-washable resin must never be rinsed with water, because water contamination ruins the solvent bath.
Conclusion: Start With the Wash, Not the Cure
The safest first step is the least dramatic one: read the safety data sheet for your resin, set up a ventilated spot, and put on nitrile gloves before you open the vat. Everything after that is a repeatable sequence. Drip and squeegee the print off the build plate, wash it in two baths with agitation between them, brush out the recesses, force it dry, check for an even matte finish, then cure it with even UV exposure and a rotation halfway through.
Most disappointing prints are not cure failures. They are wet prints cured too early, hollow prints with no drain holes, or a bath that went cloudy weeks ago. Fix those three things and most of the frustration disappears. Whatever your resin maker’s data sheet says about times and PPE outranks anything here, and it is a two-minute read that will keep you out of trouble.