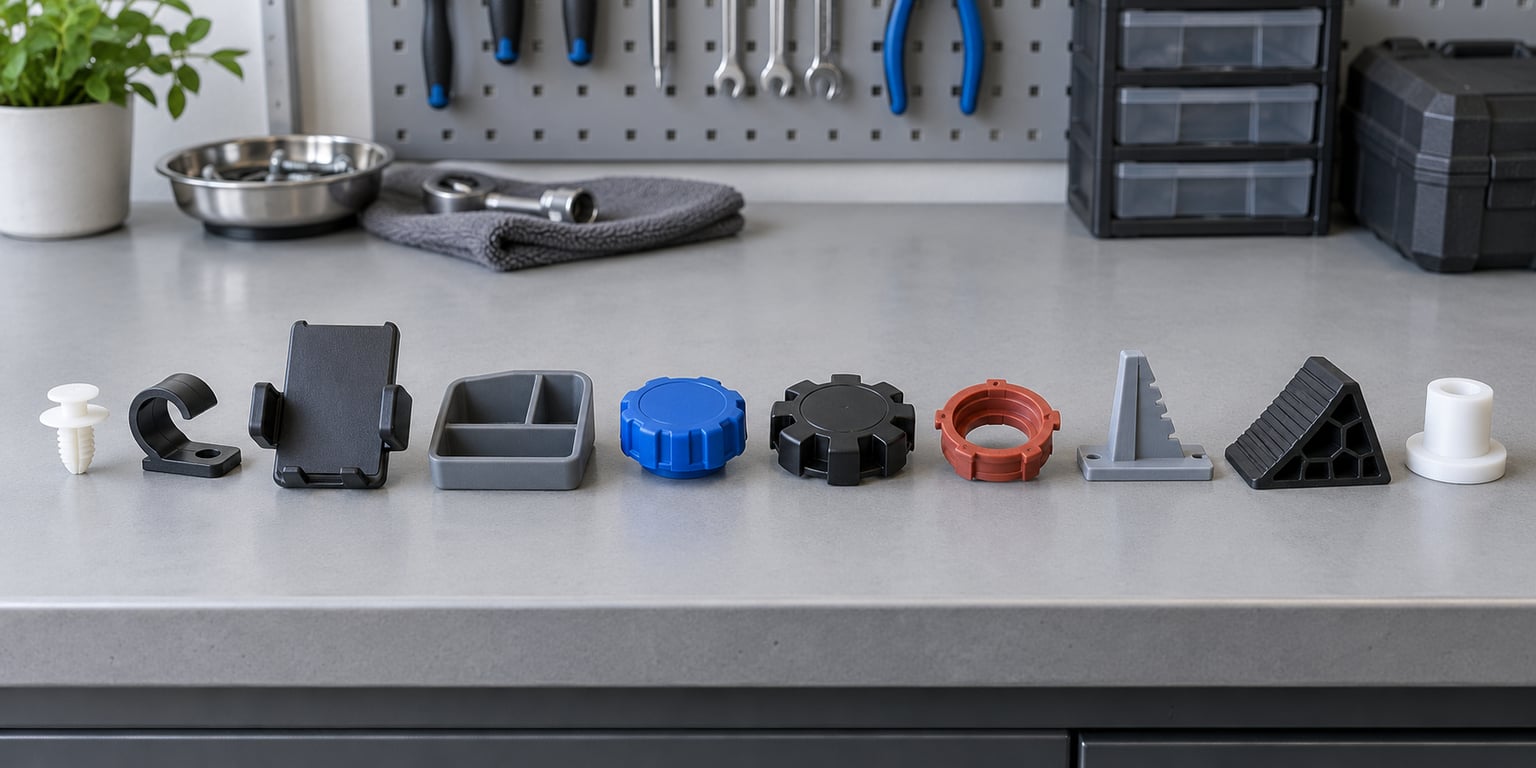
Most of the 3D printed car parts you see online never make it past the workbench. They look great in photos, fit badly in the door, and turn to paste the first week of July. The ones that earn their place are boring: a door card clip, a cable guide, a reservoir cap, a sensor spacer.
This is a list of 3D printed car parts you can actually use, and it is built around those boring parts. Every entry below includes what the part does, which filament to print it in, how hard it is, and where it fails. Nothing here touches brakes, steering, suspension, or anything pressurized. If a project puts a safety-critical component between your foot and the road, it stays a paper exercise.
Updated for October 2026. Start with the glance table below if you want to skip straight to a first project.
Table of Contents
- 3D Printed Car Parts You Can Actually Use at a Glance
- 1. Custom Interior Trim and Panel Clips
- 2. Cable Guides and Wire Retainers
- 3. Phone and Accessory Mounts
- 4. Rear-Seat and Trunk Organizers
- 5. Replacement Reservoir and Service Caps
- 6. Wheel Center Caps and Accessory Rings
- 7. Door Seal and Weatherstrip Retainers
- 8. Tire and Wheel Inspection Accessories
- 9. Jack Pad and Emergency Support Accessories
- 10. Custom Parking Sensor and Sensor Mounting Aids
- Frequently Asked Questions
- Can I use 3D printed parts inside my car?
- What 3D printing material is best for car interior parts?
- Are 3D printed replacement car parts safe?
- Why do 3D printed car parts loosen or break?
- Which printed car parts require professional inspection?
- Conclusion: Start With a Low-Risk, Easy-to-Test Part
3D Printed Car Parts You Can Actually Use at a Glance
| Part | What it does | Typical material | Difficulty | Durability | Key limitation |
|---|---|---|---|---|---|
| Interior trim clips | Replaces snap-in fasteners for door cards, dash trim, and covers | PETG or ABS | Easy with calipers; moderate if scanning | Outlasts the original thin clip | Brittles if printed in PLA near a hot dash |
| Cable guides and wire retainers | Routes aftermarket wiring away from hinges and sharp edges | PETG or TPU | Easy | Long service life indoors | Loosens on rough roads if walls are too thin |
| Phone and accessory mounts | Holds a dashcam or phone in a reachable, viewable spot | PETG | Easy | Fine in moderate climates | Adhesive backing fails on hot glass |
| Rear-seat and trunk organizers | Holds cables, tools, emergency kit, and small cargo | PETG | Easy to moderate | Holds light loads indefinitely | Must clear seat belts and latch points |
| Reservoir and service caps | Replaces a lost cap on a non-pressurised, non-hot reservoir | PETG or ABS | Moderate | Good if the thread match is right | Never for coolant systems, brakes, or fuel |
| Wheel center caps and rings | Restores a missing cosmetic trim piece on the wheel | ASA or ABS | Moderate | Fine with UV-stable filament | PLA fades and softens on a sunny wheel face |
| Door seal retainers | Secures replacement weatherstrip along the door aperture | PETG | Easy | Holds along continuous compression | Blocks drain holes and traps water |
| Tire and wheel inspection aids | Tread gauges, sidewall readers, wheel-gap markers | PETG | Easy | Tool lives in the glove box | An aid only, never a substitute for proper equipment |
| Jack pads and storage blocks | Stands, chocks, and blocks that carry no vehicle load | PETG or ABS | Easy | Good for storage duty | Never for lifting or supporting the car |
| Parking sensor spacers | Repositions a sensor or holds a positioning template | ABS or ASA | Moderate | Fine if geometry is preserved | Obstructed detection makes a safety device useless |
A quick material rule covers most of this list. PETG for anything inside the cabin, ABS or ASA for anything outside or near heat, TPU where the part needs to grip something, and PLA only for tools that never leave the house.
All ten of these print on a normal desktop FDM machine. ASA and ABS need an enclosed chamber because warping ruins a part that has to fit, and a part that has to fit is the whole point here.
1. Custom Interior Trim and Panel Clips
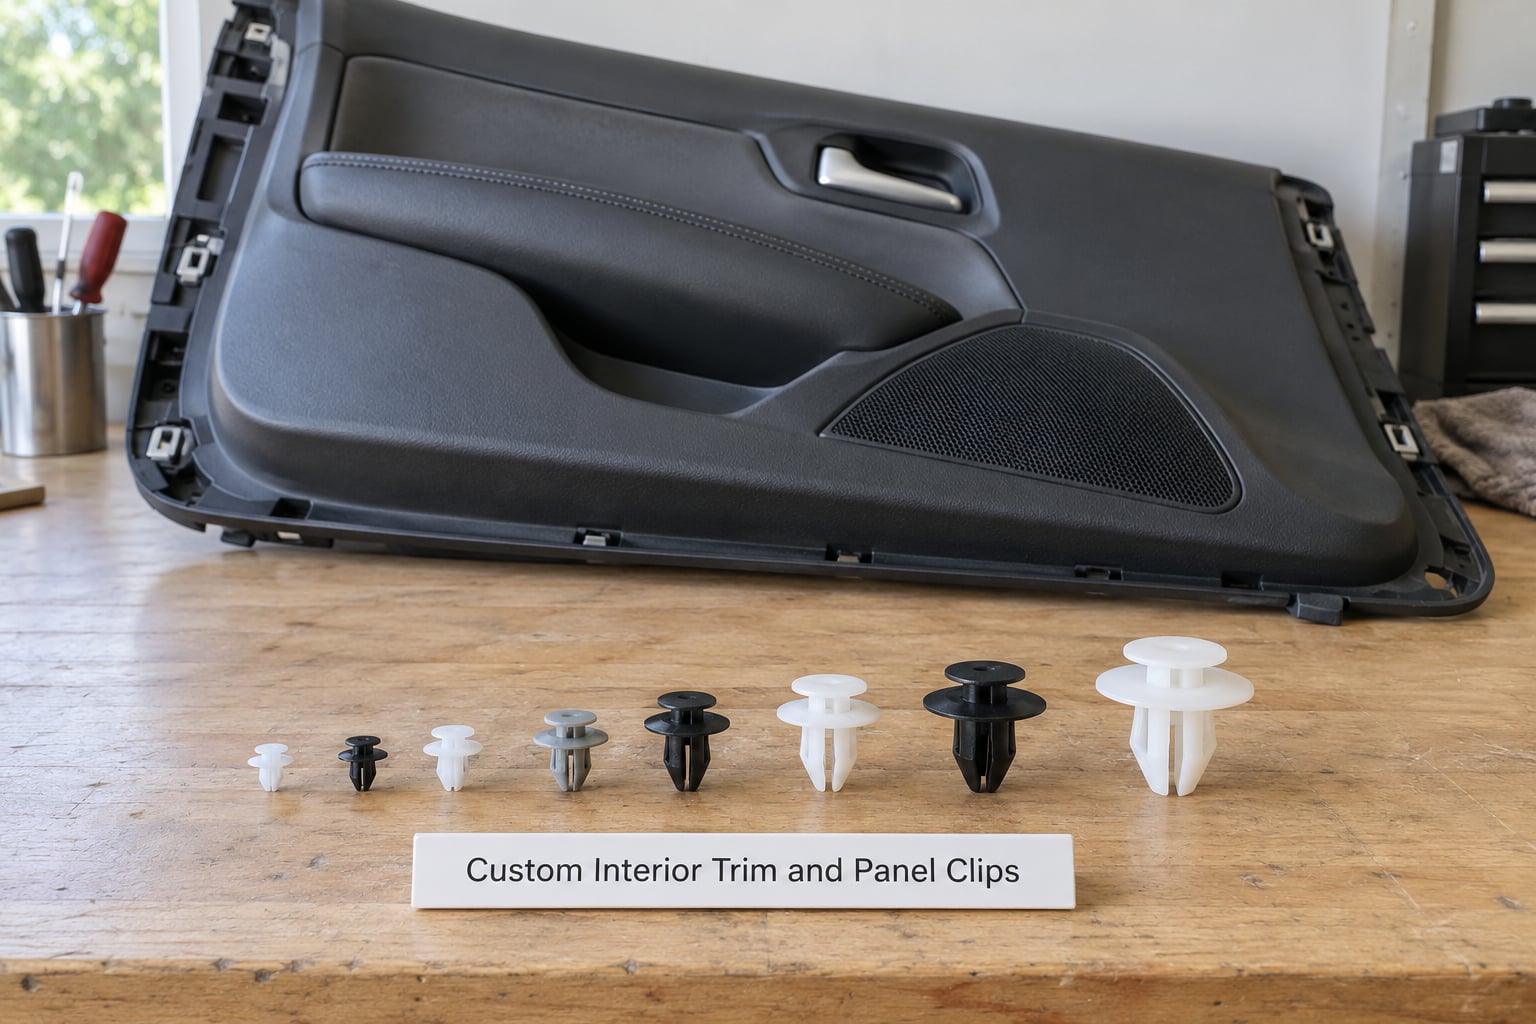
The clip is the part that starts every conversation about printing car parts. Modern interior fasteners snap into thin stamped slots, and they fail after a few door opens, a cold snap, or one enthusiastic yank on a handle.
The key is measurement, not modelling skill. A cheap digital caliper gives you the slot width and depth; you reproduce the clip with a bar and two legs, then print a test at 0.2 mm layer height with four perimeters. Print it in PETG for most of the cabin.
Two rules keep clips from snapping in your hand. Print them standing so the layers run across the flex, and keep the legs thin enough to deflect but thick enough not to shear. Test fit with a fingernail before you trim anything else off the panel.
Here is the honest version. A dash clip that spends a summer behind a windscreen sees temperatures that approach the softening point of PLA, which sits near 60 degrees Celsius. PETG holds its shape comfortably in that range, and ABS or ASA hold it better again.
The same logic explains why printed clips often work fine for a year and then let go in a heatwave. The geometry was never wrong; the material was. Printing the same clip in PETG usually turns a seasonal failure into a non-event.
Print three or four at once, in slightly different thicknesses. The one that feels right is the one to fit, and you have spares for the next time the door card comes off.
2. Cable Guides and Wire Retainers
Printed cable guides solve a problem that shows up the moment you add a dashcam, an amplifier, or a rear camera. Wires get routed across a hinge or a raw sheet-metal edge, and they chafe there for years.
Snap-in guides, adhesive P-clips, and slotted trunk channels all print easily. Keep the cross-section thin, add a fillet where the wire enters, and give the wire a 30 mm slide rather than a hard clamp so road vibration cannot fatigue it at one point.
Before printing anything you downloaded, open it in a slicer and look at the cross-sections. A working guide has a defined entry point and a defined exit; a file that slices as a solid block is a file that wastes twelve hours. Reading the comments on a design page catches most of the rest.
TPU works well here because it grips a wire without cutting into the insulation. For sharp edges, print the guide so the wire sits inside the part and never touches the metal edge directly.
Check them every few months. A guide that has walked loose on rough roads is a rattle and a chafe risk, and it takes ten seconds to reseat or reprint with more walls.
3. Phone and Accessory Mounts
A printed phone cradle solves an awkward problem: no factory mounting point where you actually want the phone. Vent mounts, console wedges, and visor clips are popular because they are easy to model and easy to iterate.
Keep the mount outside your sightline to the road and outside the driver’s hand reach for anything that changes while driving. Leave a fingertip of clearance so the phone cannot slide into the vent or the screen.
Vibration is the honest limit. A phone bracket printed from PLA in a hot car loses stiffness in traffic, and a sticky pad on a glass surface in summer regularly lets go on a hot day. Printed mounts with a mechanical clamp or a screwed base hold far better than adhesive-only versions.
Print the cradle so the phone rests against a wide rib rather than two thin fingers, which is what stops the buzzing that makes people abandon a mount after a week.
4. Rear-Seat and Trunk Organizers
Organizers are the easiest category to print well, and the easiest to print badly. A tray for charging cables, jump leads, a torch, and a first-aid pouch in the boot is a genuine part that replaces a pile of loose cargo sliding around.
Design for removal. A bin with finger scallops and a 3 mm wall prints flat, nests when empty, and drops into a well or a seat gap. Keep every edge rounded; a sharp printed corner in a boot liner is exactly the thing that ends up near your knee in a panic stop.
Clearances decide whether the bin is usable. Leave room for the seat belt buckle, the boot latch, and the parcel shelf rail, and check the anchor points where the seat belt latches to the body. A bin that fouls a buckle is a bin you will take out after the first week.
Keep weight low and spread it. Heavy items belong low and forward against the seat back, not piled in a tall printed tower.
5. Replacement Reservoir and Service Caps
A cap is where printers earn their keep on older cars, because caps are cheap, small, and go missing. A windshield washer reservoir cap on a 1998 wagon is a good candidate: unpressurised, unheated, and holding nothing you would miss.
Confirm the vehicle, part number, thread pitch, and seal design before you print. Measure the cap diameter across the sealing face, the thread diameter, and the thread pitch with a thread gauge or by counting thread turns over a measured length. Add a small gasket lip if the original used a rubber seal, and print in PETG or ABS rather than PLA.
Keep it simple and print the cap at 0.15 or 0.2 mm layer height with four or five perimeters, because thread engagement depends on the outside diameter being round. Three or four test caps in slightly different diameters costs fifteen minutes and saves a stripped thread.
Fit it finger-tight and confirm the reservoir level reads correctly before you drive away. A printed cap is a reasonable long-term replacement on a washer bottle; it is a stopgap on anything where the level matters to a warning light.
Stop at the boundary. Never print a cap for a pressurised system, a coolant system, a fuel system, or anything near an exhaust component. A printed brake reservoir cap that does not seal cleanly is a serious safety problem, and cheap caps exist for a reason.
If the cap carries a warning or a minimum fluid level marking, treat the printed version as a temporary shim until you can fit the correct part.
6. Wheel Center Caps and Accessory Rings
A missing center cap exposes wheel studs to road salt and grime, so replacing one is functional repair with a cosmetic result. The difficulty is holding the exact diameter and clip geometry.
Measure the outer diameter, the depth of the cap recess, and the clip or barb that retains it. Print a ring of test diameters before committing, and check the cap face for clearance from the brake caliper at full steering lock.
Cross-reference the printed diameter against the manufacturer listing before printing, because cap diameters vary between models that look identical from the outside. A cheap digital caliper is the single best investment for any of these projects.
Material is the deciding factor here. A wheel face sees sun, road heat, and brake heat on a mountain descent. PLA fades and softens on the outside of that; ABS yellows in ultraviolet light; ASA holds colour and stiffness far better and is the filament that car people reach for in exactly this situation.
Skip decorative trim and anything people would call a load-bearing ring. Cosmetically, a printed cap is fine. Mechanically, it must not be the thing holding the wheel together.
7. Door Seal and Weatherstrip Retainers
Weatherstrip normally slides into a channel or clips into a slot in the door aperture. When the channel lip breaks, the seal rattles and water gets in. Small retainer clips print well and take minutes.
Match the channel cross-section, then add continuous support along the run so the seal is held the whole length rather than at two points. Squeeze the part to make sure it presses the seal evenly; a retainer that works at the front and floats at the back will leak at the back.
Mind the drainage. Door apertures have weep holes at the bottom, and a retainer that bridges one traps water inside the door skin where it corrodes the sheet metal from the inside out.
Use a UV-stable filament. The lower door corners and the sill see direct sun every day, and PETG is a reasonable choice there while ASA lasts longer.
8. Tire and Wheel Inspection Accessories
Some of the most useful printed car parts never touch the vehicle. A tread-depth gauge, a sidewall-reading jig for tire size, date, and load rating, and a wheel-gap gauge for ride height checks all cost a few grams of filament.
Print the tread gauge at a real scale and check it against a known-good gauge before you trust it. A mis-scaled gauge gives a wrong number, which is worse than no number.
Keep these tools in the same category as a tire pressure gauge and a small flashlight. They are inspection aids that save you a trip to the tire shop, and they do not replace calibrated equipment, a jack, a torque wrench, or a technician.
The most useful version is a clip that mounts to a wheel lug so it stays with the car rather than in a drawer.
9. Jack Pad and Emergency Support Accessories
There is printed parking here, and there is printed lifting, and the line between them is absolute. Wheel chocks, storage risers, a spare-tire shelf, and a stable block for a jack handle all belong in the first category.
A printed chock for a temporary hold on a level driveway is fine. Use a real, rated wheel chock for anything on a slope or where a car will be left overnight, because a printed ramp can split under load and a car on a slope does not wait.
Storage blocks that lift a shelf, a bin, or a toolbox never touch the vehicle. Printing a jack stand is a different project entirely: a jack stand is a load path that can drop a car, and it is not a hobby project.
If you ever find yourself tempted to print something that carries the weight of a vehicle, stop and buy the tool. The savings are never worth the arithmetic.
10. Custom Parking Sensor and Sensor Mounting Aids
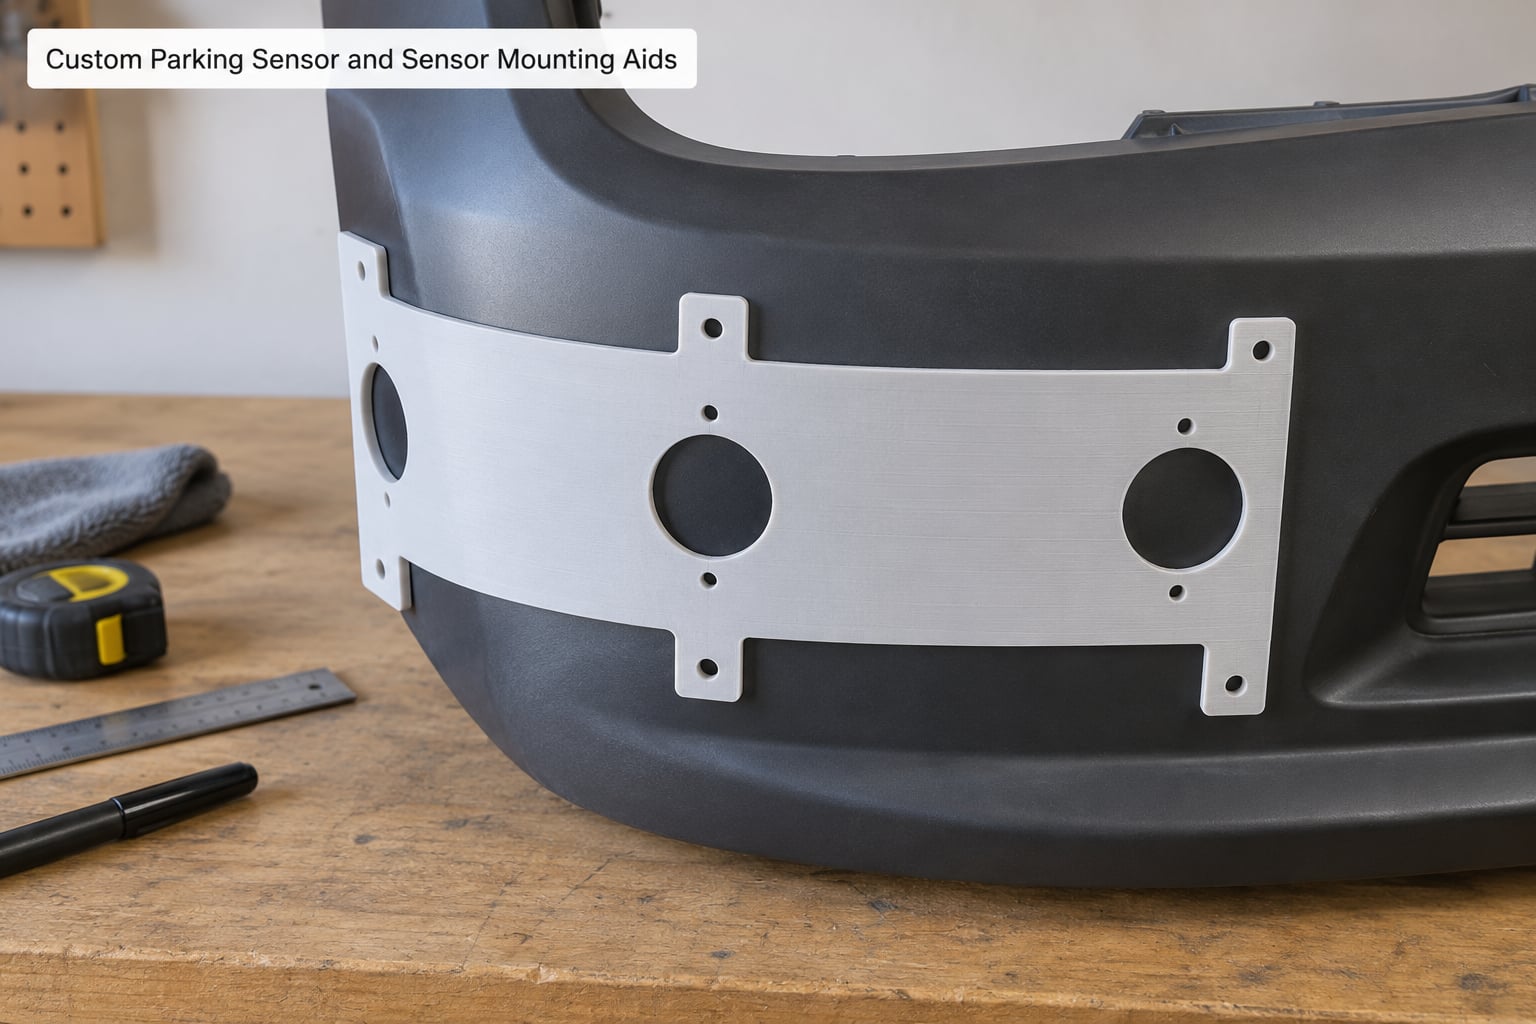
Parking sensors fail from a damaged housing, a loose mount, or a harness problem. When the mount is the issue, a printed spacer can put a sensor back at its intended height or angle.
Measure carefully and preserve factory geometry. The spacer should hold the existing sensor at the original position, not at a new one. A flat template with cutouts is the safest version of this project, because it positions the work without becoming part of the car.
Know the limits before you print. A spacer must not obstruct the detection cone, must not change how the sensor reads a kerb or a wall, and must not hide a wiring fault. If the sensor beeps constantly or shows an error code, the fix is a diagnosis and a replacement part, not a printed shim.
Print the template in ASA and keep it in the toolbox. It costs nothing to leave in the car, and having the original alignment reference stops a repair becoming guesswork.
After fitting any spacer, walk around the car at slow speed and confirm the coverage matches the other corners before you rely on it in a tight car park.
Frequently Asked Questions
Can I use 3D printed parts inside my car?
Yes, for non-safety-critical interior jobs like clips, cable guides, organizers, and mount brackets. PETG is the sensible default for the cabin. Avoid anything that supports a seat belt, a pedal, a door latch, or an airbag. Cabin heat is the deciding factor: a parked car in summer gets hot enough to deform PLA, so keep PLA off the dash and console.
What 3D printing material is best for car interior parts?
PETG for most interior work, because it holds stiffness in a warm cabin, tolerates road vibration, and prints without an enclosure. ABS or ASA where temperatures run higher or the part sits in sun, with ASA preferred outdoors for its colour stability. TPU is useful for flexible grips and cable guides. Save PLA for models, jigs, and tools that stay inside the house.
Are 3D printed replacement car parts safe?
It depends entirely on whether the part carries a load, a pressure, or a legal safety function. Clips, retainers, guides, caps, and organizers are fine when the material matches the temperature and the geometry is accurate. Brakes, steering, suspension, drivetrain, structural body parts, and anything pressurized are not. If a failure could injure someone, buy the OEM part.
Why do 3D printed car parts loosen or break?
Usually four causes: printing in PLA where heat softens it, printing flat so layers split under load, leaving walls too thin for the clip and flex direction, or measuring the broken part badly and compensating with too much clearance. Add perimeter walls, orient the part so layers run across the stress, print in PETG or ASA, and measure the original twice before changing anything.
Which printed car parts require professional inspection?
Anything attached to the steering, brakes, suspension, drivetrain, or the structure that holds the body up. Also check with a mechanic before fitting a printed part that sits near a hot exhaust, affects emissions equipment, or blocks a sensor you rely on for safety. For a classic car being judged in competition, printed parts may be rejected on originality grounds, so ask the organiser first.
Conclusion: Start With a Low-Risk, Easy-to-Test Part
If you only print one thing this month, make a door card clip. It takes an hour, it fits in any build volume, and it proves the whole workflow from measurement to fitment without putting anything important at risk.
From there, work outward in this order: cable guides, then a trunk organizer, then a reservoir cap once you have confirmed the part number and thread. Save ASA and ABS for anything on the outside of the car, and keep an eye on orientation, wall count, and clearance as you go.
Two habits separate prints that last from prints that end up in a bin. Measure the original twice before you model anything, and recheck printed parts every few months. Where a failure could hurt someone, keep the original part.