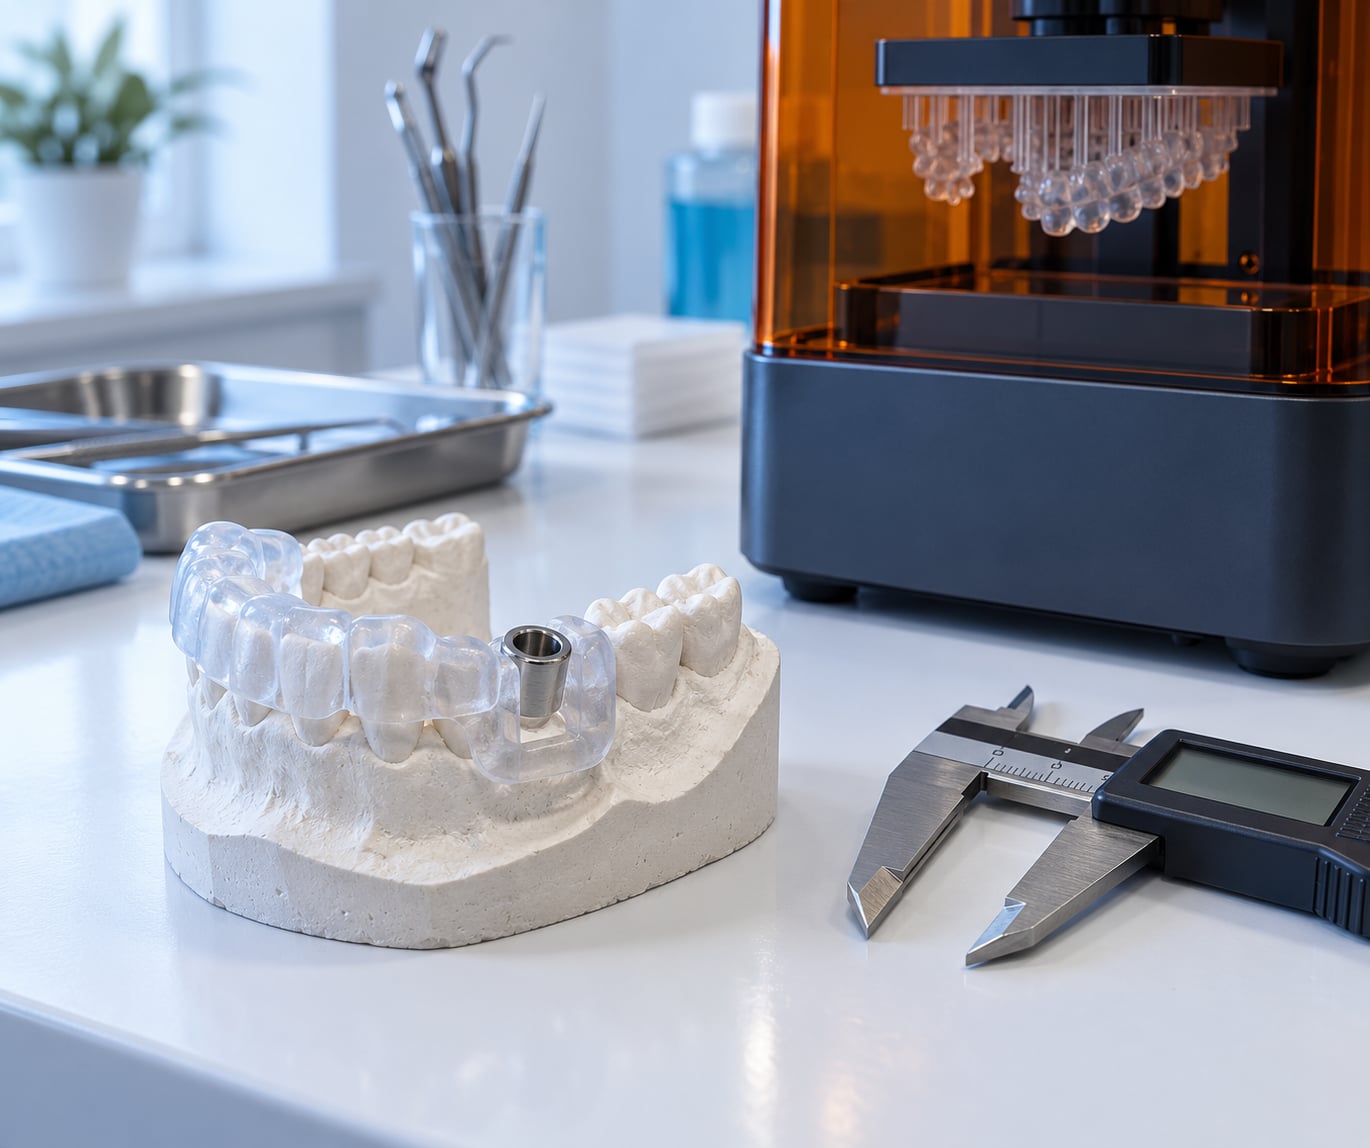
A 3D printed surgical guide is a patient-specific template that a dentist or surgeon seats in the mouth before drilling, so a metal sleeve physically holds each drill at the position, angulation and depth chosen on a digital plan. The guide is built from the patient’s own scan data, printed in a biocompatible resin, and checked against the plan before it ever touches a patient. Knowing how the transfer from screen to mouth works explains both its value and its limits.
Table of Contents
- What Are 3D Printed Surgical Guides?
- How 3D Printed Surgical Guides Are Made
- What Materials Are Used?
- How the Guide Fits onto Teeth or Implants
- How the Surgical Drill Is Guided
- How Computers Turn a Scan into a Surgical Guide
- How 3D Printed Surgical Guides Are Checked for Safety
- What Are the Main Advantages and Limitations?
- Frequently Asked Questions
- Are 3D printed dental surgical guides made for one patient only?
- Can a surgical guide be sterilized and reused?
- Does a 3D printed guide guarantee perfectly accurate implant placement?
- What software is used to design a dental surgical guide?
- Can a surgical guide be used for every dental implant procedure?
- Conclusion
What Are 3D Printed Surgical Guides?
A 3D printed surgical guide is a rigid, sterilizable template fabricated by additive manufacturing from a merged cone beam CT (CBCT) and intraoral scan data set, containing metal sleeves that physically constrain a surgical drill to the planned implant position, angulation and depth.
That is the whole mechanism in one sentence. The drill is not guided by a screen, a machine or the operator’s eye. It is guided by a hole with a known diameter and a known axis, and the only way through is the way the software planned.
Three things are controlled at once. Position is the entry point through the gum or gum flap, angulation is the tilt of the drill axis in three dimensions, and depth is how far the drill is allowed to go before it reaches bone or a nerve.
It is worth being clear about what a guide is not. It is not a drill, and it is not a temporary component such as a healing abutment or a temporary crown. It is also not the same object as a diagnostic wax-up or a presentation model, even though all three come out of the same CAD/CAM pipeline. A model only needs to look right. A guide has to hold a tolerance tight enough to keep a 4 mm drill off an inferior alveolar nerve.
Clinicians reach for a guide because freehand placement carries real deviation. Studies of freehand implant placement report angular deviation in the region of ten degrees from the planned axis, which is enough to put a fixture through a lingual cortical plate in a narrow ridge. A rigid template removes that variable.
How 3D Printed Surgical Guides Are Made
The workflow runs in six steps, and every one of them feeds the next. Skipping one is how a guide ends up printed accurately and still wrong in the mouth.
- Capture the bone. A CBCT scan records the jaw in DICOM format, giving the surgeon a 3D view of bone volume, density and the position of the nerve and sinus floor. The scan itself takes seconds.
- Capture the soft tissue and teeth. An intraoral scan (IOS) of the arch produces a high-resolution STL mesh. A conventional physical impression can substitute, but it takes minutes and an IOS takes about as long.
- Merge the data. The DICOM volume and the surface scan are registered against shared anatomy, usually tooth surfaces. Whatever registration error exists here carries straight through to the final guide.
- Plan the implants. The implant library is positioned virtually against the intended final restoration, a prosthetically-driven approach. If the plan is wrong, every later step faithfully reproduces the mistake.
- Design and print the guide. The guide body is modelled to sit on the chosen support surfaces, sleeves are placed on the planned axes, and the file is sliced, printed, washed, post-cured and fitted with the sleeves.
- Verify and sterilize. The guide is checked against the plan and against the model, then sterilized under the validated method and labelled before clinical use.
Steps one through four are planning assumptions. Step six is clinical verification. A guide can only ever be as good as the plan it carries, which is why nobody treats a perfect print as proof of a perfect plan.
What Materials Are Used?
Most printed surgical guides use a biocompatible photopolymer resin, cured by light in an SLA, DLP or LCD/MSLA printer. A smaller number use thermoplastic filament in FDM printers. Both can work, and the differences are practical.
Resin wins on surface detail and speed. Layer thickness and the way the resin cures mean a resin guide can carry sleeve tolerances in the range of tens of microns, and the material is rigid, non-toxic once fully cured and stiff enough not to flex under a handpiece.
Transparency is a quiet advantage. A clear guide lets the clinician see whether it is fully seated instead of guessing, and it makes resin easier to inspect for voids, chips and incomplete cure before the guide is used.
Filament prints in a different way, needs support material that must be removed from the underside, and is less dimensionally stable, but it is cheap, the material is familiar, and some clinics already own the printer.
Heat is the constraint both have to live with. Autoclaving a resin guide is only appropriate if the manufacturer validated that resin for that cycle, and heat plus repeated cycling can shift dimensions or degrade the surface. Always follow the validated manufacturer instructions for the specific resin and printer combination.
How the Guide Fits onto Teeth or Implants
A guide works only if it lands on the same anatomy the plan was built from, so the support type is the first real design decision. Tooth-supported guides key onto prepared or unprepared teeth, mucosa-supported guides rest on gum tissue, bone-supported guides fix to the jaw bone itself, and hybrid or implant-supported designs combine anchors for edentulous patients.
Published figures show why the choice matters. Tooth-supported guides are the most consistent, with mean entry point deviation around 0.43 mm and apical deviation around 0.24 mm. Bone-supported guides land near 1.16 mm and mucosa-supported guides near 1.68 mm at the apex, and freehand placement runs roughly ten degrees of angular deviation against about three degrees for a static printed guide.
| Support type | Mean entry point deviation | Mean apical deviation | Angular deviation |
|---|---|---|---|
| Tooth-supported | about 0.43 mm | about 0.24 mm | lowest of the guided options |
| Bone-supported | varies by fixation | about 1.16 mm | moderate |
| Mucosa-supported | varies by tissue stability | about 1.68 mm | moderate to high |
| Freehand placement | several millimetres | several millimetres | about 10 degrees |
Before any drilling, the guide is seated and checked for full support and zero rocking. A guide that rocks has not transferred the plan, no matter how accurate the print was, and drilling proceeds only once the clinician confirms stability and orientation.
Support also has to physically fit. Limited mouth opening restricts molar access in a meaningful share of older patients, and a severely atrophic ridge gives a mucosa-supported guide very little to hold on to.
How the Surgical Drill Is Guided
The sleeve is the part everyone pictures. It is a short metal tube with a hole cut to match the drill diameter, set into the guide at the planned axis, and the drill can only travel along that axis.
Sleeves get into a printed guide in a few ways, and each one adds its own error. Printed-in sleeves are formed in the resin during printing and need no assembly, but the printed hole is only as round as the layer stack. Press-fit and metal-inserted sleeves are pushed or bonded into a printed channel and hold diameter better, at the cost of a bonding gap. The practical result is that sleeve choice, drill diameter and guide material together set the tolerance chain.
A sleeve constrains position and angulation. Depth is handled differently, usually by a depth stop on the drill itself, so the clinician still has to stop drilling at the right moment. Bone density, unexpected soft tissue, a calcified ridge or a patient who moves will still change the outcome.
That is the honest limit of guided surgery. A guide removes guesswork about trajectory. It does not remove judgement, and it cannot be adapted mid-surgery if the anatomy turns out differently than the scan showed.
How Computers Turn a Scan into a Surgical Guide
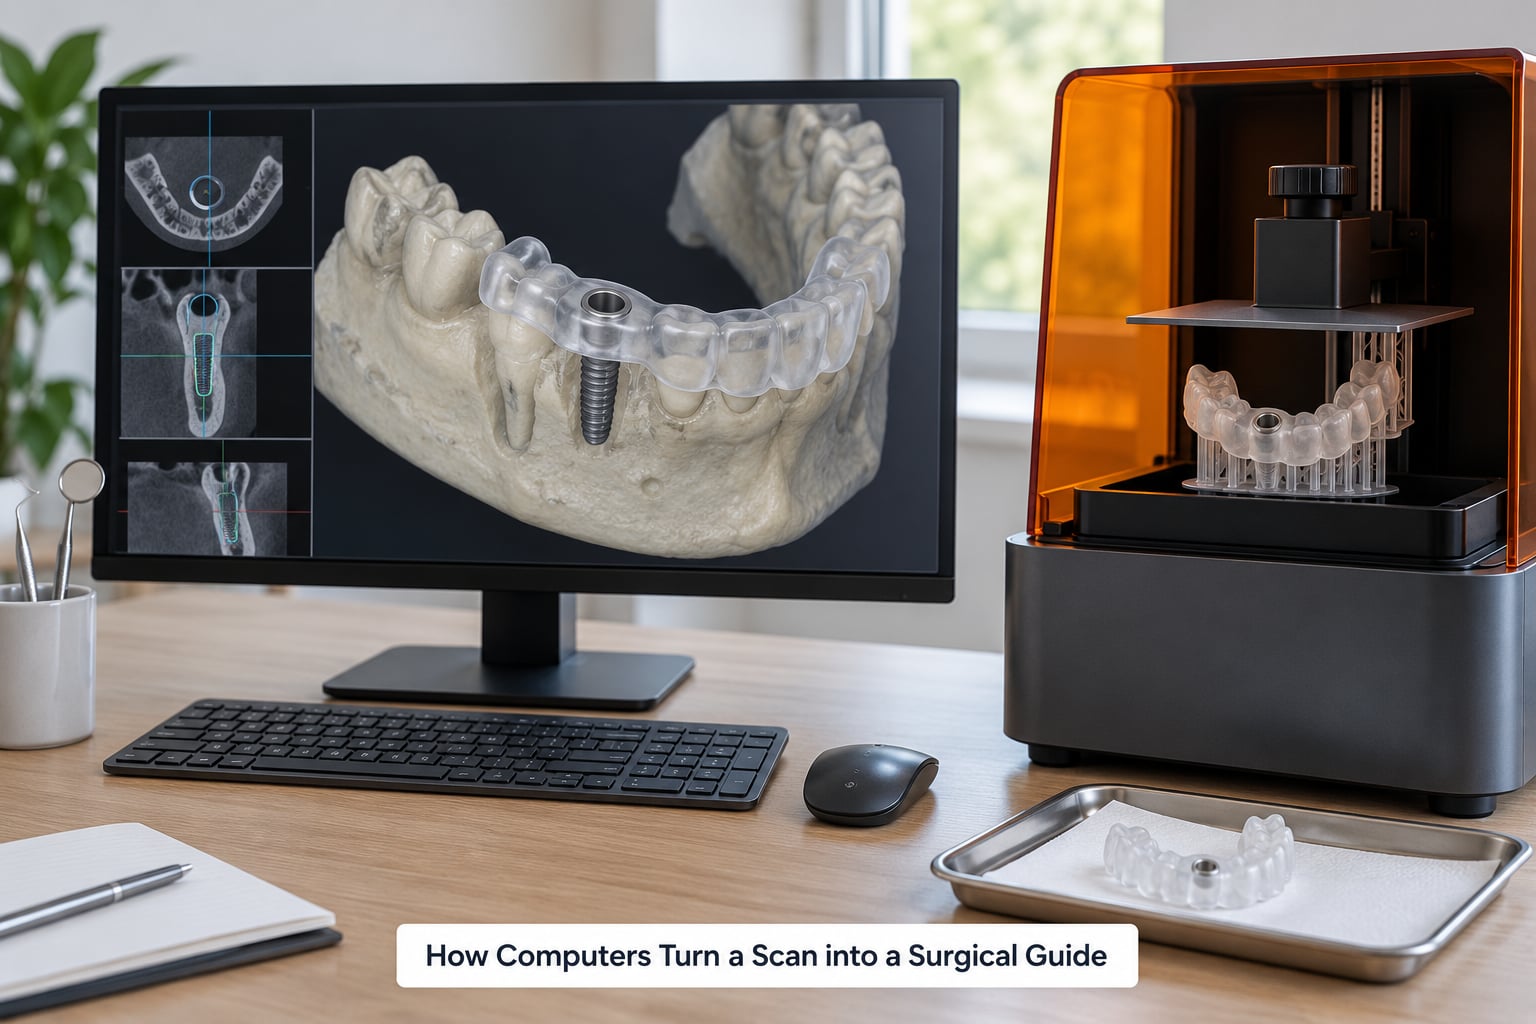
If you have never opened one of these files, the pipeline is less mysterious than it sounds. It starts with anatomy and ends with a triangulated mesh the printer can slice.
Segmentation separates the structures the software cares about, including the inferior alveolar nerve channel and the maxillary sinus floor, from everything else. The surgeon then places an implant from a library of real implant geometries, orients it, and adjusts it until the emergence point lines up with the planned restoration.
From there the guide body is modelled: a surface offset slightly from the teeth or mucosa, support arms for stiffness, and sleeve channels along the planned axes. Guides are often built in separate segments that key off each other, so a patient with limited mouth opening can still reach the posterior sites in stages.
Orientation on the build platform matters more than it does for a display model. Laying a guide flat with heavy support structures traps stress in the exact surfaces that seat on the teeth, and it is the most frequent cause of a failed guide print. Tilted orientation with tuned supports trades a little build height for a better surface.
Layer height, wash and cure routine and the printer profile are set in the slicing software, and the finished guide is measured against the plan before anyone looks at it clinically.
How 3D Printed Surgical Guides Are Checked for Safety
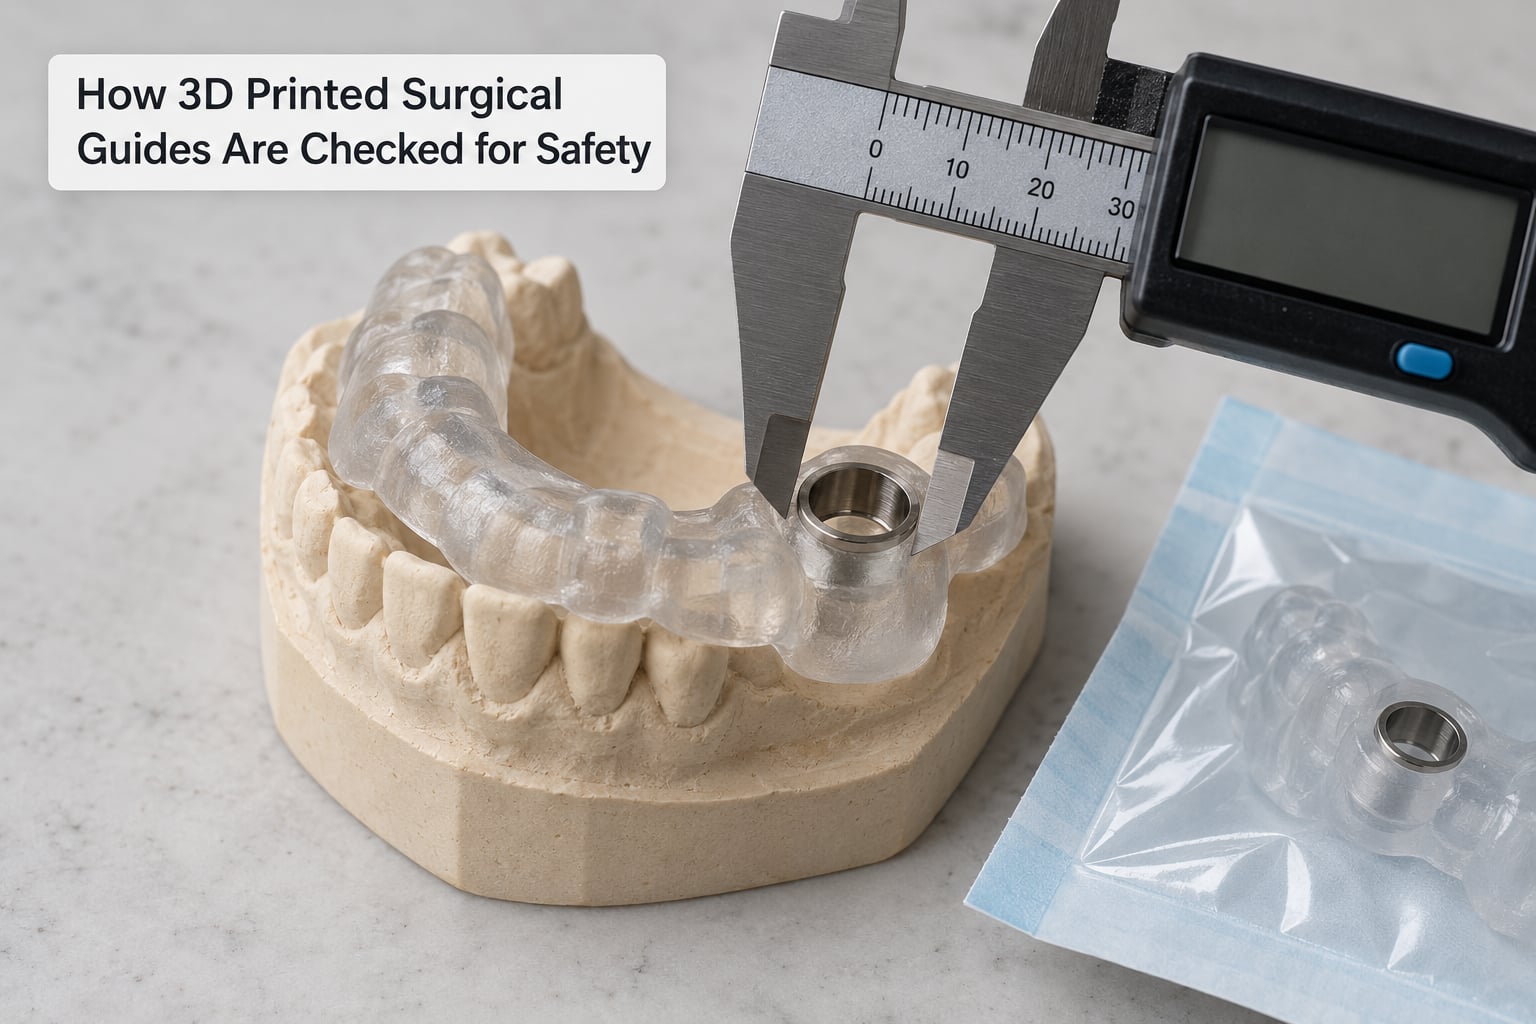
This article is general information about dental technology, not clinical advice. Anything that affects a real patient belongs to a trained dental professional working under the validated instructions for the material and device.
The checks fall into four groups. Dimensional checks confirm the sleeve diameter and the distance between sleeves match the plan, usually against the digital file. Fit verification puts the guide on the printed or plaster model and looks for full seating, no rock and no contact between sleeve and soft tissue.
Visual inspection looks for voids, cracks, incomplete cure, chipped support scars and any rough surface that could irritate tissue. Documentation covers the resin batch, print settings, wash and cure times, and whether that resin is validated for intraoral use at all.
Then there is sterilization and labelling. Guides are commonly treated as single-use items unless the manufacturer has validated a reuse cycle. Autoclaving is only appropriate when the resin and the guide geometry have both cleared that validation, and repeated cycles can affect dimensional stability.
Finally, a qualified dentist or surgeon confirms the guide matches the plan before the first incision. In-house printing does not replace that step; it makes it faster to redo.
What Are the Main Advantages and Limitations?
Guides trade setup time for predictability. The advantages and the limitations are two sides of the same design, which is easier to see side by side.
| Potential advantage | Matching limitation |
|---|---|
| Transfers the digital plan into a physical constraint on position and angulation | Carries every error in the scan, the registration and the plan straight into the mouth |
| Makes placement repeatable between implants in the same case | Cannot adapt if intraoperative anatomy differs from the scan |
| Reduces deviation from plan compared with freehand placement | Support type matters, and mucosa-supported guides are the least predictable |
| Supports flapless and limited-mouth-opening approaches in full-arch cases | Limited mouth opening and an atrophic ridge can make seating difficult |
| Can be produced same-day when the clinic prints in house | Requires imaging, a planning licence, a validated resin and a documented workflow |
| Print geometry that would be expensive or impossible to mill | Layer-level surface accuracy and heat exposure can still shift dimensions |
| Easy to modify if the plan changes before surgery | Easy to modify means a reprint cycle, and prints do fail |
A practical question clinicians ask is whether a guide is necessary at all. It is a tool, not a requirement. It earns its setup most clearly in full-arch cases, limited bone, aesthetic-zone implants and cases with nerve or sinus proximity, where freehand deviation would be hardest to live with.
It is also not a cure-all. Guided implant surgery is a means of placing an implant where the plan said to put it, and the plan still rests on clinical examination and the manufacturer’s guidance for the specific system in use.
Frequently Asked Questions
Are 3D printed dental surgical guides made for one patient only?
Yes, in almost every case. The guide is generated from that patient’s own CBCT and intraoral scan, so its surfaces match one mouth and one plan. Some systems offer anchor sleeves for a second surgical stage in the same patient, but a guide is not transferable between patients, and using it that way would be inappropriate.
Can a surgical guide be sterilized and reused?
Most printed guides are treated as single-use. Some manufacturers validate specific resin and guide designs for autoclave reuse, and heat plus repeated cycling can affect dimensional stability and surface quality. Follow the validated instructions for your exact material, and never assume a guide that came out of the printer can go through an autoclave cycle.
Does a 3D printed guide guarantee perfectly accurate implant placement?
No. Studies report mean apical deviation around 0.24 mm for tooth-supported guides, near 1.68 mm for mucosa-supported guides, and roughly three degrees of angular deviation for static guides against about ten degrees freehand. A guide reduces deviation; it does not eliminate it, and it cannot correct a plan that was wrong to begin with.
What software is used to design a dental surgical guide?
Practitioners typically use dedicated implant-planning packages that import DICOM data, merge an intraoral scan, place implants from a library and export the guide design. Many clinics also use general dental CAD or mesh software for the guide body and a separate slicer to prepare the print. The exact package depends on the clinic workflow and the printer in use.
Can a surgical guide be used for every dental implant procedure?
No. Guides are most practical for fully guided implant placement in cases where the plan is fixed in advance. Single-tooth work with a wide margin of safety, unusual anatomy, limited mouth opening or a heavily resorbed ridge may need a different approach, and the decision belongs to the treating clinician rather than to the workflow.
Conclusion
A 3D printed surgical guide is a physical bridge between a virtual plan and a moving patient: scan, plan, print, seat, verify, and the drill simply cannot go anywhere else.
If you want to understand this properly, learn the full data path from DICOM file to sliced print, and follow the validated instructions for the specific resin and printer rather than a general workflow found somewhere online. For anything patient-specific, talk to a dentist or oral surgeon, because the guide is only ever as good as the clinical decisions behind it.