If you want to know how to lubricate 3D printer rods and rails without wearing them out, the rule is simple: clean the surfaces first, then lay down a thin film of the right lubricant for that specific part. Smooth rods take light oil, linear rails take a synthetic PTFE or silicone grease, and threaded lead screws take the thickest grease you can get. The whole job takes 30 to 45 minutes per axis set, needs nothing more exotic than a lint-free cloth, and the most common mistake is using too much rather than too little.
Lubrication matters because friction in the motion system is what makes steppers skip steps, generates heat, and wears holes into chrome-plated steel. A dry axis that squeaks today becomes a binding axis that lands layer shifts next month.
Table of Contents
- What You Need
- Step-by-Step
- Identify Whether You Have Rods or Rails
- Clean the Rods and Rails
- Apply the Right Lubricant
- Test the Motion and Reassemble
- Common Mistakes
- How Often Should You Lubricate Your 3D Printer?
- Frequently Asked Questions
- What lubricant should I use on 3D printer rods and rails?
- Can I use WD-40 to lubricate a 3D printer?
- Should I use grease or oil on smooth rods?
- How often do I need to lubricate my 3D printer?
- Can I lubricate the lead screw on a 3D printer?
- How do I remove old lubricant from printer rods?
What You Need
You need less than people expect: a lint-free cloth or paper towel, a soft nylon brush, warm water with a drop of mild dish soap, and about a gram of lubricant. That covers a whole bedslinger.
Then pick your lubricant by the part it will touch, not by the tube it came in:
- Smooth chrome rods and optical rods: light machine oil or 3-in-1 oil. These surfaces are wiped clean by every pass of a bearing, so only a thin film survives.
- Linear rails (MGN12H, HGR20 and similar): synthetic PTFE grease or silicone grease. A rail runs inside a recirculating ball groove that traps lubricant, so a grease with a reservoir is the right shape for the job.
- Z lead screws, trapezoidal or threaded: high-viscosity grease, the same family you find on a garage door. A thin oil drains off and runs down onto the bed.
- LM-style linear bearings such as LM8UU and LM12UU: a light grease on the seal lips only. Sealed or unshielded variants differ, so check what your carriage uses before you open it.
- Parts that must stay dry: GT2 belts, idler wheels, V-wheels and POM rollers, extruder drive gears, the print surface, and anything near the hotend, heater block or PTFE liner.
The reason the last list matters: grease on a belt or a V-wheel turns into a dirt magnet within days, and oil that migrates to a heated zone can gum up printed parts. Keep lubricant off all of them.
Before you apply anything, check your printer’s manual. Manufacturers publish specific lubricant recommendations for their own machines, and a few specify a particular product or forbid grease on certain assemblies. Their guidance beats any general guide, including this one.
Step-by-Step
Identify Whether You Have Rods or Rails
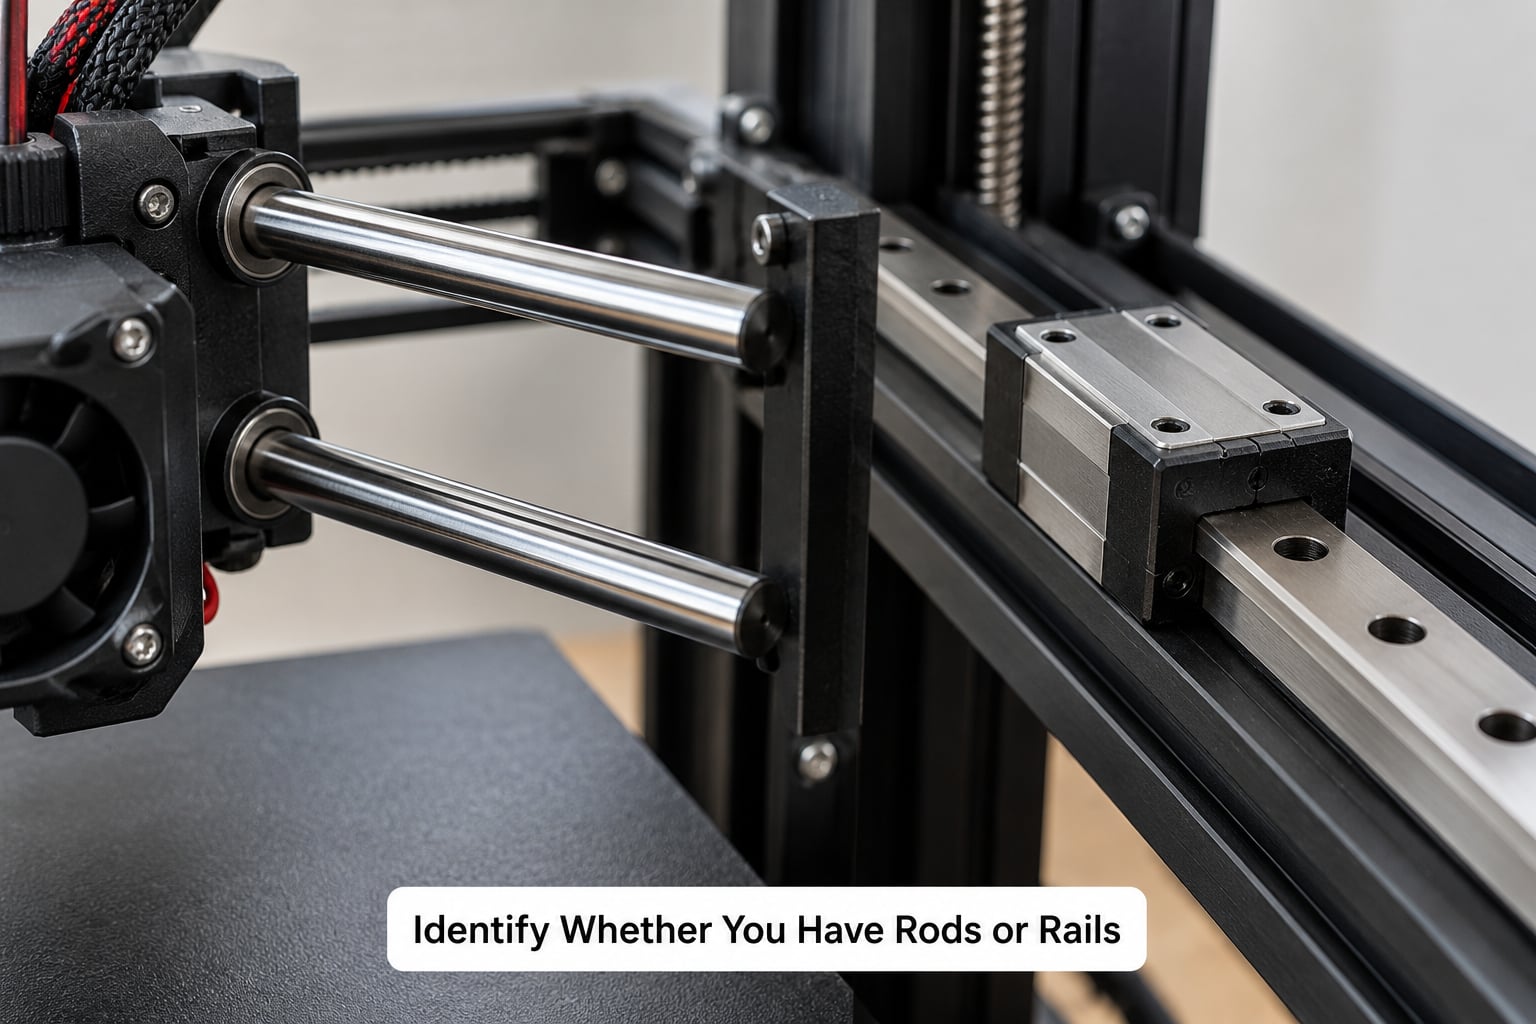
Smooth rods are polished, perfectly round, and shiny. Linear rails are blocky, usually mounted to a long extruded profile, and carry square carriages that bolt to the gantry. Lead screws are threaded and turn inside a nut when the Z axis moves. If your axis has a round polished rod with a bearing sleeve sliding on it, it is a rod and it wants oil. If it has a carriage riding in a groove, it is a rail and it wants grease.
Also identify what you are not lubing. On a bedslinger, the belt runs along the same frame as the rods and is easy to smear. On a CoreXY or a Voron, both X and Y use rails, which means twice the surface to clean and both axes need checking afterwards.
Clean the Rods and Rails
Degreasing first is the step almost everyone skips, and it is the step that decides whether the job lasts a month or a year. Old grease holds dust, and fresh grease laid over dirty grease just seals the grit in place.
Move the carriage to one end of its travel, then wipe along the full length of the rod or rail with a cloth dampened with warm water and a drop of mild dish soap. Keep the cloth flat and let the rod’s rotation or the carriage’s travel pull the dirt off rather than scrubbing across the surface. Repeat with a clean damp section until the cloth comes away without a grey smear.
For heavy grease or a rod that has gone dark, a cloth barely dampened with isopropyl alcohol cuts through it. Do not flood a rail, a linear bearing, or anything with a seal.
Dry it completely before lubrication. A water film trapped under grease forms a paste that abrades faster than the dry surface you started with. If you disassembled a carriage, reassemble it dry and hand-cycle it a dozen times to push the last water out before you lube.
Apply the Right Lubricant
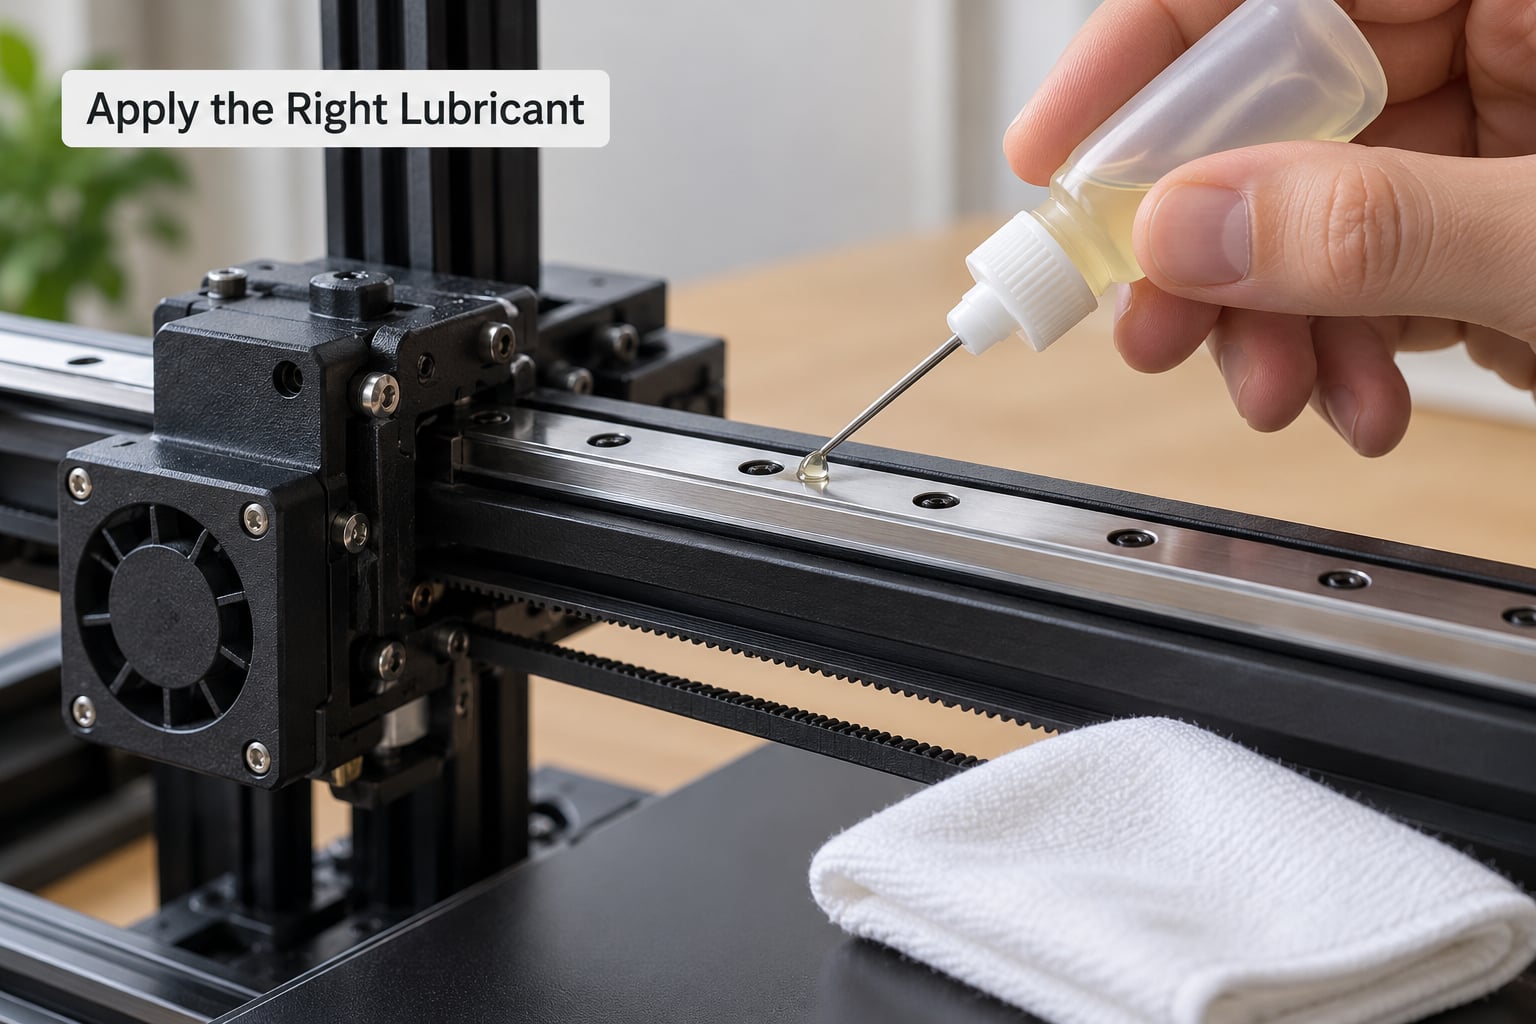
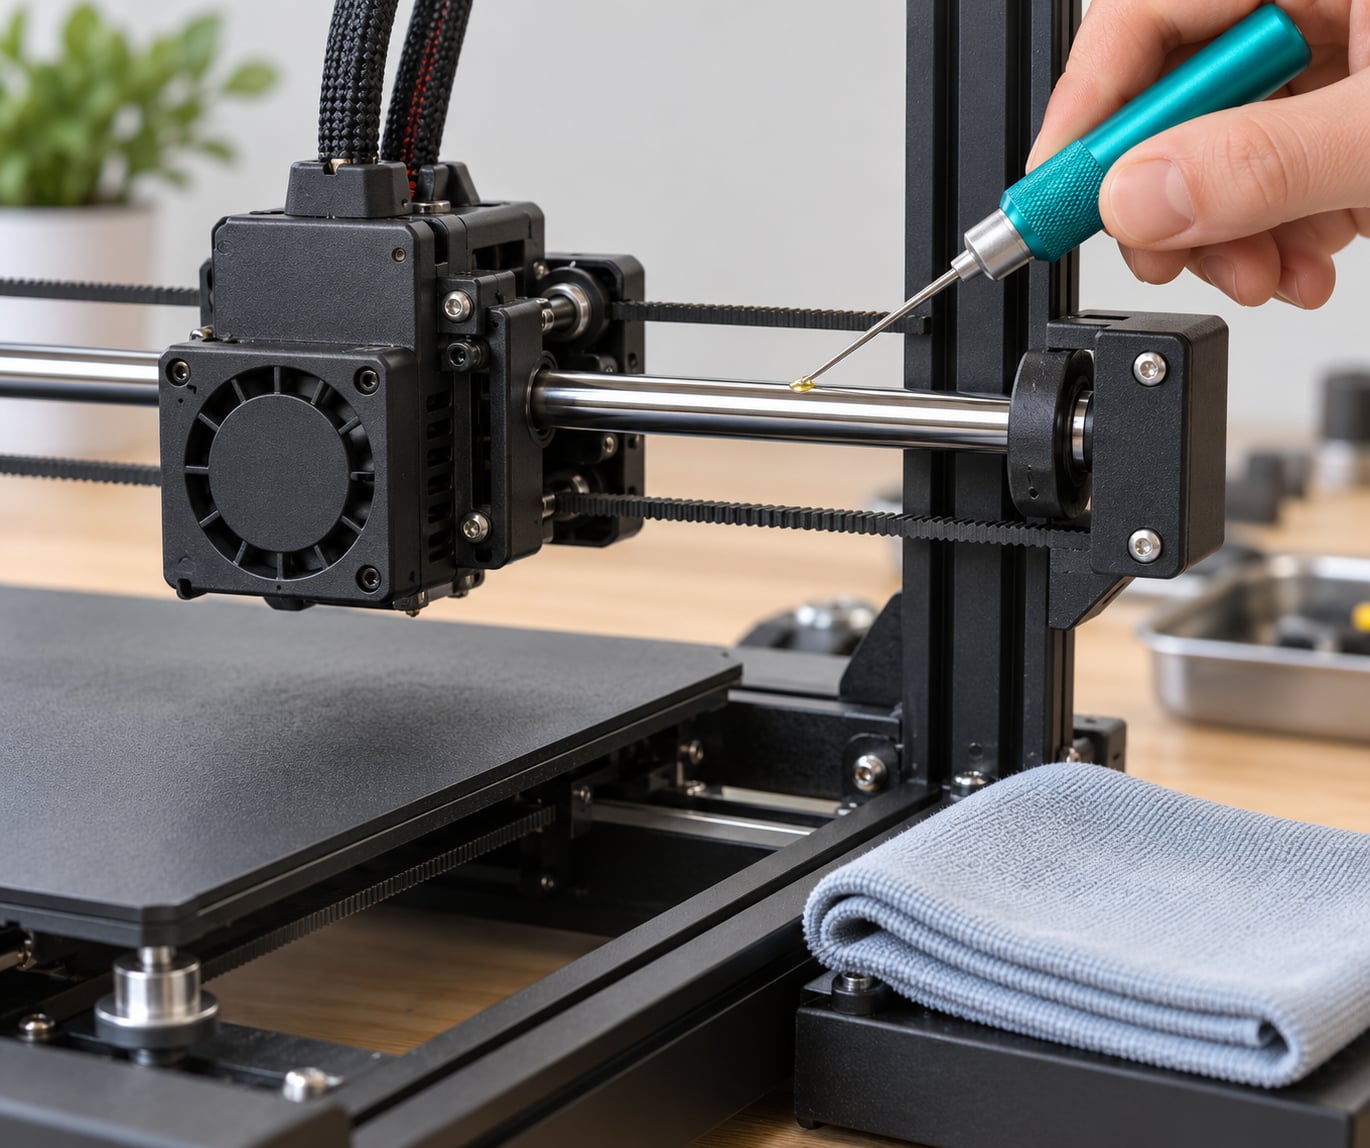
Apply in a thin film, roughly the amount you would put on a fingertip before touching a screen. For rods, run a few drops of light oil along the exposed length. For rails and lead screws, put a small dab of grease at each end of the carriage travel and at the centre, then move the axis slowly by hand so the grease spreads into a film.
Users on maker forums describe the technique the same way: a small dab on each side of each traveller, smoothed out with a cloth, excess wiped away. That is exactly right.
Wipe off everything that squeezes out. A visible bead of grease at the edge of a bearing is the layer that catches airborne dust and turns to abrasive paste. The film you want is invisible once you look at it in side light.
Keep grease away from belts and pulleys by masking them off, and keep every drop away from the hotend, fans, and connectors. If a shaft needs any lubrication at all, it takes a single drop on the shaft itself, not on the coupler or the bearing housing.
Test the Motion and Reassemble
Hand-cycle each axis from end to end before you power anything on. It should move with a consistent, quiet glide and no gritty feel at one specific point. A bind that appears at the same spot every pass usually means debris is still in the bearing, or the rod is genuinely bent, and lubrication will not fix a bent rod.
Then home all axes, run a short test print, and listen. Ringing and echo usually mean the axis is binding. A gritty sound that appears only at speed means over-lubrication, so degrease it and go lighter. You can also use a print itself as a distribution pass: a slow, small test print moves the axes through their whole range and lays the film in evenly.
Common Mistakes
Using grease where oil belongs. Thick grease on a smooth rod builds a ridge at each bearing edge that small, repeated passes start to feel. Light oil on a lead screw drains away and leaves you dry in a week. Match the viscosity to the geometry.
Using WD-40. Regular WD-40 is a water-displacing spray with a thin film and a solvent carrier. It cleans, it will not lubricate a sliding joint for long, and the solvent can craze some plastics and printed parts. The white lithium variant is a different product and behaves much more like a proper grease, which is why it shows up so often in forum recommendations, but it is still thicker than a rod wants.
Using silicone spray. A spray is a very thin fluid; it beads and runs off instead of forming a lasting film. Silicone grease is a completely different product with body to it. People mix these two up constantly, which is why one-word advice on the internet sends people down the wrong path.
Applying too much. More lube is not smoother. Excess gathers dust and grit, drips onto the bed, and makes an axis sloppier than it was. If you can see lubricant, you have applied too much.
Lubricating the wrong part. Belts, idlers, V-wheels, extruder gears, and the bed itself stay dry. Grease on a V-wheel is a common self-inflicted problem.
Skipping the clean. You are sealing in whatever was already on there.
Ignoring the printer’s manual. Some manufacturers specify their own lubricant, and a few prohibit certain products outright.
How Often Should You Lubricate Your 3D Printer?
There is no fixed calendar that fits every machine, so let the printer tell you. Service an axis when it squeaks, when it starts to feel gritty rather than glassy, or when you notice a new rumble at speed. For most home printers, that lands somewhere between every 300 and 500 print hours on rods, with rails needing less because they hold grease in a sealed groove.
Shorten the interval if you print with dusty filaments in a room that generates particles, or if the machine is an open frame sitting in a workshop. Lengthen it if your printer runs in a filtered enclosure with a bed cover and clean filament. If oil runs and drips within a week, you used too much rather than too little.
Frequently Asked Questions
What lubricant should I use on 3D printer rods and rails?
Light machine oil for polished smooth rods and optical rods. Synthetic PTFE grease or silicone grease for linear rails and LM-style carriages. High-viscosity grease for threaded Z lead screws. Keep grease off belts, idlers, V-wheels, extruder gears, and the print surface. Check your printer manual first, since some manufacturers name a specific product.
Can I use WD-40 to lubricate a 3D printer?
Not the regular original formula. It is a water-displacing spray with a thin film and a solvent carrier, so it does not stay on a sliding joint and the solvent can craze plastics and printed parts. WD-40 Specialist White Lithium Grease is a genuinely different, heavier product and works on rails, though it is thicker than smooth rods want. Use light machine oil for rods instead.
Should I use grease or oil on smooth rods?
Light oil. A polished rod is wiped clean every time a bearing passes over it, so only a thin film survives, and heavier grease tends to build a ridge at the bearing edge that small repeated passes can feel as a bump. Reserve grease for rails and lead screws, where it stays trapped in a groove or in the nut instead of being wiped away.
How often do I need to lubricate my 3D printer?
Judge it by signals rather than a calendar: squeaking, a gritty feel, a new rumble at speed, or visible bind at one point in the travel. As a rough guide, rods on a typical home printer want attention every 300 to 500 print hours, while linear rails need less because they hold grease in a sealed channel. Dusty rooms and open frames shorten the interval.
Can I lubricate the lead screw on a 3D printer?
Yes, and it should be. Use a high-viscosity grease, the same family used on garage door screws. Thin oil drains off the threads and runs down onto the bed within days. A lead screw is a sliding contact surface, and friction there shows up as Z banding, uneven first layers, and extra heat in the Z stepper.
How do I remove old lubricant from printer rods?
Wipe along the full length with a cloth dampened with warm water and a drop of mild dish soap, moving the axis so the carriage helps lift the dirt. Repeat until the cloth comes away clean. For heavy grease, use a cloth barely damp with isopropyl alcohol. Dry the surface completely before applying fresh lubricant, since trapped moisture under grease forms an abrasive paste.
Start tonight rather than waiting for a squeak: turn the printer off, wipe down the X and Y motion system with a damp cloth, put a few drops of light oil on any polished rod, and a dab of PTFE grease on any rail or lead screw you can reach. That is the whole routine. Wipe the excess, hand-cycle the axes, and run a short print to hear whether anything changed. Updated for 2026.