If you own an FDM printer and a balcony, patio or small garden, the useful 3D printed garden and plant projects are the ones that solve a specific problem: watering a pot while you are away, holding a tomato stem upright, giving a seed tray the right cell size, feeding a drip line. The best of them are also cheap, quick prints you can size to the exact pot, shelf or tubing you already own. Print anything that lives in sun, rain or soil in PETG or ASA rather than PLA, and most of the projects below take an evening each on a hobby machine.
Table of Contents
- 3D Printed Garden and Plant Projects at a Glance
- 1. Modular Self-Watering Planter
- How a two-part self-watering planter actually moves water
- Printing and material notes for the reservoir
- 2. Adjustable Seed-Starting Tray
- Sizing the cells for different seeds
- Filament choices for 3D printed garden seed trays
- 3. Custom Plant Labels
- Styles that actually stay readable
- Filament choice for outdoor markers
- 4. Precision Drip-Irrigation Emitters
- Matching the emitter to your tubing
- Flow, pressure and clogging
- 5. Stackable Plant-Trellis Clips
- Spacing and load on the clip
- Fasteners, weather and crop growth
- 6. Adjustable Pot Feet
- Fixed-height and adjustable designs
- Choosing a size and load rating
- 7. Compost Sifter and Aerator
- Choosing the mesh size
- Frame construction and printing orientation
- 8. Snap-Fit Plant Support Cage
- Ring and stake styles, and how they assemble
- Reinforcement where the load lands
- 9. Mini Greenhouse Humidity Dome
- Vents, handles and condensation control
- Materials and timing the move outdoors
- 10. Modular Garden-Tool Organizer
- Wall-mounted or freestanding, and how slots should work
- Mounting, load and drainage
- Frequently Asked Questions
- What filament is best for 3D printed garden and plant projects?
- Are standard PLA plant pots safe to use outdoors?
- How do you make a 3D printed planter waterproof?
- Which garden project is easiest to print for beginners?
- How should I orient functional garden parts on the print bed?
- Can 3D printed garden parts be recycled or composted?
- Conclusion
3D Printed Garden and Plant Projects at a Glance
Each project below is scored on the same four things: what problem it solves, how it prints, and which material carries the benefit or the risk. Difficulty assumes a printer you have already run successfully a few times.
| Project | Best use | Printing approach | Main material benefit |
|---|---|---|---|
| Modular self-watering planter | Herbs and salad greens while away for a week | Tall, printed upright; 4 perimeters; test for leaks before soil | PETG holds water and shrugs off UV |
| Adjustable seed-starting tray | Starting seeds indoors in late winter | Flat, no supports; modular cells printed separately | Heat-tolerant cells under a grow light |
| Custom plant labels | Marking rows and potted herbs | Fast, support-free, batch-printed | ASA or PETG letters that do not wash off |
| Drip-irrigation emitters | Feeding a row of pots from one line | Small, printed in multiples on one plate | Tolerance to constant water contact |
| Stackable trellis clips | Peas, beans and flowering climbers | Small parts with slight chamfers on hooks | Snap-fit flexibility in the living hinge |
| Adjustable pot feet | Free drainage and tabletop watering | Wide, flat, load-bearing base | Creep-resistant layer bonding under weight |
| Compost sifter and aerator | Turning a pile and sieving finished compost | Frame flat, screen printed at 45 degrees | Rigid frame; mesh sized to your compost |
| Snap-fit support cage | Ties, peppers and heavy-fruiting stems | Two halves printed flat and assembled | Reinforced joints where load concentrates |
| Mini greenhouse humidity dome | Seedlings and cuttings before hardening off | Clear dome, vents printed separately | Transparency plus UV stability in the light |
| Garden-tool organizer | Trowels, pruners and markers in one place | Wall plate printed flat on its face | Weatherable slots that do not sag |
Most 3D printed garden and plant projects start as a model you adapt rather than a finished part, and they are easiest to find on libraries such as Printables, MakerWorld and Cults3D, where you can filter by licence, filament and print time before downloading. Check the licence before you remix a model and repost it: public domain lets you do what you like, while a share-alike licence asks you to publish your modified version under the same terms.
1. Modular Self-Watering Planter
How a two-part self-watering planter actually moves water
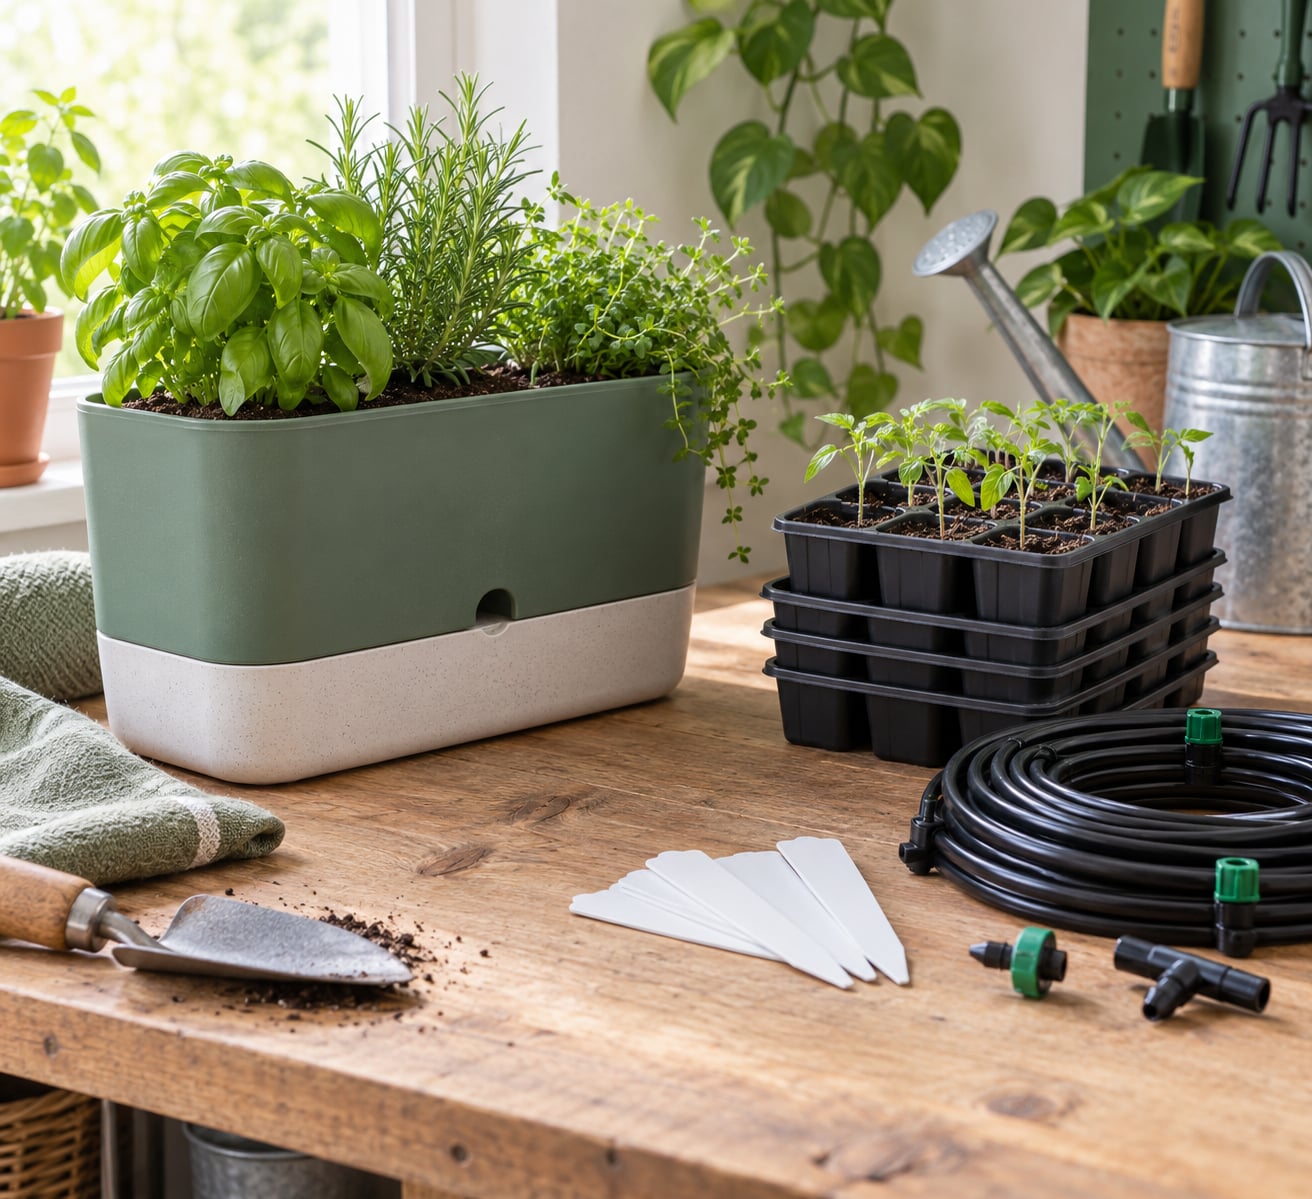
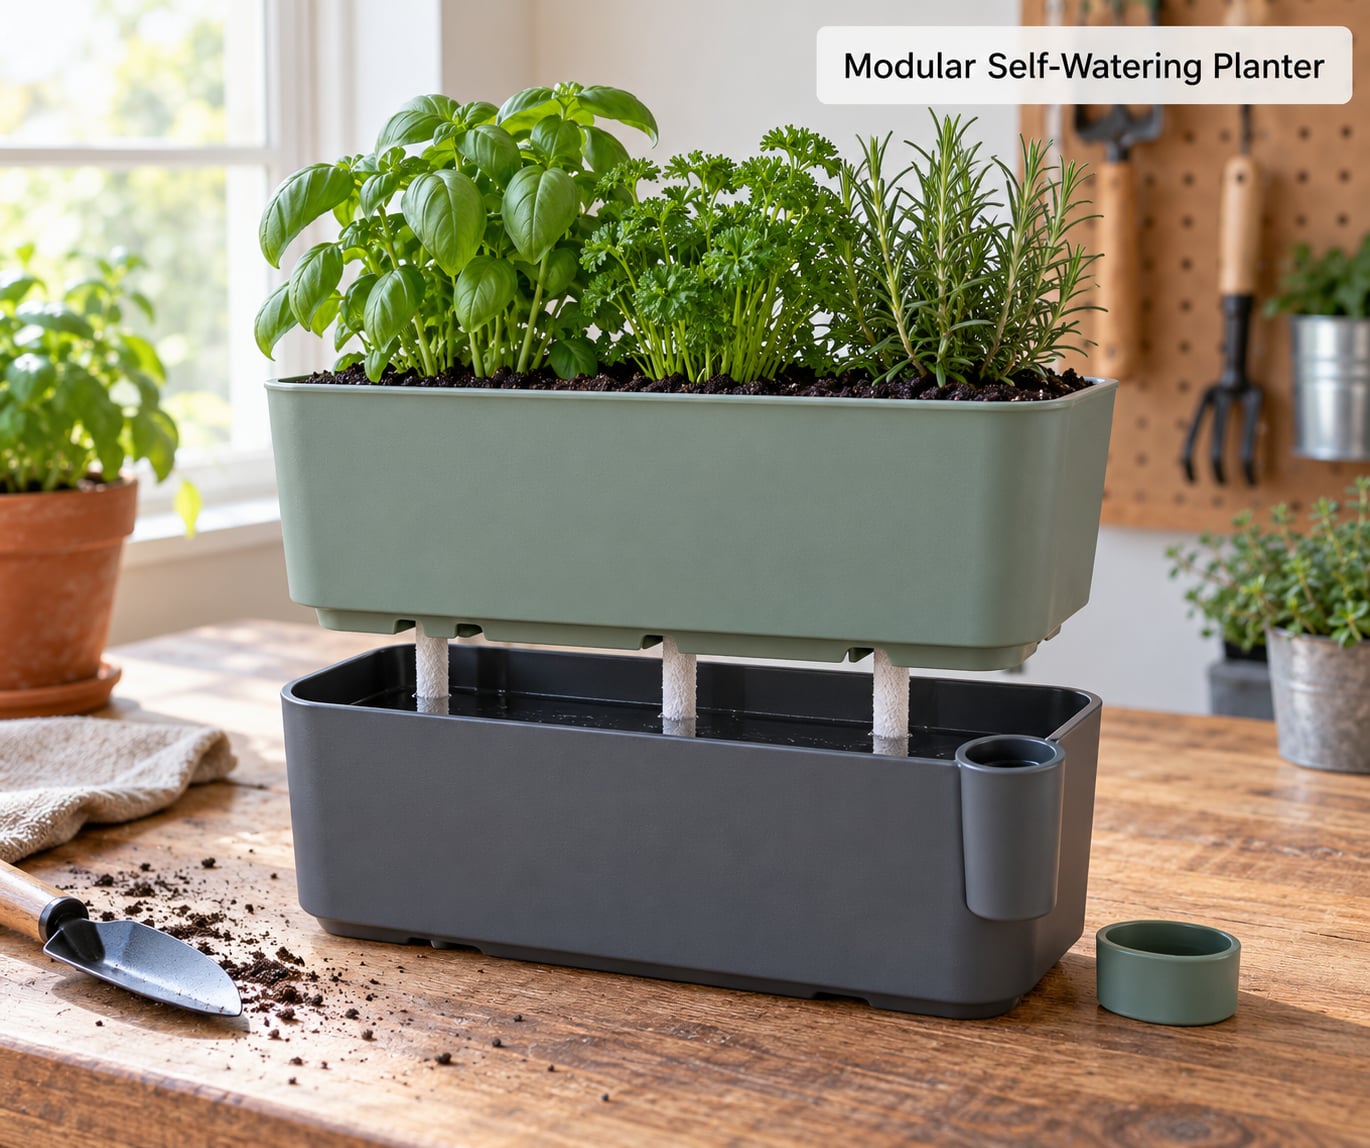
A self-watering planter is two nested shells: an inner pot holding the root ball, and an outer pot forming a sealed reservoir below it. Water sits in the reservoir, and the soil in the inner pot reaches it through wick holes in the floor or through strips of felt that pass through a gap in the floor.
Capillary action keeps the soil at whatever moisture level the plant draws down. Roots are only wet when they are actively growing, so a two-week holiday is realistic with a reservoir sized to the pot.
Printing and material notes for the reservoir
Print the reservoir upright with at least four perimeters and 100% or heavily dense infill in the base; layer adhesion is what decides whether it leaks, not the infill pattern in the walls. Print a test reservoir with no soil, fill it with water, and leave it on an absorbent cloth for a day. That check costs twenty minutes and saves the whole pot.
PETG is the practical pick for the body. ASA works if the planter sits in full sun all day. Avoid PLA for anything holding water outdoors, because it is the first thing to go brittle and split at the layer lines once the material warms up.
Print the two shells as separate parts if your bed is small. The fill port on the side lets you top up without dismantling the pot, and a small floating indicator rod shows the water level without lifting the inner pot out.
One warning worth repeating: cacti and most succulents hate a constant reservoir. Use a plain draining pot for those, and reserve this design for herbs, lettuce, chillies and leafy greens.
2. Adjustable Seed-Starting Tray
Sizing the cells for different seeds
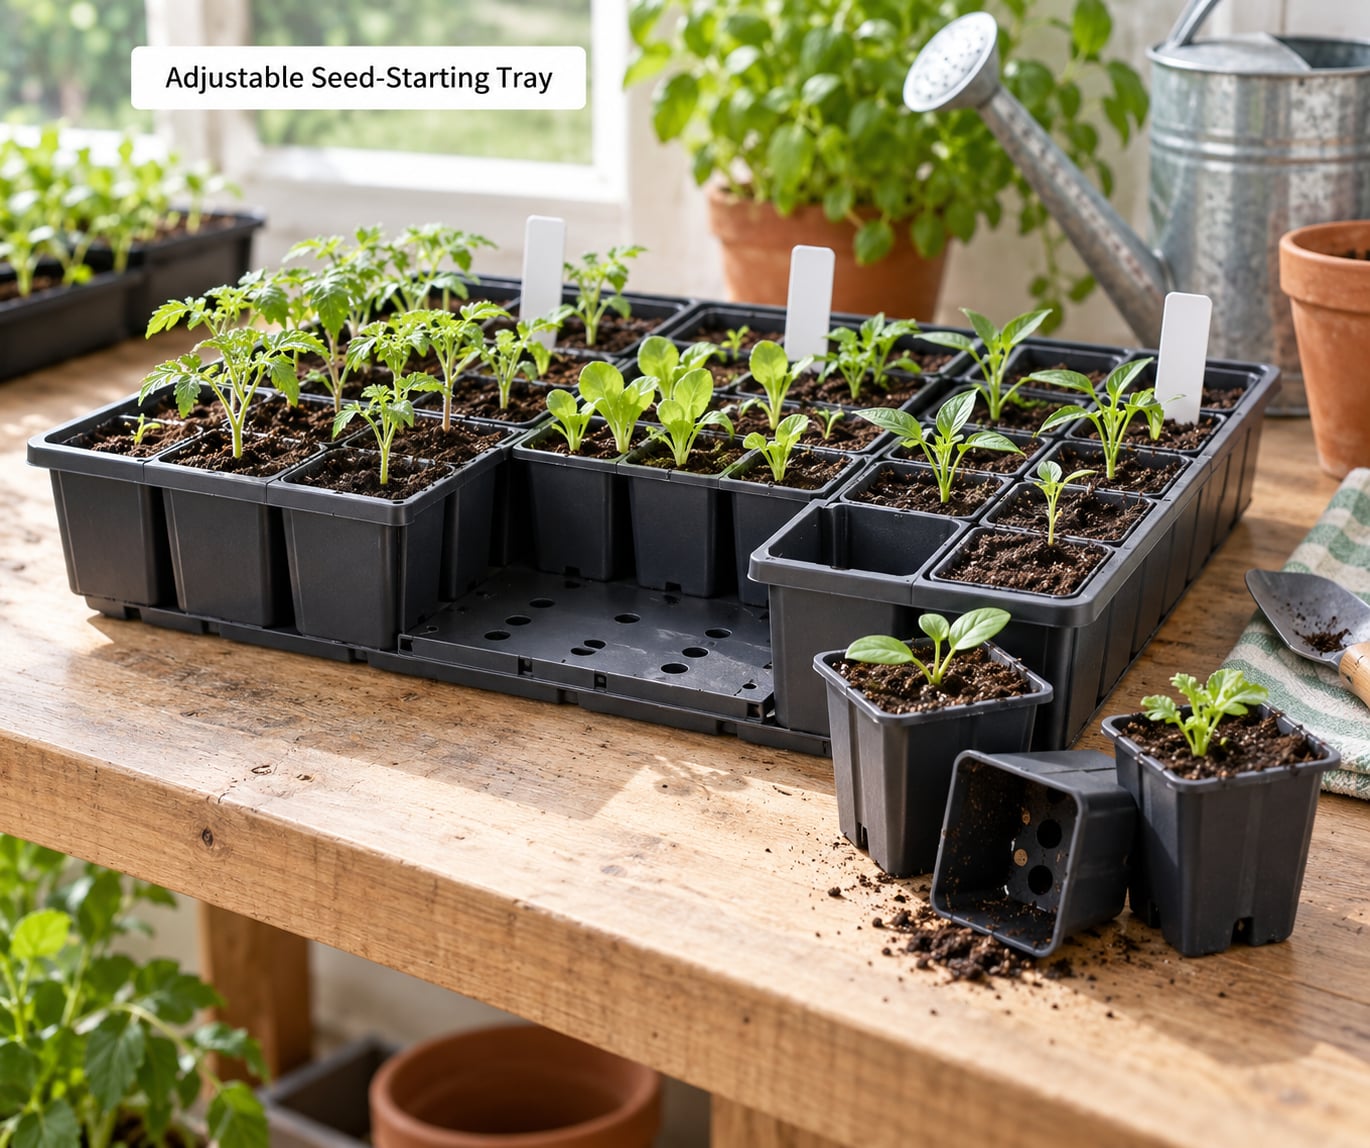
A removable-cell tray beats a solid tray because you can lift a single seedling out without disturbing its neighbours. Standard cell sizes cluster around 50 mm square for large seeds such as beans, 35 mm for tomatoes and peppers, and 20 mm or less for carrots, basil and lettuce, which dislike being transplanted.
If you are designing your own, make the cell walls 1.2 to 2 mm thick and give the floor 3 to 5 mm drainage holes. Wide holes dry out too fast, and holes smaller than about 3 mm hold enough moisture to invite damping-off in a warm, closed tray.
Filament choices for 3D printed garden seed trays
Seed trays get wet repeatedly and then sit under a grow light for sixteen hours a day, which is a harsher combination than most people expect. PETG and PCTG clean up with a quick rinse and tolerate the warmth; a heat-deformed PLA tray that curls under a lamp will not accept a flat seed cell any more.
Print the cells flat with no supports, and add a matching blank label tab to each one so you can write the variety and date with a grease pencil. If you want to keep using it, print a second identical tray in a different filament colour and run the two as early and late sowing batches.
3. Custom Plant Labels
Styles that actually stay readable
Labels are the cheapest project on this list and the one you will reprint most often. Embossed text, where the letters stand proud of the surface, survives wet soil and scrubbing better than engraved text, which fills with dirt and becomes unreadable within a season.
Stake styles push into the soil beside a row. Clip styles clamp onto a pot rim or a tomato cage, which is better for containers that get moved around. Whichever you choose, print a small batch of six to ten at once, because labels have a way of disappearing into the compost heap.
Filament choice for outdoor markers
Use ASA for anything left in full sun, and PETG anywhere with partial shade. Both hold fine detail at a reasonable layer height; if the embossing comes out mushy, drop the layer height and slow the outer wall rather than increasing the text depth.
Colour is a free labelling system. Red for chillies, green for herbs, yellow for brassicas, and any neutral colour for everything else gives you a bed you can read at a glance without a label anywhere in sight.
Print two-part labels with the name on a small flag and the stake as a separate body if your bed is windy; a single thin flag in a flimsy filament will snap at the neck after a gust.
4. Precision Drip-Irrigation Emitters
Matching the emitter to your tubing
Printable emitters work because you can match the barb or thread to the exact tubing you already have instead of hunting for a compatible fitting. Measure the outside diameter of your line first, then model the inlet to that number. Common household drip tubing is in the 6 mm to 8 mm range, with 6 mm fittings the most widely stocked.
Push-fit inlets are easier to print and easier to replace. Threaded inlets seal better but need a matching nut, and printed threads strip if the first fitting is forced. Whichever you use, print a short length of test tube with the emitter fitted before committing to twenty of them.
Flow, pressure and clogging
Flow depends on the internal channel length and diameter, not the outer body. A narrow channel gives a slow drip suited to seedlings; a short wide one floods a pot in minutes. Keep internal passages at least 2 mm across, and add a small filter chamber at the entry if your water is hard or you are drawing from a tank with any sediment.
Pressure is the other half of the puzzle. Emitters at the far end of a line see less pressure than the ones nearest the tap, so unequal runs are normal. Print a few with different channel sizes, run them on your actual line, and measure with a marked container over an hour before you settle on one design.
Residual stringing inside a narrow channel is the classic failure here. Keep the channel vertical in the slicer, wipe the nozzle between prints, and print one test piece first. Do not skip the flow test; a blocked emitter is invisible until that pot is wilting.
5. Stackable Plant-Trellis Clips
Spacing and load on the clip
Trellis clips are small C-shaped clips that hook over a wire or a twine line and grip the stem. Print them in a stack so you can vary spacing along a run without re-clipping everything each time: tight spacing for young peas that need support immediately, wider spacing for beans once they are established.
Load is the limit. A clip carrying a heavy bean vine concentrates force at the hook, so keep a generous bend radius there and print at 100% infill with three or more perimeters on that hook section. A printed-in-place hinge that flexes is far more forgiving than a rigid clip that snaps.
Fasteners, weather and crop growth
Decide early whether the clip slides on or locks. Slide-on clips are gentle on stems and easy to reposition. Locking clips save you a weekly tie-up session but need a release lever to avoid shearing a thick stem, so leave 0.5 mm of clearance at the jaw.
Weather resistance comes down to the hook material and to sunlight. PETG handles a season of rain and sun on a fence; a clip printed in PLA on a south-facing wall will stiffen and crack within weeks. Check the spacing against how fast your crop grows, too, because a clip set too tight becomes a girdling ring as the stem thickens.
6. Adjustable Pot Feet
Fixed-height and adjustable designs
Pot feet raise a container so water can drain out of the saucer instead of sitting against the base, which is the difference between a healthy pot and a sour one. Fixed-height feet are three or four small blocks printed in one go; adjustable designs use a threaded stud and a foot that screws up or down to set the gap.
For tabletop watering, adjustable feet are the better buy. A riser that lifts a pot 15 mm off a saucer is enough to keep the bottom from wicking moisture back up through the drainage holes all day.
Choosing a size and load rating
Match the foot to the pot: the top surface should sit inside the base diameter, not on the rim, and the footprint needs to spread the load of wet soil across the surface below. A 20 cm pot full of wet compost is heavy, and a tall pot concentrates that weight awkwardly.
Print feet base-down with a wide first layer and no bridging, or print them inverted with a small brim if your bed adhesion is marginal. Test the finished foot with something heavy and boring first, like a bag of compost, before a tall pot of tomatoes leans on it all summer.
A printed riser that lets a plant stay in its nursery pot is quietly one of the most useful prints here; repotting a plant just to raise it is work you can skip.
7. Compost Sifter and Aerator
Choosing the mesh size
A compost sifter is a frame with a screen in it. You fill it with material from the pile, shake or turn it, and the fine stuff falls through as finished compost while twigs and unrotted chunks stay on top for the next round. That screening action is also the aeration step, so one tool does both jobs.
Mesh size sets the trade-off. A screen around 6 mm to 10 mm passes a fine, almost-finished compost but needs shaking. A coarser 15 mm to 20 mm screen moves fast and suits a rougher batch you intend to return to the pile. Larger holes also clog less, which matters more than people expect after a few turns.
Frame construction and printing orientation
Print the outer frame flat on its largest face so the whole part is perimeters on the outside. That gives far more rigidity than printing the frame on edge, where the load path runs across layer lines. Print the screen separately at 45 degrees, or as an array of crossing bars, and glue or screw it into the recess.
Round the frame corners generously. A sifter gets dropped, dragged over a pile and handled with gloves on, and sharp external corners are the first thing to chip. Add a shallow lip on two sides so it can stand propped against the bin while you work.
On hygiene, rinse it after each use and let it dry in the sun. Compost carries enough moisture and warmth to grow mould on a screen that sits damp overnight, and dried compost dust is unpleasant to breathe.
8. Snap-Fit Plant Support Cage
Ring and stake styles, and how they assemble
A support cage holds a plant upright by clipping around the stem rather than tying to it. Ring-style clips open at the stem, expand slightly and settle around it. Stake-style versions clip to a cane or a length of wire, which is stronger for tall tomatoes but needs a frame to attach to.
Print the halves flat and press-fit them together, checking the fit with a scrap cut before printing the whole set. A cage that is too tight cracks the stem, and one that is too loose flops around and chafes in wind.
Reinforcement where the load lands
Stress concentrates at the joint and at the points where the ribs meet the ring. Reinforce those areas with extra perimeters, and consider printing the joint as a flexing hinge rather than a rigid corner so an accidental knock does not shatter it.
Wind is the factor that breaks most printed cages. A leafy tomato plant in a pot catches far more load than it looks like it should, so test a finished cage on one pot in an exposed spot before you fit the whole row. Size the cage to the crop, too: a cage sized for a chilli is far too small for a cordon tomato, and one sized for a tomato is bulky and wasteful around a pepper plant.
9. Mini Greenhouse Humidity Dome
Vents, handles and condensation control
A humidity dome keeps humidity around seedlings and cuttings while their roots establish. The simplest version is a clear dome that snaps or twists onto a seed tray; the better versions have adjustable vents that let you raise humidity gradually as the plants harden off.
Vents matter more than most beginners expect. A dome with no opening traps condensation that drips onto the leaves and can knock a seedling flat by morning. Fit at least one vent per dome and open it a little each day from the second week.
Handles are a small feature that pays off. A dome you can lift with one hand while the other hand holds a tray is far less likely to end up on the floor. Print them thick, and make them part of the same piece rather than a thin add-on.
Materials and timing the move outdoors
Use clear filament for the dome itself. PLA clouds and goes brittle once it is exposed to sun through the cover, so PETG or clear PETG is the better choice for anything that will sit on a windowsill in bright light.
Time the transition by the plant, not the calendar. When seedlings have their first true leaves and the top growth is leaning slightly toward the light, start opening the vents fully and lengthen the uncovered period each day. Moving a dome-hardened plant straight into full sun on a warm afternoon is the fastest way to scorch a seedling that never needed the dome in the first place.
10. Modular Garden-Tool Organizer
Wall-mounted or freestanding, and how slots should work
A tool organizer is a board or caddy with configurable slots sized to the tools you actually own: hand trowels, dibbers, pruners, plant markers, twine, gloves. Modular versions print as separate slot blocks that clip onto a rail, so you can rearrange after you find what fits.
Wall-mounted versions keep the floor clear and are better on a balcony where ground space is precious. Freestanding versions work where drilling a wall is not an option. Either way, size the slots from a measurement of your own tools rather than from a generic model, which is exactly the kind of adaptation printing makes easy.
Mounting, load and drainage
Print a wall plate flat on its largest face and reinforce the screw holes with a washer face on both sides; the failure mode is almost always the plate tearing around a fixing rather than the slots. Add a lip so tools do not slide out when the wind gets up, and keep heavy pruners low on the board so the load does not lever the top fixing out.
For an outdoor organizer, drainage matters as much as load. Drainage holes along the bottom of each slot stop rainwater pooling in the base of a pocket where it will sit against a trowel blade and against dirt. Choose PETG or ASA for anything outside, and check that the mounted height keeps the board clear of the soil splash zone after heavy rain.
Frequently Asked Questions
What filament is best for 3D printed garden and plant projects?
PETG is the safest default for most garden parts: it handles repeated water contact, stays flexible rather than brittle, and prints without much fuss. ASA is the upgrade for anything in full sun because it holds its colour and stiffness under UV. PLA is fine indoors and for tools, but avoid it for planters, reservoirs and anything left outdoors in summer heat.
Are standard PLA plant pots safe to use outdoors?
Not really. PLA softens in a hot car or a sunlit windowsill and becomes brittle after a season or two of UV, so a PLA pot often cracks at the layer lines rather than failing gracefully. If you want to try it, keep the pot in shade, use thick walls, and treat it as a seasonal part you will reprint. ASA or PETG is the better choice for a pot that must last.
How do you make a 3D printed planter waterproof?
Print it upright with at least four perimeters and a solid or gyroid infill in the base, because layer adhesion decides whether it leaks. Avoid spiral vase mode, which produces gaps between layers. Then test the empty planter with water on an absorbent cloth for a day before you add soil, and add a shallow inner pot if you would rather isolate the soil from any printed surface at all.
Which garden project is easiest to print for beginners?
Plant labels and pot feet are the two easiest. Both are small, flat, support-free prints that fit comfortably on a beginner bed and finish in well under an hour, which means you get a useful result without diagnosing a failure. A seed tray is a good third project because it is still a flat print but teaches you about clearances and fit, which almost every later garden project depends on.
How should I orient functional garden parts on the print bed?
Orient for the load, not for how the model looks. Print anything that holds water, carries weight or clips open with its largest face flat on the bed, because that puts perimeters on the outside where the stress is. Print screens, funnels and channels at an angle so they need no supports. Keep moving parts on the bed so the snap-fit joint is printed in its final orientation.
Can 3D printed garden parts be recycled or composted?
They can, with caveats. Clean PLA, PETG and ABS parts can go into household plastic recycling where your local scheme accepts them, and unglued, unpainted prints can be chopped down for a home filament extruder. Parts in contact with soil, algae or diseased plants should go to garden waste or composting instead, never into a plastic recycling stream. ASA is widely recycled and behaves much like ABS.
Conclusion
Sort these by the problem you actually have rather than by how clever the print looks. Plant labels and pot feet are the quickest wins and the best way to learn your machine; a seed tray adds real value in a couple of hours and teaches fit and clearance for everything after it.
Once the basics feel routine, move to a project with a problem attached: a self-watering planter if you travel, drip emitters if you water a whole row from one line, a support cage if your tomatoes keep snapping under wind. In every case, pick PETG or ASA, print it in the orientation the load wants, and test anything that holds water before you put soil in it.