Store-bought kitchen organizers are sized to fit a showroom drawer, not yours. The gaps, the rattles, and the two wasted centimetres on each side are why a printed insert usually works better. Printing 3D printed kitchen organizers to make for your own shelves means you measure once, print once, and the thing actually fits.
Small kitchens benefit most, and rented flats more so, since nothing can be screwed in permanently. A drawer insert cut to 480 mm when your drawer is 447 mm inside solves a problem no catalogue solves, and it costs a few grams of filament. The ten projects below cover drawers, counters, the sink, the pantry and the wall, and each one includes a sensible starting size, the material I would reach for, and the part people usually get wrong on the first attempt.
You do not need CAD skills for any of these. Download a model from a repository like Printables, MakerWorld, Thingiverse or Cults3D, slice it in OrcaSlicer, Bambu Studio or PrusaSlicer, and print. Where a project needs custom sizing, I explain the measurement first, because that is the part that decides whether the print is useful or bin fodder.
Table of Contents
- 3D Printed Kitchen Organizers to Make at a Glance
- 1. Adjustable Drawer Divider
- Sizing 3D printed kitchen organizers to make fit a non-standard drawer
- 2. Vertical Pan and Lid Organizer
- 3. Stackable Spice Jar Labels
- 4. Under-Sink Cable and Tube Holder
- 5. Reusable Produce Bag Dispenser
- 6. Countertop Coffee Pod Holder
- 7. Wall-Mounted Utensil Rail
- 8. Stackable Pantry Jar Base
- 9. Sink-Splash Caddy
- 10. Reusable Coffee Filter Dripper
- Frequently Asked Questions
- What filament is best for 3D printed kitchen organizers?
- Are 3D printed kitchen organizers safe to use with food?
- How do I stop drawer dividers from rattling or moving?
- Can I scale a kitchen organizer model to fit a different size?
- Should kitchen organizers be washed with soap and water?
- Do I need supports or a specific print orientation for these projects?
- Conclusion
3D Printed Kitchen Organizers to Make at a Glance
Every project below is judged on four things: how hard it is to print, which filament suits it, and whether it earns its space in a kitchen under about ten square metres. The sizes are starting points, not specifications. Measure your own drawer before you scale anything.
| Organizer | Suggested size | Best material | Difficulty | Kitchen problem it solves |
|---|---|---|---|---|
| Adjustable drawer divider | Start 180 x 60 mm per segment | PLA or PETG | Easy | Cutlery and junk drawer collapse into one mess |
| Vertical pan and lid organizer | 300 x 120 mm footprint, 3 slots | PETG | Easy | Pans stacked seven deep in a low cabinet |
| Stackable spice jar labels | 63 mm wide by 18 mm tall plate | PLA | Easy | Jars you can identify only by lifting them |
| Under-sink tube holder | 120 mm wide, 2 to 3 cradles | PETG | Easy | Cleaning tubes coiled on the cabinet floor |
| Produce bag dispenser | 110 mm wide, 70 mm deep bin | PLA or PETG | Easy | Roll of bags taking over a drawer |
| Coffee pod holder | 2 x 3 pods per tray | PLA or PETG | Easy | A loose box of pods on the counter |
| Wall-mounted utensil rail | 300 mm rail, 25 mm hook pitch | PETG | Intermediate | Utensils stacked in a crock you never touch |
| Stackable pantry jar base | 70 mm ring, 22 mm tall | PETG | Easy | Jars you cannot pull out and cannot stack |
| Sink-splash caddy | 120 x 90 mm, 12 mm tray | PETG | Easy | Sponge and soap pooling on a wet surface |
| Reusable coffee filter dripper | 80 mm top diameter cone | PETG | Intermediate | Paper filters you keep running out of |
1. Adjustable Drawer Divider
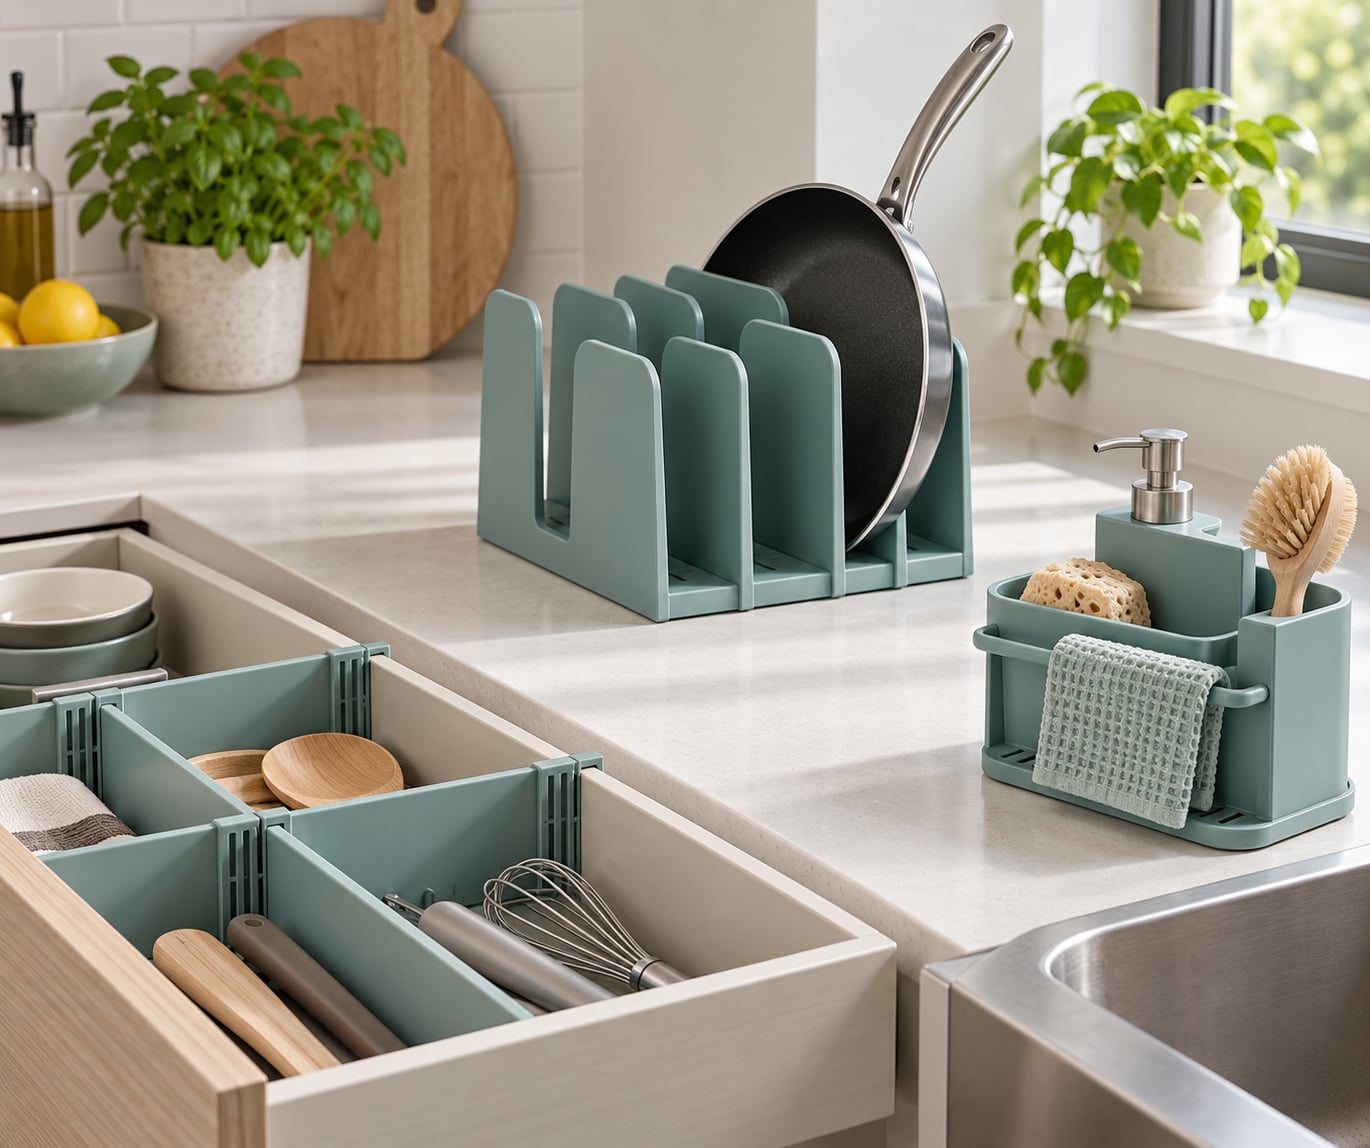
An adjustable divider is the easiest win in a kitchen because every drawer needs one and almost no drawer comes with a good one. The idea is simple: interlocking comb strips that clip into each other, so the same print fits a 300 mm drawer or a 600 mm one. Start at 180 mm long per segment with a 4 mm wide tooth, which is about right for a standard 20 to 25 mm thick drawer wall.
The part people get wrong is tolerance. If you print at 0.2 mm layer height and leave the default horizontal expansion, the teeth come out tight and the divider rattles every time the drawer closes. Model the slot 0.2 mm wider than the tooth, and print the strip lying flat on the bed with the teeth running lengthwise rather than across it. Long flat parts printed across the grain bow; printed along the bed they stay straight.
To stop it moving once fitted, add one or two rubber feet printed in TPU, or a small TPU pad 3 mm thick that sits between the divider and the drawer wall. It takes 20 minutes to print and turns a rattling drawer into a silent one. An example layout: a 447 mm interior drawer split into a 180 mm cutlery bay, a 140 mm miscellaneous bay and a 120 mm bay for takeaway menus and lighter.
If your drawer is an awkward size, print a thin measuring spacer first. A 5 mm tall blank block, printed in four variants of slightly different widths, will tell you within one print job how much slack your drawer actually has.
Sizing 3D printed kitchen organizers to make fit a non-standard drawer
Measure the interior width at the front and at the back. Most domestic drawers are not parallel, and a divider that fits perfectly at the back binds halfway along. Use the narrowest figure minus 2 mm as your target length, then design the divider in two overlapping segments rather than one long strip. Two short pieces print more accurately and can be resized later without reprinting both.
2. Vertical Pan and Lid Organizer
A vertical pan organizer stores frying pans on edge instead of stacked flat, which usually frees the depth of two pans in a shallow cabinet. The geometry is a set of slots with a rounded entry at the top, so you lower a pan in rather than angling it in. A 300 x 120 mm footprint with three slots is a good first build, sized for 22 to 26 cm pans.
Rigidity matters more here than in a drawer. PETG prints cleaner in tall, unsupported walls than PLA, which I find brittle when a slot flexes and the pan drops a couple of centimetres. Add a small foot at the bottom of each divider rather than relying on the panel alone, and keep the wall at least 3 mm thick.
Lid thickness is the detail most models get wrong. A glass lid with a knob is often 8 to 10 mm thick, while a flat stainless lid is barely 3 mm. Measure both before you print, then widen the lid slot rather than the pan slot, because a pan that wiggles is normal and a lid that will not go in is a wasted afternoon. You can also print a separate 4 mm lid rail that clips onto the front of the organizer, which handles both lid types with one base.
3. Stackable Spice Jar Labels
Raised or embossed jar labels turn a wall of identical lids into something you can read without picking anything up. Print a 63 mm wide by 18 mm tall plate that fits the common 43 mm twist lid jar, add a 2 mm lip that slides under the rim, and print two or three at a time since they are small and the plate is the whole object.
Measure the jar rather than trusting the nominal size. Small spice jars vary by a few millimetres between brands, and a label that grips too tightly will crack the thin plastic rim the first time it dries. Design for a friction fit on the underside of the rim with about 1 mm of clearance.
Bridging is the usual failure, because a raised letter is a short roof with nothing under it. Make letters at least 1.2 mm wide, orient the text so the strokes run along the print bed rather than across it, and print the plate flat. For contrast, printing the label in a dark filament and setting it on a light jar reads better than colour-matching, and it means one plate design serves every jar in the cupboard.
4. Under-Sink Cable and Tube Holder
The cabinet under the sink is the most wasted square metre in most kitchens. A cradle 120 mm wide with two or three slots holds cleaning-product tubes upright, and a shallow lip underneath catches the last few grams that squeeze out of the nozzle.
Geometry matters more than looks here. Each cradle needs a back wall tall enough that the tube leans against it rather than rolling out, and a U-shape at the bottom rather than a flat ledge, so the tubes cannot walk off. Tilt the cradle back by about 5 degrees and they stay put even when the cabinet gets kicked.
If you rent, skip screws in the cabinet carcass. Mount a printed rail to the inside of the door with removable adhesive hooks, or use the tension of the cabinet frame itself. Then the whole holder lifts out for cleaning, which is the honest reason to do it: the underside of a sink collects residue, and a part that can be removed can actually be removed.
5. Reusable Produce Bag Dispenser
A dispenser gives your reusable mesh produce bags a home instead of the drawer they used to flatten. Model a housing roughly 110 mm wide and 70 mm deep with a slot at one end sized to the roll width plus 3 mm of play, plus a hinged or flexible front lip so you can pull one bag out without tearing it.
Mounting strength decides whether this survives. On a counter, sit the housing on a flat base 3 mm thick and keep the load over the base rather than hanging off the front lip, or the whole thing tips forward when you pull. On a cabinet door, use at least two fixings 90 mm apart and spread the load with a printed backer plate. Adhesive on a dusty painted door will let go within a few months, so if you are in a rental, a cabinet-side magnet holder or a suction version that sticks to tile is the safer bet.
Loading is simpler than it looks. Thread the roll onto the axle first, drop it into the body, then fit the front lip. Trying to insert a loose roll through the slot is what makes people over-tighten it.
6. Countertop Coffee Pod Holder
The way to model a pod holder that actually fits is to put one pod on the bed and measure it. Take the outside diameter, the rim height, and the lid dome above the rim, then add 1 mm clearance all round. A holder built from a pod spec sheet rather than a pod in your hand is the most common reason a coffee organizer ends up in a drawer.
A 2 x 3 layout per tray is a sensible start: it prints flat in under two hours on a standard bed, and it keeps the machine footprint small enough for a corner counter. Add a catch tray under the pods with a 3 mm fall toward one corner, because used pods carry water out of the machine and that water has to go somewhere other than your worktop.
On stability: a wide base and a low centre of gravity matter more than weight. A holder that holds four pods vertically without a base 3 mm thick will tip the first time you pull one out at an angle. And this is for home use only. If you intend to print anything that holds liquid you drink, stop and read the food-contact section below first, because resin and plastic parts are a different category of question from storage.
7. Wall-Mounted Utensil Rail
A wall rail moves measuring spoons, spatulas and small tools off the counter and onto the wall, which is the only genuinely free surface most kitchens have. A 300 mm rail with hooks at 25 mm pitch gives you twelve positions across about 300 mm of wall.
Load limits come from the screw, not the plastic. Two M3 screws into studs, or into wall plugs rated for the load, will carry a full rail of spatulas. Screw into drywall alone and the rail will pull out with the first heavy spoon, and printed plastic does not have enough grip area to be worth relying on for that. Print a 3 mm thick backer strip so the screw head spreads its load across the rail rather than splitting a thin rib.
Make the hooks removable and give yourself a cleaning path. A hook that lifts off the rail in one motion means you can take the whole rail down and wash it, which is the only way it stays tidy. Keep the clearance under each hook at least 6 mm so a wet wooden spoon can dry instead of sitting against the wall.
8. Stackable Pantry Jar Base
A pantry jar base is a shallow ring that turns an ordinary jar into a pull-out container you can slide forward instead of lifting. Model a 70 mm outer diameter ring, 22 mm tall, with an inner lip that grips the jar wall, and add a finger recess on the front so pulling is one-handed.
Measure the jar wall thickness and the outside diameter at the shoulder, not the base. Most pantry jars are straight-sided, so the base diameter is the wrong number and a ring built from it will sit loose. Height clearance matters too: 22 mm is enough for stacking two tiers with a 10 mm gap between lids, which is where the space saving actually comes from.
Labels go on the outside of the ring, so you can swap the jar contents without reprinting anything. Material choice is the deciding factor here. This part never touches food, but it sits in a pantry where humidity and condensation are constant, so PETG holds its shape better than PLA. If any part of a printed piece will contact dry food directly, put a barrier between it and the food rather than relying on the filament alone.
9. Sink-Splash Caddy
A sink caddy holds dish soap, a sponge and a brush without letting any of them sit in standing water. The critical feature is drainage: give the tray a 12 mm floor with a 2 mm fall to a corner, and cut drainage holes through the base so water leaves the part instead of pooling in it.
Keep the edges rounded. A caddy lives next to water and gets knocked with a pan handle, so fillet every external vertical edge with at least 1.5 mm radius. Sharp corners on printed plastic chip, and a chipped corner collects residue you cannot see.
Non-slip feet do more work than people expect. Print four 3 mm pads in TPU, or press a strip of silicone matting into the base recess, and the caddy stops skating every time you pull the soap out with a wet hand. Make the soap bottle holder a separate piece rather than a moulded well, so the caddy can be washed, rinsed and dried as three separate items instead of one gunked-up lump.
10. Reusable Coffee Filter Dripper
A reusable filter cone matches a common carafe or cup, and the model has to follow that vessel rather than the other way around. Measure the inside top diameter of your cup and the depth from rim to base, then build a cone with a flat filter bed at the bottom and a wall thin enough to pour through in about 30 seconds. An 80 mm top diameter is a common starting point.
Hole size is the whole design. Anything under 0.3 mm stalls with fine coffee, and anything over 1 mm lets silt through and clouds the cup. A grid of 0.4 to 0.6 mm holes, or four concentric rings of small slots, gives flow without sediment. Print the bed flat on the build plate so the holes are drilled vertically rather than at a layer angle, which is the difference between a filter that pours and one that clogs.
Heat is the constraint. Hot water runs through this part every single use, so print it in PETG, which handles around 80C, and keep it out of a dishwasher because the heat cycles will warp it. For anything that contacts coffee, print on a clean plate, wash with unscented dish soap and warm water, and let it air dry fully between uses. A filter that smells of detergent will taste of it.
Frequently Asked Questions
What filament is best for 3D printed kitchen organizers?
PETG for anything near water, steam or a hot pan, PLA for dry zones like spice shelves and wall rails, and TPU only for grippy pads, feet and non-slip mats. ABS is a reasonable alternative to PETG in a cabinet that gets warm, though it prints with more warping. Match the filament to the location of the part, not to the project.
Are 3D printed kitchen organizers safe to use with food?
Treat the filament as the deciding factor, not the design. A printed part that touches food, drinks or your mouth should sit behind a food-safe barrier such as an epoxy coating rated for contact, or the food should sit behind something like a glass jar or a paper filter. Prints used purely as organizers and holders sit well away from this question, which is why the pantry base and drawer dividers need no barrier.
How do I stop drawer dividers from rattling or moving?
Print the divider along the length of the bed so the teeth do not bow, leave 0.2 mm extra on every slot, and drop in a TPU pad 3 mm thick between the divider and the drawer wall. If a long divider still fits loosely, split it into two overlapping segments instead of adding more material. Check that the drawer front and back are parallel before trusting the fit.
Can I scale a kitchen organizer model to fit a different size?
Yes, for length and width, as long as you keep wall thickness at 3 mm or more and do not scale the whole object uniformly. Scaling everything also scales the snap-fit clearances, so a 110 percent model will not slide into its baseplate and a 90 percent model will fall out. Scale the outer dimensions in your CAD tool and leave fit features at their original size.
Should kitchen organizers be washed with soap and water?
Hand washing with unscented dish soap and warm water is fine for PETG and PLA prints, and it is the only sensible method for TPU feet, which can be slippery when wet. Skip the dishwasher entirely: the heat and detergent cycle will warp PETG and roughen PLA surfaces. Dry parts fully before reassembling them, because moisture trapped under a divider is what causes a drawer to stick.
Do I need supports or a specific print orientation for these projects?
Most organizers, including the dividers, labels, jar bases and caddies, are designed to print with no supports at all, provided you lay them flat on the build plate. Rails, hooks and angled spice inserts are the exceptions and usually want supports or a chamfered entry instead. If a model needs support material, try raising the entry angle before reaching for the support option in your slicer.
Conclusion
If you have one printer and one free evening, start with the adjustable drawer divider. It prints flat in about two hours, it needs no supports, and it gives you a lesson in tolerances that every later project depends on. Measure the drawer first, narrowest measurement, and take 2 mm off.
After that, pick one organizer based on the problem that annoys you most this week rather than the project that looks cleverest. The pan organizer for a cabinet you cannot open properly, the under-sink cradle for the tube pile you step over, the caddy for a soap bottle that never dries. Measure the thing you are organising before you model it, and the print you will make will fit the first time.