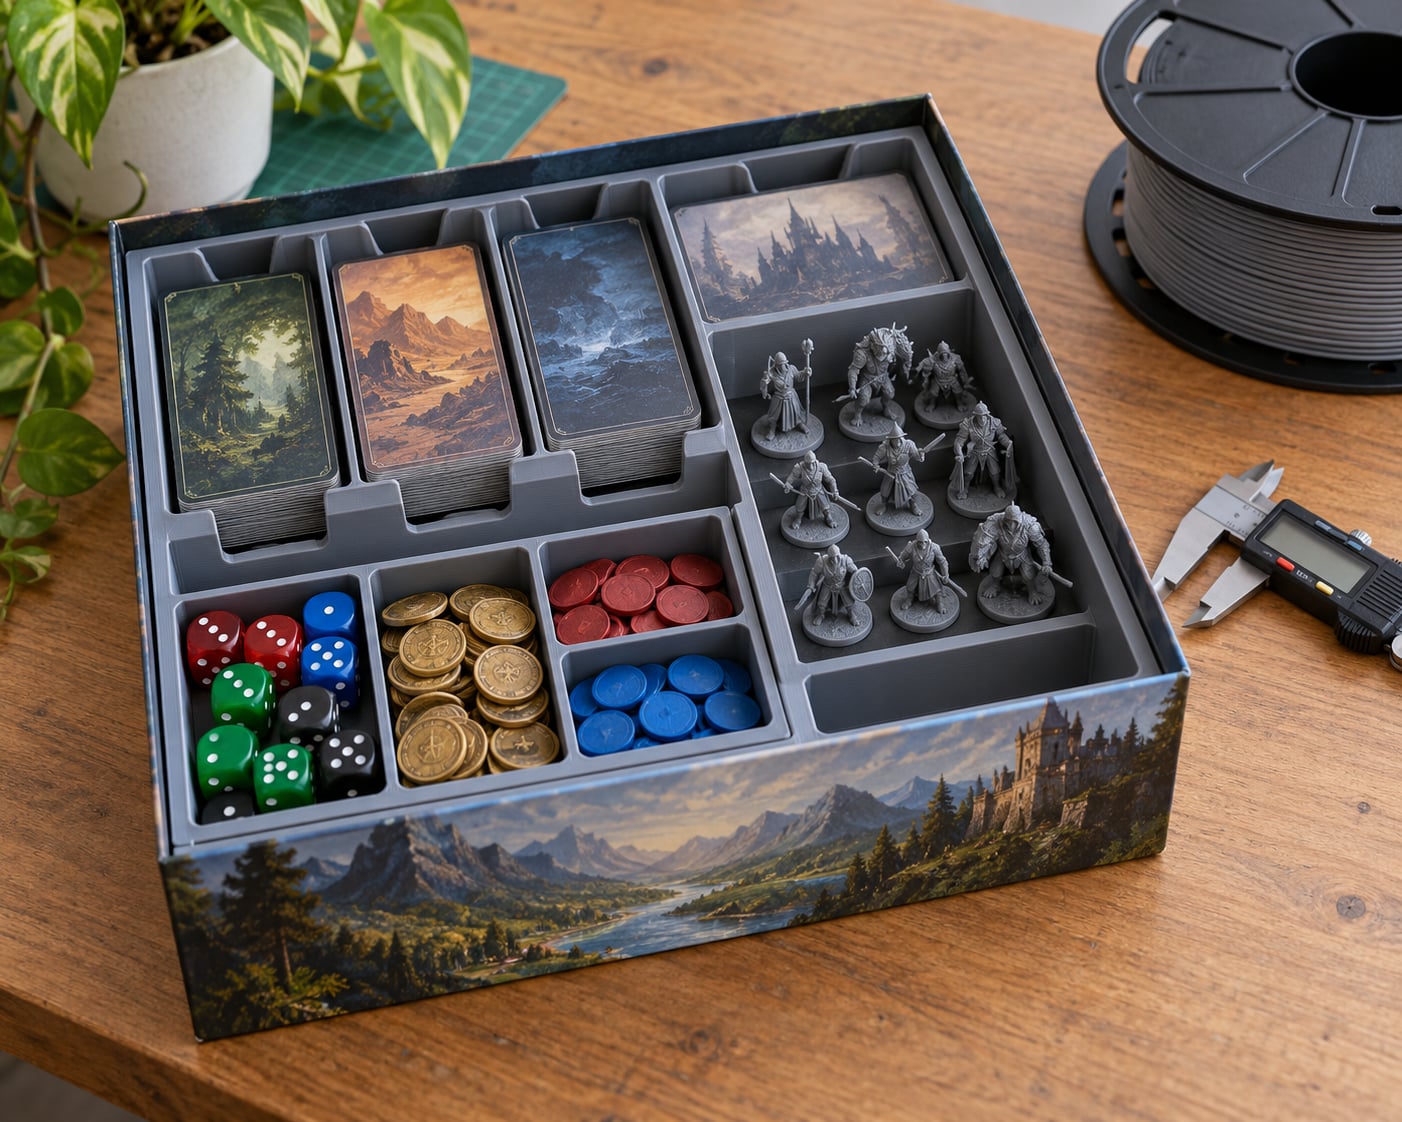
3D printed board game inserts and organizers are custom trays that fit inside a game box and hold cards, tokens, coins and miniatures in their own slots, so nothing migrates into the lid or disappears between sessions. You can download a ready-made STL file or model your own in about an evening, then print it in a rigid filament on any FDM printer. Most of the work is measurement, not CAD skill.
The reason this topic keeps coming up on printing forums is simple: a box with 200 loose tokens takes ten minutes to sort and thirty seconds to break. A fitted tray fixes that, and it reclaims shelf space because stacked trays replace the pile of baggies sitting next to the game.
Below is the full workflow I use, from calipers to finished tray, including the tolerance numbers that decide whether a part snaps into place or sits there loose.
Table of Contents
- What You Need to Build 3D Printed Board Game Inserts and Organizers
- Step-by-Step
- Measure the Box and Components
- Choose an Insert Layout
- Model the Compartments
- Add Supports, Labels, and Handling Features
- Test-Print and Adjust the Fit
- Print the Final Insert
- Common Mistakes
- Frequently Asked Questions
- What CAD software should I use to design a board game insert?
- Can I 3D print board game inserts on a basic FDM printer?
- What filament is best for a board game organizer?
- Can I reuse one insert design for several games?
- Why will my printed insert not fit the game box?
- Conclusion
What You Need to Build 3D Printed Board Game Inserts and Organizers
The tool list is short. Everything else is software you likely already have access to or can download for free.
- Digital calipers for internal box dimensions. A steel ruler is fine for a first pass, but calipers remove the guesswork from wall clearance.
- Cardboard or a thin card template to sketch compartment footprints before you commit anything to CAD.
- CAD software. TinkerCAD handles simple box-and-divider trays. Fusion 360 or FreeCAD handle anything with curved walls, snap fits, angled compartments or magnet pockets.
- A slicer such as PrusaSlicer, Cura or OrcaSlicer, where you set layer height, wall count and tolerances.
- An FDM printer with a heated bed. A resin printer produces sharper labels and cleaner pockets but adds a washing and curing step, so most people start on FDM.
- Rigid filament. PLA for most inserts, PETG for anything living in a warm cupboard, ABS if you need heat resistance.
- Test pieces and scrap card. You will print a small pocket test before committing to a full insert.
Keep a note of your printer’s real dimensional accuracy before you start. Community advice is consistent on this point: a Thingiverse user warned that a 0.3 mm tolerance box “has a rather small tolerance so make sure your printer is properly dialed in.” If you have never printed a calibration cube, do that first.
Step-by-Step
Measure the Box and Components
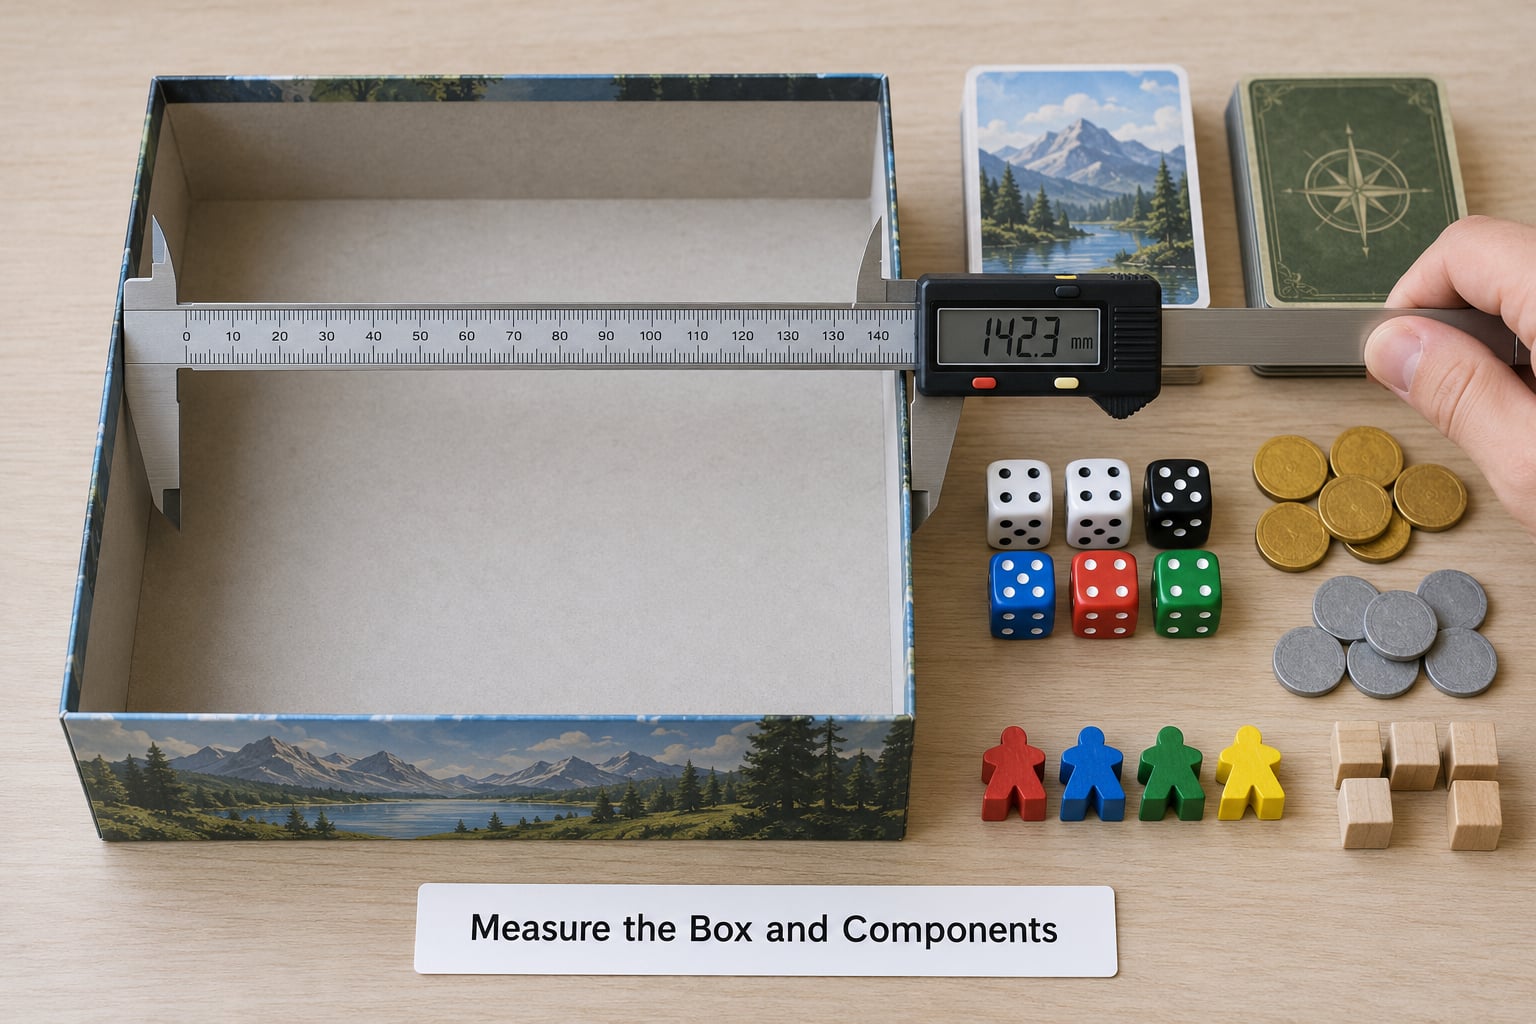
Measure the inside of the box, not the outside. You need the internal length, width and depth, plus the depth available below the lid when the lid sits closed.
Then measure every component that gets its own compartment. Cards first: measure a sleeved card, not a bare card, and add 0.5 mm of play so the stack drops in without a fight. Note the stack height for the number of cards you actually own, since a base-game box rarely holds the same count as a full-expansion box.
Write down three numbers for each item: footprint, height and how many. Dice get a cube of side length plus 0.3 mm. Tokens get their diameter plus clearance. Miniatures usually go in one shared well sized to the largest model’s base.
Subtract your wall thickness and clearance from the internal dimensions to get the usable interior, then lay the compartments out on paper at that scale. Count how many layers the insert stack will be; two shallow layers are easier to print flat and easier to lift than one deep tray that fights the bed.
Choose an Insert Layout
Pick the layout that matches how the game is actually played, not how it is stored. These are the five that work nearly every time.
- Single tray. One flat insert with dividers, sized to the box interior. Best for small box games and card games where everything fits in one plane. Fastest to print, but it only adds height.
- Modular stacked trays. Several shallow trays that nest or sit flush with each other. This is the most popular option because each tray packs flat between games and you can lift one without disturbing the rest.
- Box-in-box. A printed outer box replaces the original inner tray and holds two removable sub-trays. Good when the game needs a lid of its own for transport to game night.
- Drawer style. One tray slides into a sleeve. Nice looking, and one of the most common sources of frustration, because the drawer needs generous clearance to move. If you build one, plan at least 0.4 mm per side.
- Lid storage. Small parts, baggies or folded player boards live in a tray printed to fit the underside of the lid, using otherwise dead space above the board.
Whatever you choose, treat “does the box still close” as a design constraint, not an afterthought. A stack one layer too tall is the single most common reason a finished insert gets rejected.
Model the Compartments
Build the model as a solid base plate with pockets cut into it, not as a thin shell. That gives you a continuous floor, stronger walls and fewer overhangs.
Start with a sketch rectangle equal to your measured interior minus clearance. Draw one pocket, cut it to the measured footprint plus 0.2 to 0.3 mm per side, and cut its depth 2 mm below the tallest component so nothing rattles.
Rounding every internal corner by 2 to 3 mm is worth the extra clicks. Sharp internal corners are where PLA cracks start, and rounded corners also release from the bed more cleanly.
Add a chamfer along every top edge of the walls, roughly 0.6 mm at 45 degrees. It removes the thin lip that snaps off when you lift the tray out, and it gives your fingers something to hook under.
Finger access is where most first designs fail. Cut a semicircular notch into at least one wall of each compartment so a token or card can be pinched and lifted out without tipping the tray. The videogamegeek inserts thread is full of people describing models that “look cool but in practice the tolerances are so tight that many don’t snap into place easily”, which is usually a clearance problem, but a pocket you cannot get your fingers into is a design problem you should catch in CAD.
For stacking, add either a small lip that sits inside the tray above it, or a chamfered rim so the next tray slides over without binding. Test the stack height against the closed lid before you export.
Add Supports, Labels, and Handling Features
Label areas cost almost nothing to model and save every argument at the table. Emboss the component name on the floor of each pocket, raised 0.4 mm, using a plain sans-serif font at 8 to 10 mm tall. Embossed text prints as solid plastic and never rubs off. Recessed text takes longer because the floor must be printed as an overhang, so use it only when the pocket will not hold ink or paint.
A label slot that holds a strip of paper is a good alternative for long names or expansions, and it lets you relabel without reprinting.
Plan the printability features before you start slicing. Add a chamfer to every vertical corner larger than 3 mm so the printer does not fight an unnecessary overhang. Put small drain or pickup holes in pockets that hold flat pieces like player boards, so a part does not sit in a sealed vacuum against the floor.
Magnet holes are a popular upgrade, but add them only if you have a plan for the magnets. A 6 mm by 2 mm pocket with a 0.2 mm press fit holds a small disc magnet, so only model it if you have the magnets to go in.
Test-Print and Adjust the Fit
Print one pocket at the same layer height and wall count you plan to use, not at draft quality. This is the step people skip and the step that saves a whole failed insert.
Drop a real component into the test pocket. It should slide in with light finger pressure and sit without visible wobble. If you have to push hard, you are fighting layer lines, so add 0.2 mm to that dimension rather than sanding the part later.
If it falls out with a shake, tighten by the same amount. The useful range is 0.2 to 0.3 mm of total clearance per side; tighter fits depend on printer accuracy that many machines do not have.
Also test one wall where the insert meets the box wall. Push the full-size print against the box side and check that the lid clears it with a fingernail. Once the pocket and the perimeter both pass, the rest of the model is repetition.
Print the Final Insert
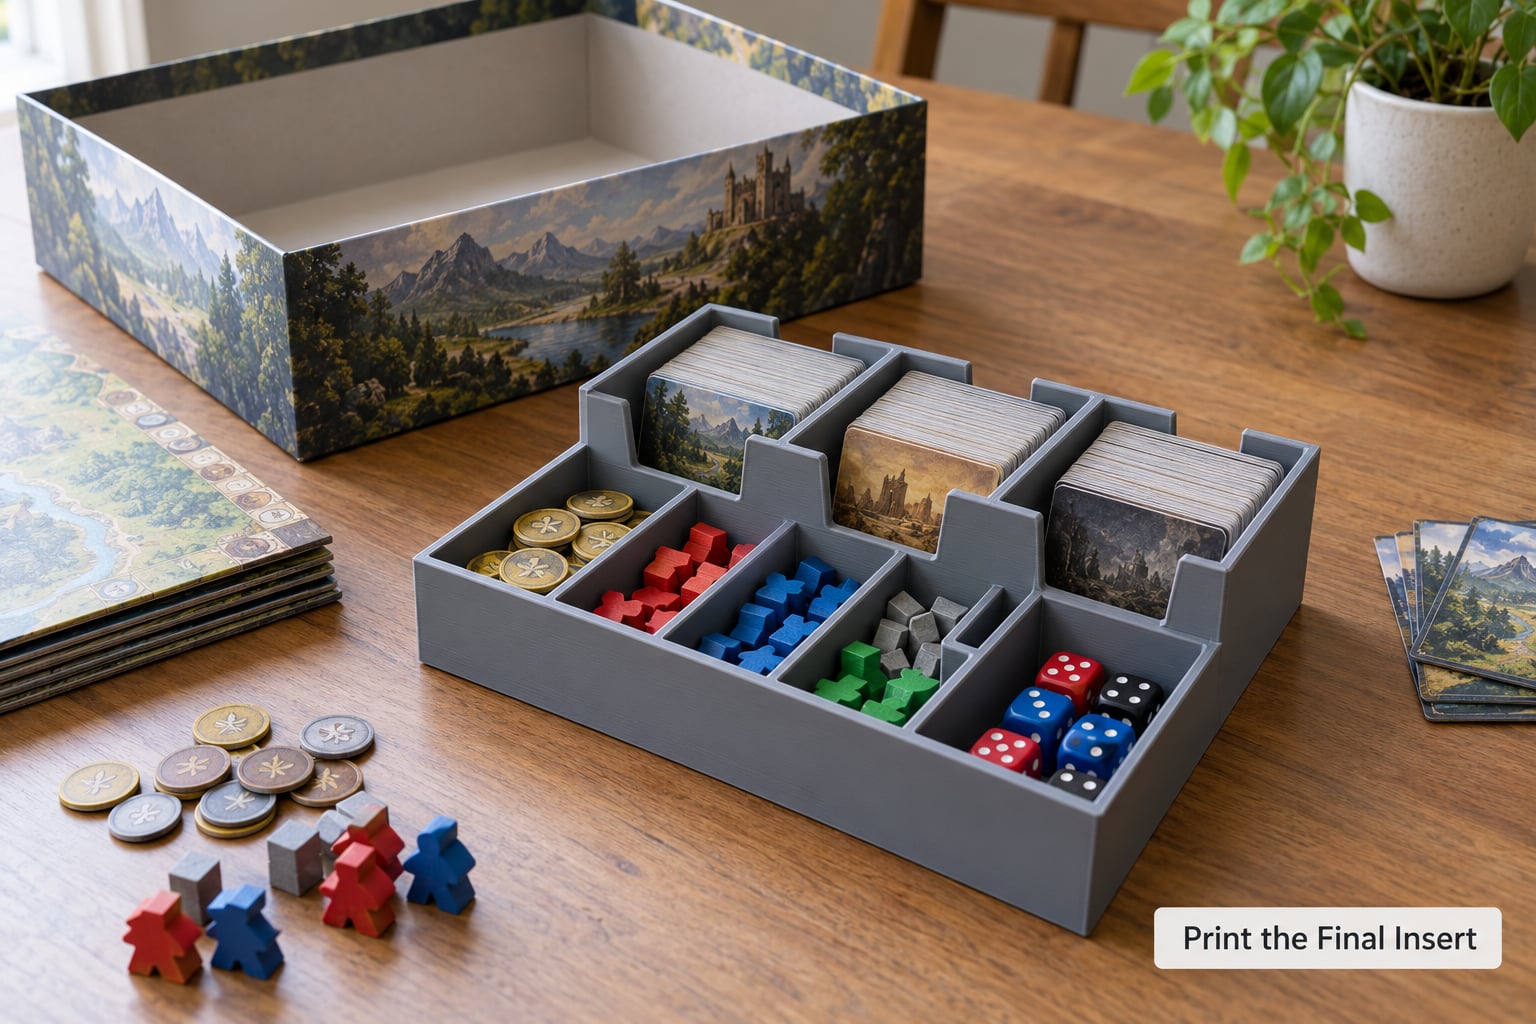
Print the base plate flat, upside down, with the pockets facing up. Every wall, every embossed label and every divider then prints without a support, and the pocket floors land as clean top layers.
Settings that hold up for most inserts:
- Layer height: 0.2 mm, or 0.16 mm when small embossed labels are the priority. Finer layers close up tolerance gaps.
- Walls: 3 to 4 perimeters. That is what holds snap fits and magnet pockets together.
- Top and bottom layers: 5 each, for pocket floors that stay flat and do not flex.
- Infill: 15 to 25%. Inserts are not load-bearing, so dense infill is wasted filament and print time.
- Supports: off when the tray prints flat. This avoids scars on the pocket walls.
- Adhesion: a skirt or brim on large plates, which stops the corners lifting.
- Clearance per side: 0.2 to 0.3 mm, so parts fit without hand-filing.
PLA prints clean and stiff, and it is the right default. PETG takes a little more force to print cleanly but shrugs off heat, which matters in a closed cupboard or a car boot in July. ABS needs an enclosure and smells strongly while printing. Skip resin unless you want crisp embossed text and have the post-processing setup.
A large modular insert set runs to a dozen or more hours of print time, so print the trays in the order that gets you a usable set first: the component tray, then the card trays. Leave the shell for last.
Remove supports while the part is still warm, then deburr the rim lightly. Test the stack and the lid closure before you print the second one.
Common Mistakes
Wrong internal measurement. You measured the outside of the box or included the lid overhang. Re-measure with the box open and the lid off, and subtract the clearance before you model, not after.
Tolerance too tight. This is the most reported problem across board game printing forums. Fix it in the slicer or the model by widening the pocket 0.2 mm per side, and avoid compensating with sanding or a file on every part.
Trays that snap at the wall. Thin dividers under 1.2 mm or dividers printed as overhangs will break. Print flat, bump dividers to three walls, and add a 2 mm fillet where a divider meets the base.
Warped corners. A large flat plate on an unlevelled bed lifts at the corners. Clean the plate, re-level, and print a brim. If the insert is very wide, break it into two modular trays rather than fighting the adhesion.
The lid will not close. Either the stack is too tall or a chamfer under the lid interferes. Measure the closed-lid clearance early and hold that number through every revision.
Inserts for unsleeved cards. Many community models are cut for bare cards and will not take sleeves. Check the model’s stated thickness or print a sleeve-fit test first.
Parts lifting out during play. One board game player reported gluing a sand timer piece into place because players pushing it kept shoving it out of position. If that is your design intent, print it as a press-fit plug instead of a loose part.
Over-closed storage. A tray that grips components too tightly turns setup into a fight. Keep a lift notch on every pocket.
Frequently Asked Questions
What CAD software should I use to design a board game insert?
TinkerCAD is enough for rectangular trays with straight dividers, and it is free in a browser. Move to Fusion 360 or FreeCAD as soon as you want angled pockets, curved walls, snap fits, stacked rims or magnet holes. Community recommendation across board game and printing forums is consistent: simple box-and-divider inserts in TinkerCAD, anything with a fit or latch in Fusion 360 or FreeCAD.
Can I 3D print board game inserts on a basic FDM printer?
Yes. Any heated-bed FDM printer will produce a usable insert. The part is a flat plate with pockets, which is the easiest geometry there is. Watch three things: level the bed so large plates do not lift at the corners, calibrate the machine so tight pockets fit, and print the trays upside down so the pocket floors come out as clean top layers with no supports.
What filament is best for a board game organizer?
PLA is the default because it prints sharp pockets and stays stiff at room temperature. Choose PETG if the insert lives in a warm cupboard, a garage or a car, since it tolerates heat and moisture better. ABS works but usually needs an enclosure and produces strong fumes. Resin gives the crispest embossed labels, though it adds washing, curing and more waste handling.
Can I reuse one insert design for several games?
Sometimes, and it is worth designing for it. Use a parametric model where the box interior, wall thickness and pocket sizes are variables, so a new game is a new set of numbers rather than a new model. Anything game-specific, such as embossed labels or a pocket shaped for one token, will need editing. Community designers often build universal trays sized to a standard grid for exactly this reason.
Why will my printed insert not fit the game box?
Three usual causes. Your measurement was of the box exterior rather than the interior. Your clearance was tighter than your printer’s dimensional accuracy, and 0.3 mm per side is optimistic on an undialed machine. Or the insert grew during printing because it was printed with the pockets facing down, adding a layer of plastic to each wall. Fix clearance in the model, not with a file and sandpaper on every piece.
Conclusion
Start with the measurement, not the software. Note the internal dimensions of the box, measure each component including sleeves, pick a layout that fits under the closed lid, and print one pocket as a test at your intended settings. That single test pocket is the difference between a finished insert and a multi-hour print you will scrap.