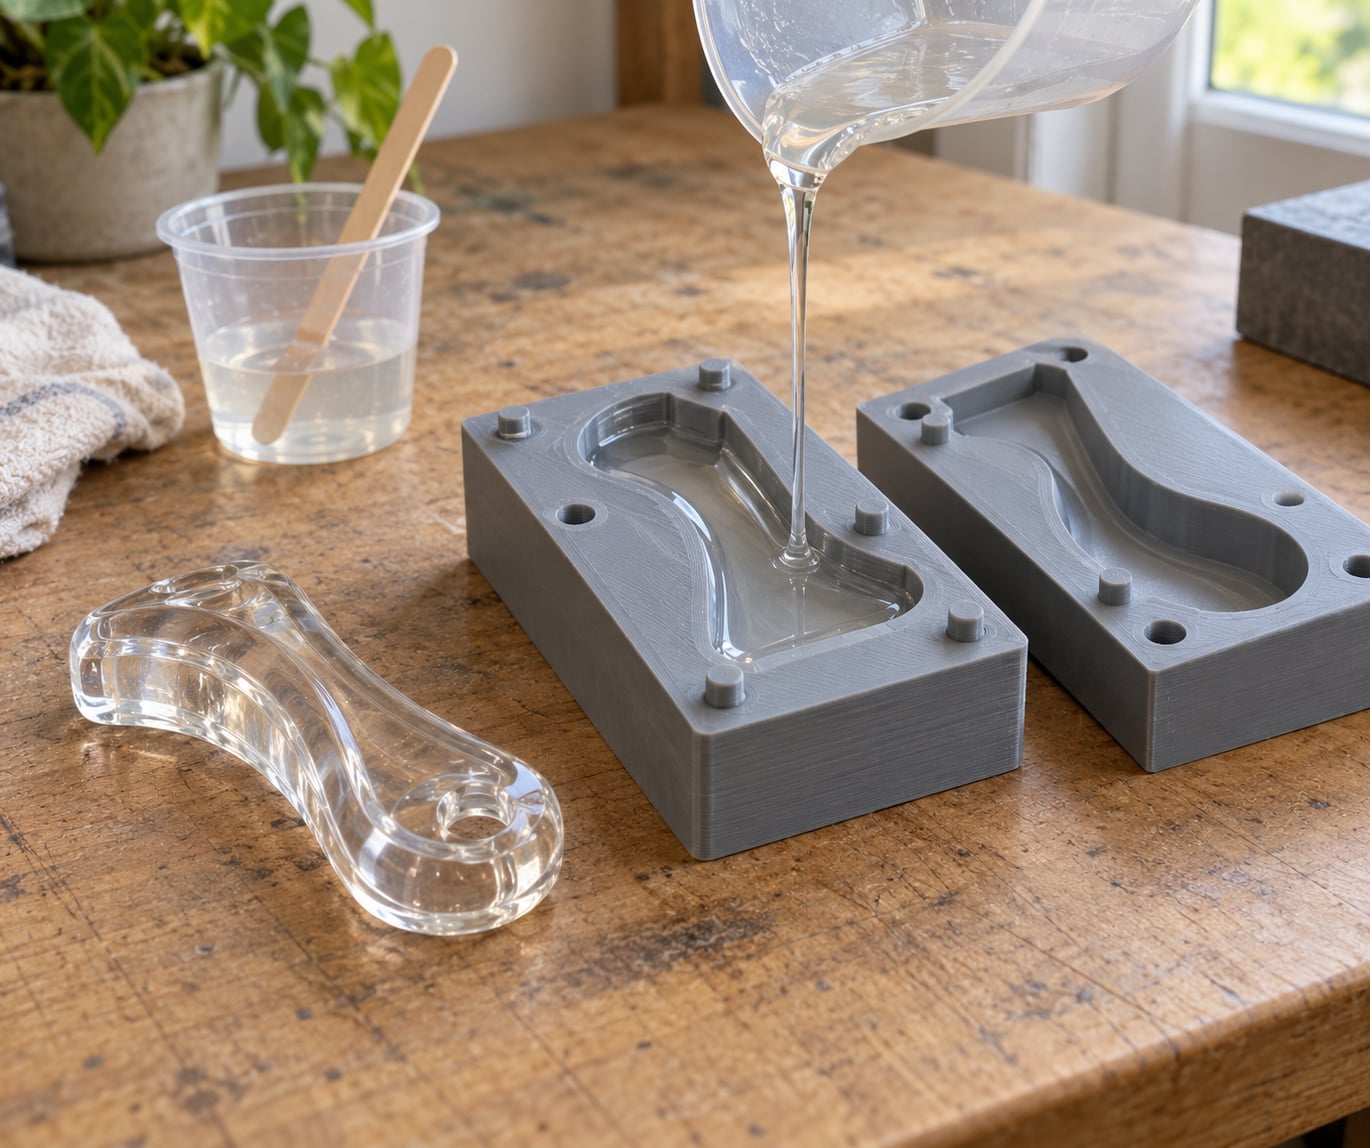
Casting resin from 3D printed molds is simple once you treat the print as a tool rather than the finished part: print a rigid cavity, seal and release it, mix the resin to the maker’s ratio, pour it slowly from the lowest point, and let it cure fully before pulling the casting out. With careful mold prep, a printed mold gives you duplicates in an afternoon.
There are really two routes. You can pour resin straight into a printed rigid mold, which is fast and cheap for one or a few parts. Or you print a master and cast a silicone mold around it, which costs more time up front but survives dozens of pours and copies fine detail far better. Most beginners start with the first and graduate to the second once they know what they want to repeat.
A first pour takes a couple of hours including print time, and the tricky parts are preparation, not the pour itself. Air trapped in small features, an unsealed porous surface, and opening the mold too early account for most ruined castings.
Table of Contents
- What You Need
- How to Cast Resin from 3D Printed Molds: Step-by-Step
- How to cast resin from 3D printed molds: prepare and test
- Post-cure, seal, and apply the release system
- Mix the resin accurately and control bubbles
- Pour slowly from the lowest point
- Let the resin cure before opening the mold
- Demold, trim, and inspect the finished part
- Common Mistakes
- Frequently Asked Questions
- Can any 3D printer filament be used to make a resin-casting mold?
- Do printed resin molds need to be sealed before casting epoxy resin?
- Can I pressure-cast or vacuum-cast resin into a 3D printed mold?
- How many times can the same 3D printed mold be used?
- Should I use epoxy resin or polyurethane resin in a home-printed mold?
- Conclusion
What You Need
Most of this list you either own already or can buy as a single kit. Nothing here is specialized, and none of it is a one-time purchase except the mold itself.
- A 3D printer and filament. A rigid, dimensionally stable filament works for direct casting. PETG, ABS and ASA hold up to heat and to a sealing coat. PLA works for a one-off but creeps under the warmth of an exothermic epoxy pour, so keep printed PLA out of the process.
- Casting resin. Epoxy or polyurethane, in a part A and part B system with a published mix ratio and pot life. The ratio is on the datasheet, not on the bottle front, and that is the number you will follow.
- A sealing system. Filler primer or spray epoxy rated for the resin, plus sandpaper and a scuff pad. This is what stops liquid resin wicking into the print and the print wicking resin back out of the mold.
- Release agent. A silicone or wax mold release compatible with both the mold surface and your resin. You will use it every pour, and skipping it is the number one cause of torn prints.
- Mixing and pouring tools. A scale accurate to a gram, a mixing cup with a flat bottom, a stirring stick, a torch or heat gun, and a small brush. A paper cup is fine for small volumes; a silicone mat under everything protects the bench.
- Curing setup. A level, dust-free spot at around 20 to 25 C, out of direct sunlight. A thermostat or a small warm box helps in a cold garage, because most cure times assume room temperature.
- Ventilation and PPE. Nitrile gloves, not latex. Safety glasses with side shields, a nitrile or vapor-rated respirator if the datasheet calls for one, and a ventilation setup that moves air away from your face. A carbon filter or a small fan in a corner is enough for most hobby quantities.
Match the printed material to the resin, not just to the printer. Polyurethane resin exotherms harder than epoxy, and a thin PLA wall will soften during a slow pour. Match the geometry too: a part with undercuts needs a two-piece mold, and a part with fine holes needs a vent at its high point or the air simply stays put.
| Printed mold material | Best pairing | Watch out for |
|---|---|---|
| PETG | Epoxy casting, one to a handful of pours | Needs a full seal; softens above about 70 C |
| ABS or ASA | Epoxy and polyurethane, repeated pours | Warps if the bed is not fully enclosed |
| Resin (SLA or MSLA) | Fine-detail masters for silicone molds | Brittle at thin walls; scratches show in the cast |
| PLA | Single experimental pours only | Creeps and softens from cure heat |
How to Cast Resin from 3D Printed Molds: Step-by-Step
How to cast resin from 3D printed molds: prepare and test
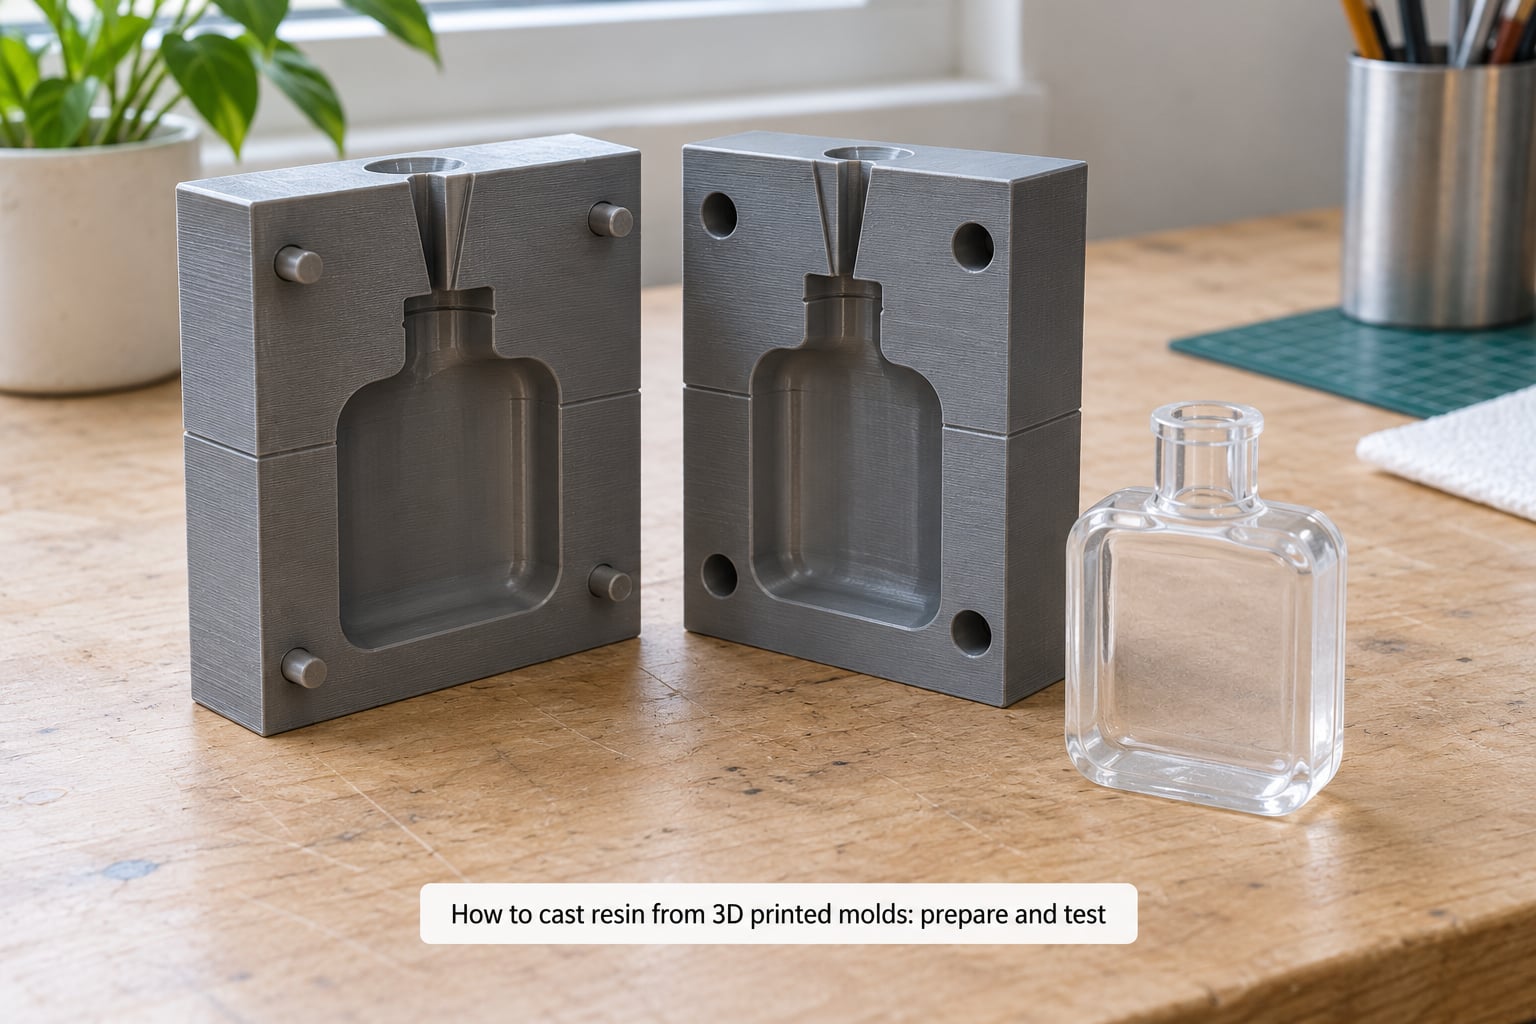
Start with a small test, not the real part. Print a simple block with a shallow pocket, one blind hole, and a parting line, and cast that first. It tells you in ninety minutes whether your material pairing, seal and mix ratio work, and a failed test costs one small print instead of a full project.
For the real mold, print in a rigid filament with at least three perimeters, a 0.15 to 0.2 mm layer height, and a flat outer rim at least 3 mm wide so you can clamp or tape halves together without loading the cavity. Put the seam on a flat side, not across the cast face, because the seam is where flash will appear.
Build the mold so liquid can actually move. Give the cavity a draft angle of 1 to 3 degrees on every vertical face so the part releases instead of grabbing, and keep cavity walls around 2 to 3 mm so the print is strong enough to survive demolding. Add a pour hole at one corner and a vent at the highest point of the cavity, both 3 mm or larger, so air has a way out ahead of the resin.
Registration is what keeps a two-piece mold from shifting. Add a small round key and a matching socket on each half, or a shallow tongue-and-groove along the parting line, so the halves register by hand every time without a tape guide. Check the fit dry, with nothing in the cavity: the halves should close without forcing and without a visible daylight gap along the parting line.
Post-cure, seal, and apply the release system
A printed mold has visible layer lines, and every one of them prints straight into the cast surface. Sand the cast face with progressively finer paper, working up to around 400 grit, then fill the remaining lines with a light coat of filler primer or spray epoxy designed for resin. Sand the filler flat, wipe with isopropyl alcohol, and let it cure fully.
Sealing is not optional for a printed mold. Unsealed plastic lets resin soak in during the pour and wick out afterward, which gives you a dull part and can slowly weaken the print. Two thin coats of a compatible sealer beat one heavy coat, and a light scuff with a Scotch-Brite pad between coats gives the next layer something to grip.
Use a release agent only if your resin and mold pair permit it. Most epoxy and polyurethane systems need a silicone or wax release, and a release that is wrong for the resin can cause exactly the tacky, uncured surface you were trying to avoid. Spray it in thin passes onto a cool, clean mold, letting each pass flash off before the next. Puddles in the cavity become print defects in the casting.
Mix the resin accurately and control bubbles
Measure by weight or volume exactly as the datasheet states, and use a scale if the ratio is given by weight. Gram-scale ratio errors are a real and common failure: a batch where part B is at 10 percent of part A mass will never cure properly, and no amount of extra hardener fixes the ratio later.
Mix slowly at the bottom and along the sides for the full time the datasheet gives, usually one to three minutes. Scraping the base and the wall matters more than speed, because fast whipping folds air into the mix. Scrape the stirring stick against the rim twice to return anything clinging to it, and mix a second cup with the same ratio if you are casting more than one part.
Rest the mixed resin for the few minutes the datasheet allows, then degas. A vacuum chamber pulling roughly 0.9 bar, about 29 inches of mercury, and holding until the foam collapses and stops rising is the standard target. Even after that, bubbles can survive: a lab test with a two-part crystal epoxy degassed twice still came out visibly bubbled, so treat vacuum as a reduction, not a guarantee.
Watch pot life, the window between mixing and gel. A slow, exothermic polyurethane with a short pot life can start thickening in the cup while you are still fighting bubbles, and thickening resin flows badly and traps air. Keep components near room temperature, and if your garage is cold, warm the closed bottles in warm water rather than using direct heat.
Pour slowly from the lowest point
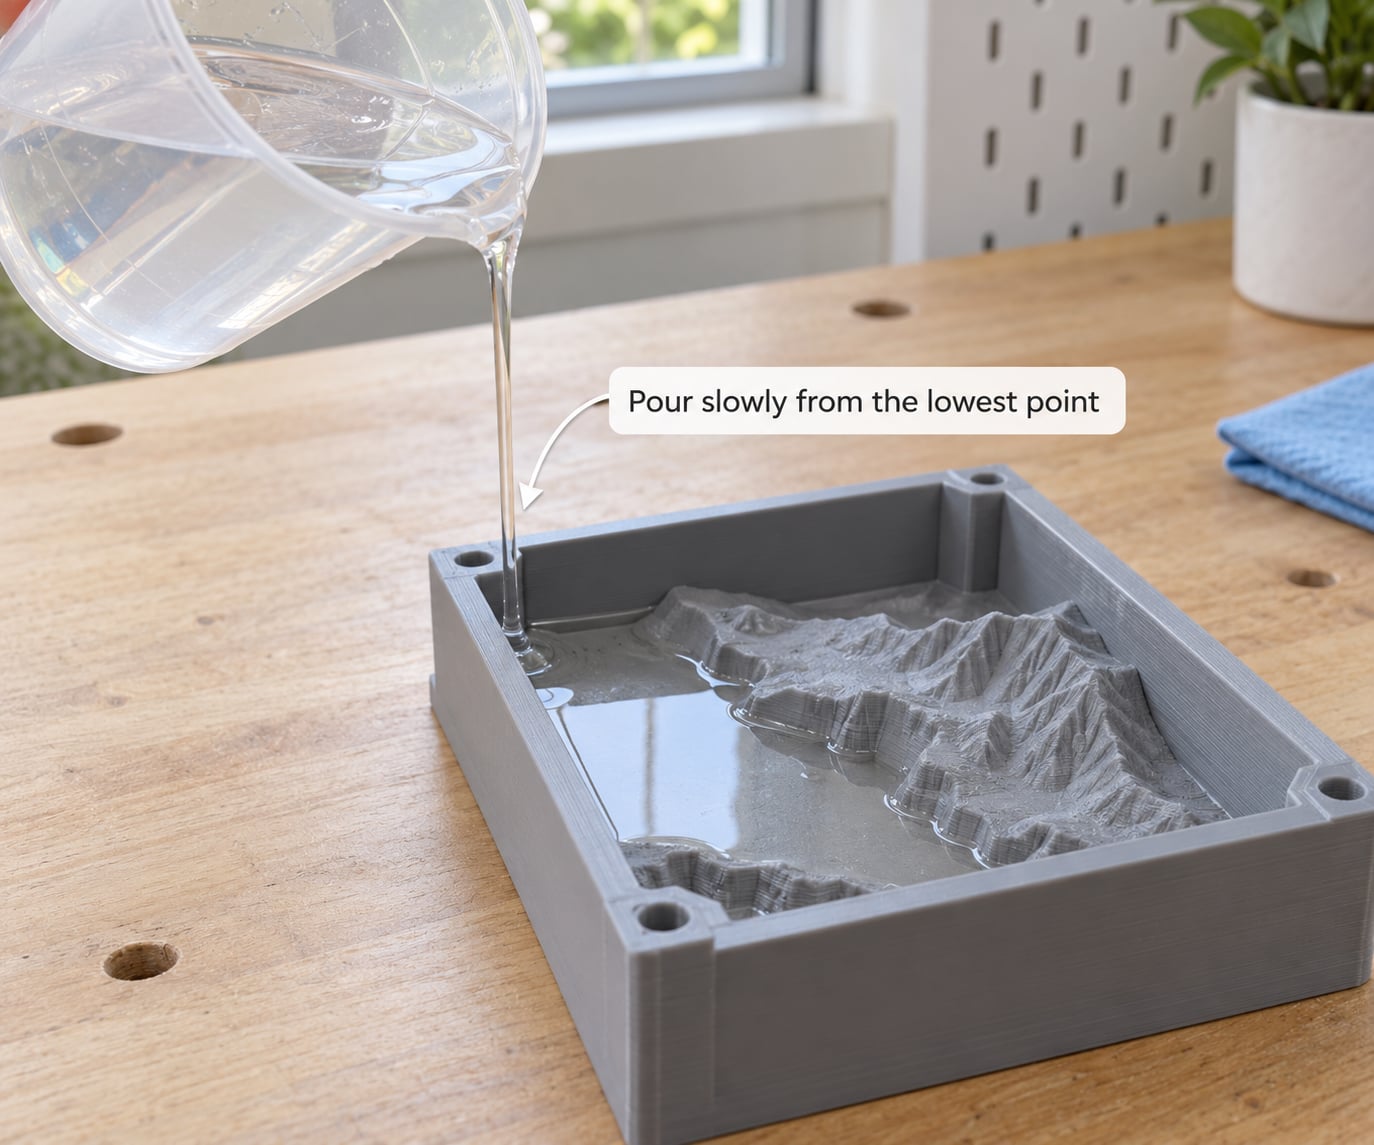
Set the mold on a level surface and check it with a spirit level first. An out-of-level mold fills one side, traps air on the other, and gives you a part that is thick on one end and thin on the other.
Pour from the pour hole at the lowest point of the cavity in a thin, steady stream, letting the resin travel and displace the air ahead of it. A fast pour traps air, overflows the mold, and wastes material. If the resin level stops rising while resin is still flowing, the vent is blocked, and you should pour from a higher point or clear the vent rather than forcing more in.
Tap the sides of the mold with a rubber mallet or the handle of a screwdriver to shake bubbles loose, and hold a heat gun a few inches away, moving constantly, to thin the surface tension holding a bubble against the wall. If you have a pressure pot, put the filled mold in it and bring it up to the resin datasheet pressure, typically 2 to 4 bar, before the pot life expires. That is the fastest way to collapse the last stubborn bubbles and give you a denser casting.
Leave the required headspace at the pour hole so the expanding resin has somewhere to go, then set the mold aside undisturbed. Walking away at this point is more important than any technique that comes after it.
Let the resin cure before opening the mold
Cure in the manufacturer’s terms: ambient cure at 20 to 25 C for roughly 24 hours, or a scheduled heat cure where the datasheet gives a ramp, hold and cool. Heat curing needs a controlled ramp, because a fast jump in temperature can push moisture or volatiles into the part and can distort it before it sets.
Tell a full cure from a partial one. The part should be hard and cool to the touch, with no tack or fingerprint transfer, and it should not flex when gently twisted. Rub a finger on the edge of the pour hole only. A dent that heals after a few minutes means the resin is still moving; a dent that stays means it is set.
Opening early is the most expensive impatience in this process. Partially cured epoxy will stick to the mold, tear the print, and gum up the cavity beyond reuse. A second cure is worthwhile when the cast is functional, load-bearing or skin-adjacent, because full cure continues for days after the part looks done. Follow the datasheet’s post-cure schedule, and give the part time there too.
Demold, trim, and inspect the finished part
Open the mold gently. Flex the printed halves by hand rather than driving a knife in at the parting line, warm the mold with a heat gun if the part feels seized, and pull along the draft angle instead of straight up. If the mold is 3D printed, a strong flex will break thin walls rather than release the part, so take it slowly.
Trim the sprue, vent scars and flash at the parting line with a file, a hobby knife and 180 to 220 grit paper, working around the part rather than across it. Small bubbles near the surface sand out. A void that reaches deep into a section is a different problem: the resin never reached it, usually because a vent was missing or the feature was too fine for the resin to fill.
Inspect before you pour again. Note where the flash was heaviest and where bubbles clustered, because both point at a design fix rather than a resin fix. Small voids, weak edges and cracking usually mean underfilled features, an inaccurate ratio, or a demold that happened too early.
Common Mistakes
The same short list of failures shows up over and over, and each one has a specific cause rather than a vague one.
- Resin sticks to the mold. Usually no release agent, or a release that is not rated for your resin. A second cause is a partially cured cast being pulled early. Release every pour, coat thin, and wait for a full cure.
- The mold leaks or looks porous. The print was never sealed, so liquid resin wicks into the layer lines. Two coats of a compatible sealer, sanded and wiped between, fix it.
- Trapped bubbles. Fast mixing, fast pouring, a missing vent, or degassing that was too short. Mix slowly, pour from the lowest point, and finish with a vacuum or pressure cycle.
- Incomplete cavities and voids. Air that had nowhere to go. Fine features such as nostrils and blind holes need a vent at their high point, or an internal feed pipe that carries resin to the bottom and lets air rise through the part, the way experienced moldmakers design it.
- Flash at the parting line. Clamping pressure, a mold closing under its own weight, or a resin that expands during cure. Leave headspace, relieve the mold slightly, and trim the flash on every cast.
- Soft or tacky cast. Wrong mix ratio, a cold room, or cure inhibition. Latex gloves, sulfur-containing modelling clay, uncured resin on the print, and fresh polyurethane spray paint will all block cure on contact. Use nitrile only, and clean the mold thoroughly.
- Yellowing or cloudiness. UV exposure on epoxy, moisture, or amine blush from a damp sealed surface. Keep parts out of sunlight and dry the mold before pouring.
- Cracking and weak sections. Under-cure, sharp internal corners, or heavy shrinkage where the part is thick and uneven. Add fillets, follow the full cure schedule, and keep section thickness even.
- Warped mold. Heat from the pour, or a large print with poor bed adhesion. Use an enclosed bed, a brim, and a rigid filament with a higher heat deflection temperature.
Two habits keep future prints cheap. Print a small leak-test coupon with every new material, and note the wall thickness that survives demolding, so the next design starts from a number instead of a guess. And a printed direct mold is a consumable in a way a silicone mold is not: expect single-digit pours in many cases, with a release coat extending that, and reprint when the parting line distorts or the surface dulls rather than fighting a tired mold.
Frequently Asked Questions
Can any 3D printer filament be used to make a resin-casting mold?
No. Direct resin casting needs a rigid, dimensionally stable filament that survives cure heat, so PETG, ABS or ASA work and PLA is a last resort because it creeps when a pour exotherms. A resin-printed SLA or MSLA part works well as a master for a silicone mold but is too brittle to pour resin into repeatedly. Always seal the print before casting.
Do printed resin molds need to be sealed before casting epoxy resin?
Yes, always. Printed plastic has microscopic gaps along the layer lines, and epoxy or polyurethane will wick into them, giving you a dull part and slowly weakening the mold. Sand the cast face, apply two thin coats of a filler primer or spray epoxy rated for your resin, scuff between coats, and cure fully before the first pour.
Can I pressure-cast or vacuum-cast resin into a 3D printed mold?
Yes, and it is the best upgrade for bubble-free parts. Vacuum degassing the mixed resin before pouring helps, but a pressure pot applied after the mold is filled collapses the last bubbles trapped against the cast face. Follow the datasheet, typically 2 to 4 bar with a slow ramp, and make sure the mold is rated for the vessel and the hose reach.
How many times can the same 3D printed mold be used?
It depends on the material and the geometry, and no supplier publishes a number. A rigid PETG or ABS mold with a good release coat usually manages several pours, while a thin-walled or PLA mold may only survive one. A silicone mold cast from a printed master is the reliable multi-shot option. Reprint when the parting line distorts, the surface dulls or the walls flex.
Should I use epoxy resin or polyurethane resin in a home-printed mold?
Epoxy is the easier first choice: long pot life, low shrink stress and forgiving cure times, so small mistakes do not ruin a batch. Polyurethane gives tougher, more flexible parts and faster cure, but it exotherms harder and has a shorter pot life, so it needs a rigid mold and fast, clean pouring. Pick whichever your datasheet recommends for the part’s thickness.
Conclusion
Start by pairing a rigid printed mold with a resin that suits it, then prove the pair with a small leak test before you commit a full print and a large batch of resin to the project. Print with solid walls, a flat rim, a pour hole, a vent and registration keys, and treat a failed coupon as useful information rather than wasted filament.
The rest is discipline: seal and release the mold every single time, measure the ratio carefully, pour in a thin stream from the lowest point, give the resin its full cure, and demold without forcing. That sequence, repeated without shortcuts, is what turns a printed cavity into clean, repeatable parts in 2026.