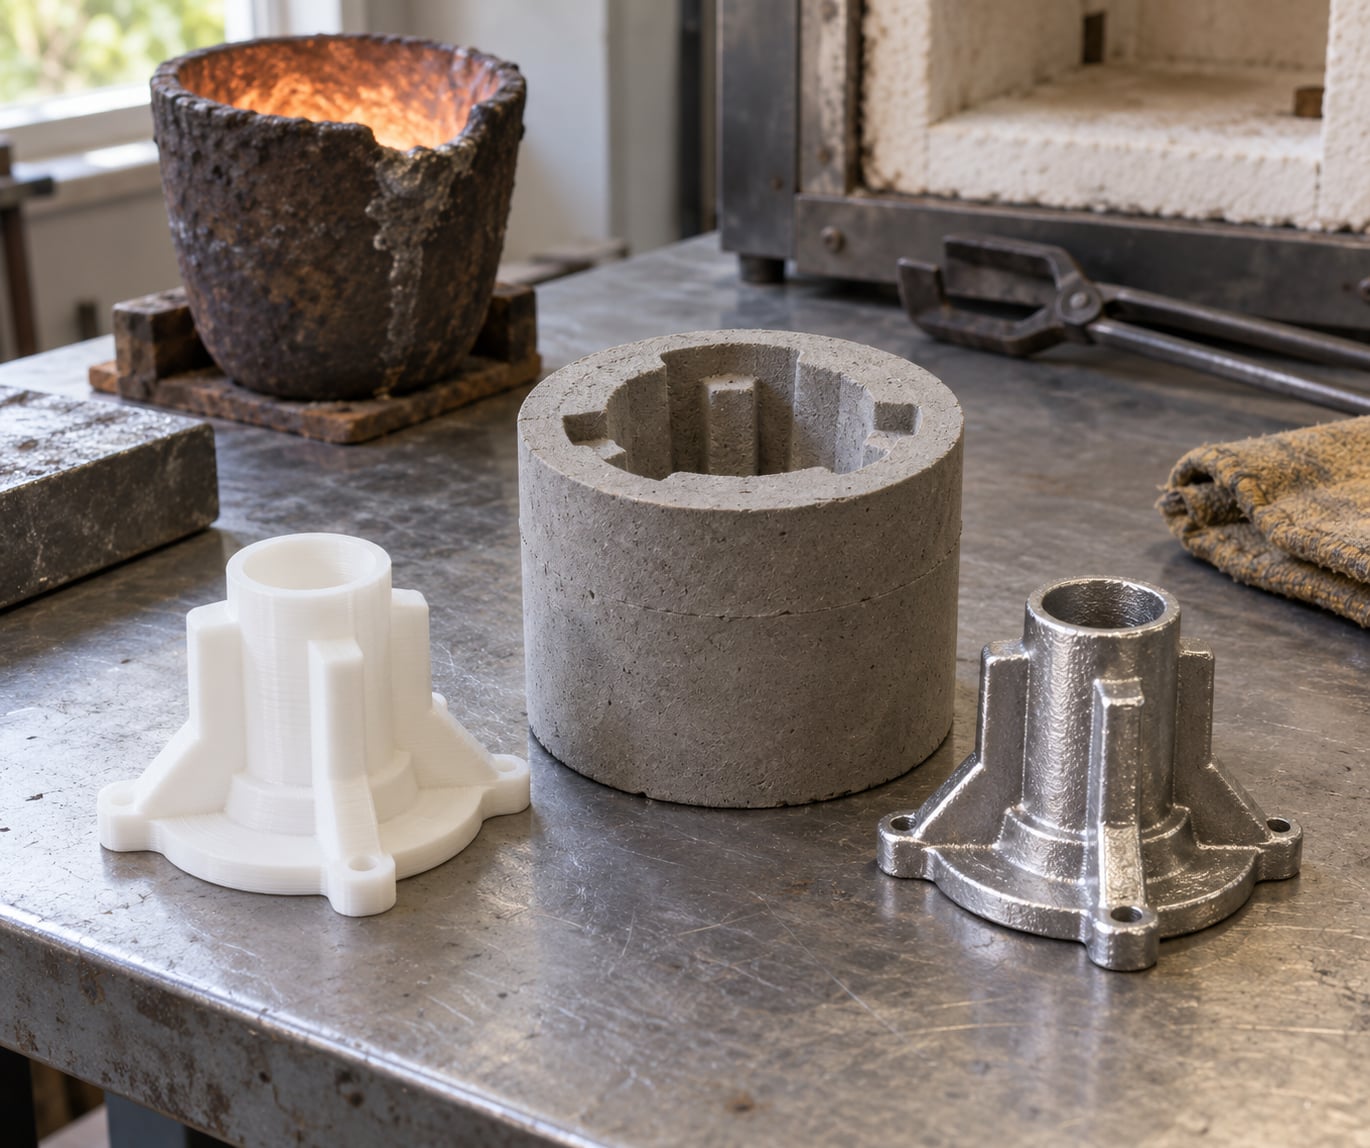
Lost PLA casting is how you turn a plastic 3D print into a real metal part. You print the part in PLA, bury it in a plaster investment, heat the whole assembly until the plastic is gone, then pour molten aluminium, bronze or brass into the cavity it left behind. It is the cheapest way I know to make a one-off metal prototype with internal detail a CNC mill would choke on, and it is also fussier than most guides let on. This guide covers the process end to end, including the burnout step where most first attempts fail.
Last reviewed for 2026. The steps, alloy figures and failure modes below come from hobby foundry practice rather than a sales page, so treat every number as a starting point rather than a specification.
Table of Contents
- What Is Lost PLA Casting for Metal Parts?
- How Does the Lost-PLA Casting Process Work?
- Lost PLA casting, step by step: eight stages
- Which alloys can you pour into a lost PLA mold?
- Which Parts Can Be Made With Lost PLA Casting?
- Why lost PLA castings fail, and how to fix it
- What Design Rules Reduce Casting Failures?
- What Materials Are Used in the Investment Mold?
- What Happens During the Burnout Stage?
- What Metal-Casting Safety Requirements Apply?
- What Are the Main Advantages and Limitations?
- Lost PLA Casting vs. Other Metal-Part Methods
- Is Lost PLA Casting Suitable for Your Project?
- Frequently Asked Questions
- Can any 3D printer make a pattern for lost PLA casting?
- What metal can be cast using a lost PLA pattern?
- How hot does the furnace need to be to burn out PLA?
- Does lost PLA casting produce good surface finishes and tolerances?
- Can lost PLA casting work for undercuts and internal channels?
- Is lost PLA casting cheaper than CNC machining or metal 3D printing?
- Conclusion
What Is Lost PLA Casting for Metal Parts?
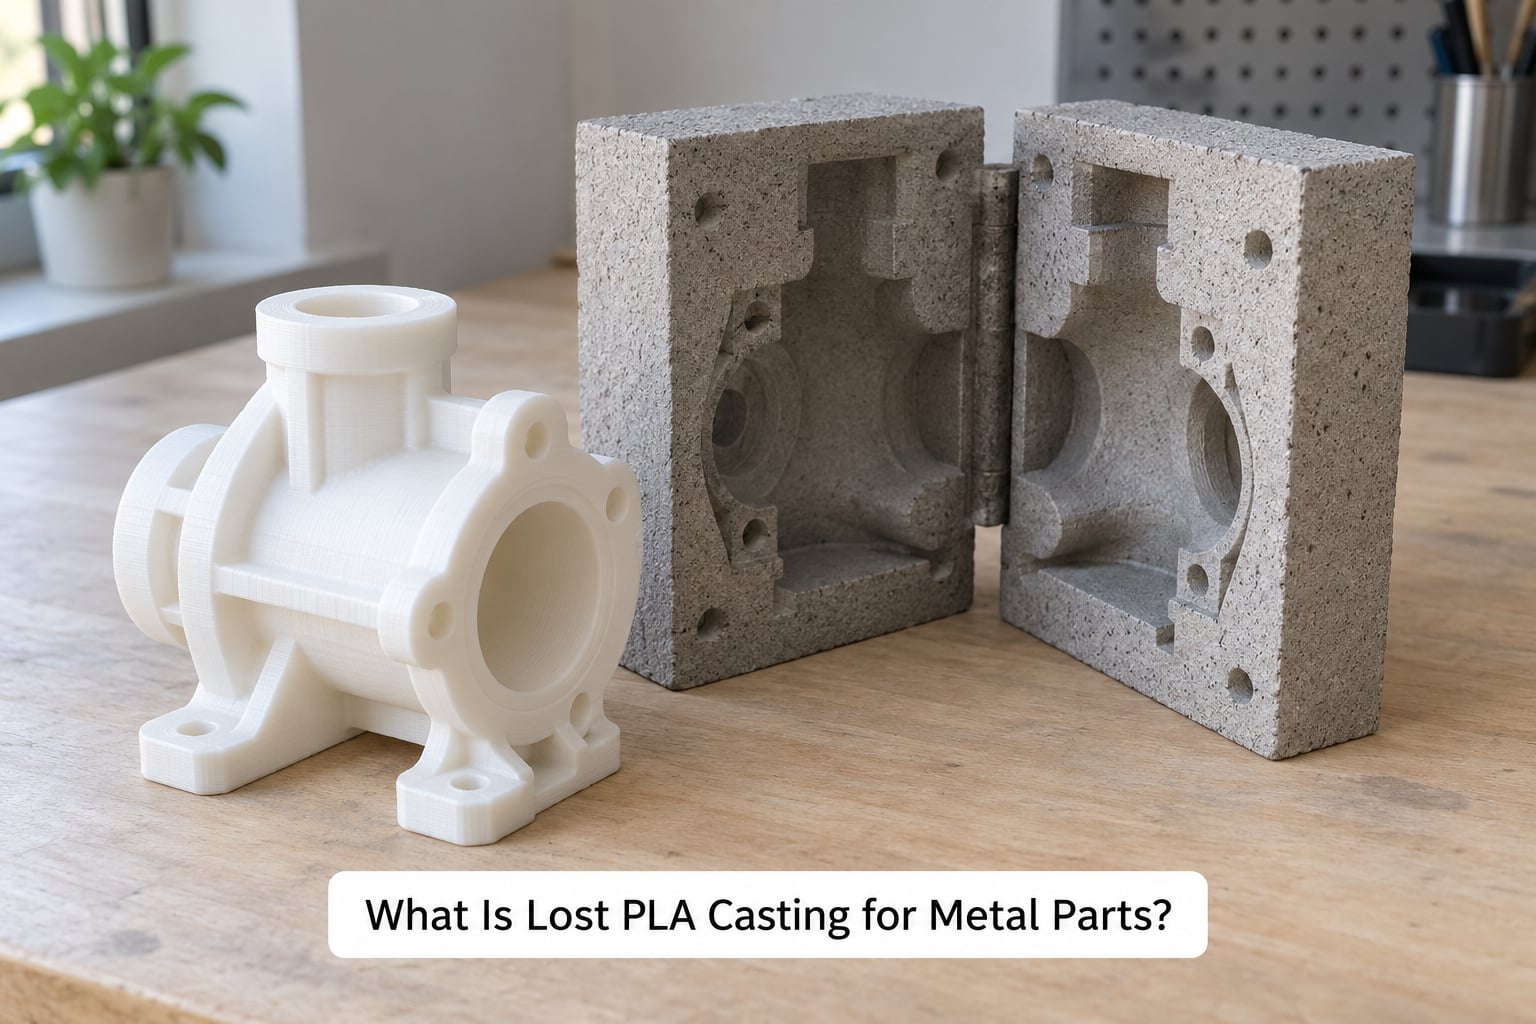
Lost PLA casting is an investment casting process where the pattern is a 3D-printed PLA part rather than a wax injection. The print is sprued, covered with a heat-resistant investment, and heated until the PLA decomposes and drains out, leaving a hollow cavity that molten metal fills. The investment is then broken off and the metal part is cleaned up.
Four components matter in every version of the process:
- The pattern — the printed positive, which is deliberately destroyed during burnout.
- The sprue tree — runners and pouring basin that carry metal into the cavity, all attached to the pattern so everything burns out together.
- The investment and flask — the ceramic shell, usually poured as a liquid around the pattern into a cylindrical flask.
- The melt — aluminium, brass, bronze or silicon bronze, melted in a furnace and poured into the cavity.
Investment casting is the umbrella term, and lost wax casting is its most common pattern-removal variant. Lost PLA casting is a sibling process: same shell, same burnout concept, different sacrificial material. Wax patterns leave cleaner molds because wax is designed to burn out completely, which is the core trade-off discussed later in this guide.
You can build a pattern on any printer that makes solid plastic parts. Nothing about the print itself is dangerous. The hazard lives entirely in the kiln and the pour, and more on that in the safety section.
How Does the Lost-PLA Casting Process Work?
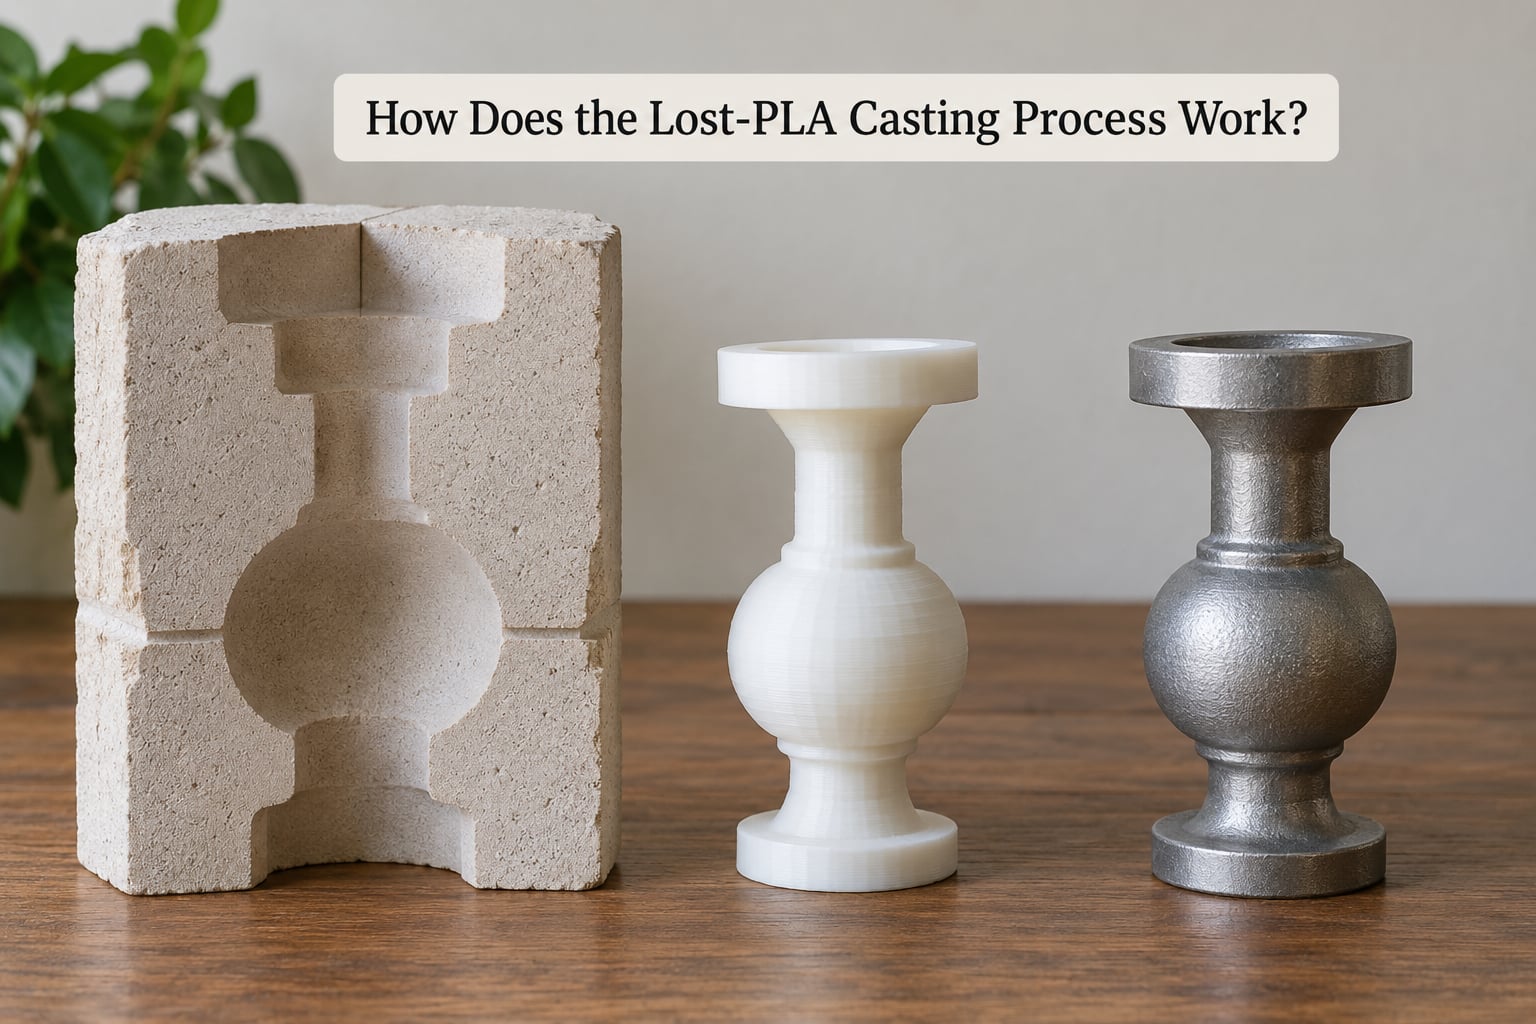
The sequence runs CAD model, print, sprue, invest, dry, burn out, pour, knock out, finish. Everything before the kiln is ordinary workshop work. Everything from the kiln onward needs foundry equipment and training, which is why the majority of hobbyists stop after printing and hire a foundry for the rest.
Lost PLA casting, step by step: eight stages
- Design and print the pattern. Model the part with draft and machining allowance built in, print in PLA at a fine layer height, and orient it so no surface that matters sits on a layer line.
- Sprue and vent the pattern. Attach printed parts and wax or PLA rods to a central pouring basin, then add vents so displaced gas and air can escape rather than trap as bubbles in the metal.
- Mix and pour the investment. Vacuum-mix the powder to a thick cream, vibrate out bubbles, and pour it over the sprued tree inside the flask, leaving a couple of centimeters above the pattern for the reservoir of investment the burnout creates.
- Dry the mold. Let it set in air, then finish drying slowly in a ventilated warm space. Rushing this produces steam pockets inside the shell that spit metal during the pour.
- Burn out the PLA. Ramp the kiln in stages so the pattern decomposes and drains instead of melting into a blob, venting gases the whole time, then inspect the empty cavity before pouring.
- Melt and pour the metal. Bring the alloy to pouring temperature with a modest superheat, remove dross from the crucible surface, and pour steadily without stopping.
- Knock out the investment. Let the casting cool, then chip away the brittle shell, working from the thick outer sections toward the part.
- Finish the part. Cut the sprue off, file and sand, remove flash at the parting line, and machine critical faces if the design called for machining allowance.
Two stages set the quality of everything else. A slow, staged burnout gives you an empty cavity with no residue in it, and a well-designed sprue keeps the metal moving in one direction so it does not half-fill and freeze. Rush either one and you learn the hard way.
Which alloys can you pour into a lost PLA mold?
Aluminium is the most common first pour, and yes, it works well: liquid at roughly 660°C and unforgiving of a damp or weak mold. Brasses and bronzes are more forgiving of mold condition but need a hotter, well-controlled flame. Zinc is easy on the furnace and unpleasant on health, so read the safety section before considering it.
| Alloy | Melting point | Typical pour temperature | Shrinkage | Notes |
|---|---|---|---|---|
| Aluminium | About 660°C | 700-750°C | Roughly 1.3% | Easiest first pour; very fluid, so it finds every flaw in the shell. |
| Silicon bronze | About 1000°C | 1150-1200°C | Roughly 1.5-2% | Forgiving of small mold defects, attractive finish, harder on the furnace. |
| Bronze (tin) | About 950°C | 1100-1150°C | Roughly 1.5-2% | Needs good superheat control; oxidises fast in an open crucible. |
| Brass | About 900°C | 1050-1100°C | Roughly 1.5-2% | Good detail, narrow working range, expensive metal. |
| Zinc (zinc alloy) | About 420°C | 450-500°C | Roughly 1.5% | Lowest melt point and lowest furnace demand, strongest fume warning. |
Treat these figures as starting points rather than specifications. Every alloy has several compositions, and each alloy supplier publishes its own recommended pouring range and shrinkage allowance. Where a foundry is doing the pour, follow their numbers rather than a table on a blog, including this one.
Which Parts Can Be Made With Lost PLA Casting?
Lost PLA casting suits moderately complex shapes with undercuts, internal passages, ribs and thin uniform walls. Those features are the reason to choose it: a pattern machined from billet would need a fixture or a five-axis setup, and a sand mold cannot hold the detail. Thin walls should stay uniform, since isolated heavy sections cool and shrink differently from thin ones and that mismatch invites cracking.
The weak spot is volume. Each part needs a dedicated sprue tree, a flask, a full shell, and a furnace run, so one-offs and small batches make sense while dozens of identical pieces do not. Large parts get difficult fast, since the investment shell has to survive both the burnout and the thermal shock of the pour without spalling.
Good candidates include jewellery and figurines, RC and model engine parts, gear blanks and brackets for prototyping, restoration parts where an original casting no longer exists, and decorative housings. Poor candidates: anything needing tight tolerances, watertight pressure boundaries, or a smooth finish with no post-processing.
Why lost PLA castings fail, and how to fix it
| Defect | Likely cause | What to change |
|---|---|---|
| Rough, pitted surface | Carbon char and ash from incomplete burnout | Extend the ramp, add a hold in the mid range, open the kiln vent |
| Layer lines visible in the metal | FDM surface transferred through the mold | Print finer, sand the pattern, change orientation, use filler primer sparingly |
| Flash at the parting line | Cracked or weak investment, or mold not fully dry | Dry longer, strengthen the recipe with refractory sand, fix the flask seal |
| Incomplete fill | Too little superheat, cold shell, interrupted pour | Pouder hotter, pour faster without splashing, check for vents |
| Porosity and gas bubbles | Turbulence, damp mold, trapped gas | Pour steadily, add vents at the far end, keep the shell bone dry |
| Cracked casting | Rigid sections with uneven cooling, no riser | Add a riser at the heavy section, even up wall thickness |
| Hot tear or seam | Draft angle missing, part locked in the shell | Add draft to vertical walls before printing, never design a sealed shell |
What Design Rules Reduce Casting Failures?
Most casting failures are decided in CAD, months before any metal is melted. Fixing a missing draft angle on the pattern costs a re-print; fixing it after the pour costs a scrapped pour. Work through this list before you slice the file.
| Design feature | Recommendation | Reason |
|---|---|---|
| Draft angle | 1 to 3 degrees on walls parallel to the pull direction | A pattern with no draft tears the shell as it burns and spalls into the cavity |
| Wall thickness | Keep sections close to uniform; 3 to 6 mm suits many hobby parts | Uneven sections cool at different rates and produce porosity and cracks |
| Sharp internal corners | Radius them with a fillet at least as large as the wall | Internal corners concentrate stress and trap metal that cools last |
| Undercuts | Fine, they are the reason to use this process; keep them shallow | Deep undercuts hold investment that is hard to clean out |
| Layer height | 0.06 to 0.1 mm on visible surfaces | FDM ridges transfer almost one to one onto the cast metal |
| Print orientation | Put the most important face away from the build plate and away from layer steps | The stair-stepping between layers is what you see on the finished part |
| Shrinkage allowance | Scale the pattern up by the alloy shrinkage figure | Metal shrinks as it solidifies; aluminium loses roughly 1.3% |
| Machining allowance | Add 1 to 2 mm on faces that need to be functional | As-cast surfaces are not dimensionally accurate enough for a press fit |
| Vent placement | Put at least one vent at the far end from the gate | Air trapped at the end of the cavity stops the fill and causes gas bubbles |
| Riser placement | One generous riser at the heaviest section | The riser feeds shrink as the part cools and prevents a void forming |
| Burnout access | Sprue and vents must let gases escape in a straight path | Trapped gas raises pressure inside the shell and cracks it |
One more rule that costs nothing: put the parting line somewhere the investment can be broken away from. Every extra millimetre of shell between the tool and the part means more knocking out and more risk of taking metal with it.
What Materials Are Used in the Investment Mold?
The investment has one job, hold a cavity against metal at pouring temperature without melting, spalling or exploding. Plain plaster of Paris manages this for aluminium and nothing more, which is why it is so common and so frustrating. Sand-loaded plaster adds heat resistance for the price of a coarser surface. Refractory sands and the commercial gypsum-bound investments are what foundries actually use when the alloy gets serious.
| Material | Best for | Watch out for |
|---|---|---|
| Plaster of Paris | Small aluminium parts, first attempts | Weak above its breakdown point; crumbles on any rough knockout |
| Sand-loaded plaster | Aluminium and light brass, cheap shells | Abrasive to the mold, duller detail, still needs a controlled burnout |
| Petrobond and similar | Pattern making where you can physically lift the pattern out | Poor fit for this process; several foundry users report it is not designed for a burned-out pattern |
| Commercial gypsum-bound investment (for example Ultra-Vest or SC-20) | Repeat work, finer detail, stronger shells | Follow the manufacturer’s burnout schedule, not a generic one |
| Pourable investment | Anything a beginner attempts | A pourable shell filled into a flask beats hand-built shells for first-time builders |
Whatever you choose, the manufacturer’s own burnout schedule outranks anything you read here. Investment chemistry varies more than the forums admit, and a schedule borrowed from a different powder is how shells crack at the worst possible moment. Mix ratios and water additions should also come from the powder’s data sheet.
What Happens During the Burnout Stage?
This is where lost PLA casting earns its reputation, and where most guides go vague. PLA does not burn like paper. It softens, then decomposes into carbon char plus gaseous products, and that char is the problem. Char only disappears when it has enough oxygen and enough dwell time at temperature to oxidise completely. Skip either and you pour a good part into a cavity with soft carbon lumps sitting in it, which then become pits in the finished surface.
The fix is a staged ramp rather than a soak. A workable approach starts the furnace at a temperature where PLA softens and begins flowing out through the sprue and vents, holds there so the bulk of the material drains while the gases have somewhere to go, then ramps in stages through the range where the remaining char oxidises, finishing at the temperature your investment needs for full strength. A final hold at the top of the schedule sets the shell for pouring.
Rules that matter more than the exact numbers:
- Vent the kiln or furnace continuously through burnout. Combustion gases are the reason this is a ventilation question, not just a comfort one.
- Ramp slowly and hold at multiple points. A fast climb liquefies the pattern into a trapped puddle that blocks vents and cracks the shell.
- Leave the flask open at the pouring basin so gases escape in one path.
- Inspect the cavity before pouring. Shine a light in and look for dark residue, ash deposits, or a loose chunk of char sitting in a corner.
- Never run a burnout in a domestic kitchen oven. It is not hot enough for real burnout, and a melting plastic pattern in a sealed kitchen appliance is a fire and fume hazard. The one domestic exception is low-temperature alloys in a purpose-built small kiln, and even that needs dedicated ventilation.
One practitioner point worth repeating: PVB filament is sometimes recommended because it pyrolizes far more completely than standard PLA. The catch, from the same foundry users who recommend it, is that it needs a final temperature close to where plaster begins to break down, so without fine kiln control you are better off with a commercial investment and a proper schedule. Resin-based castable patterns burn cleaner still, at a higher material cost.
Nobody publishes a single burnout schedule that transfers between patterns, and that is a feature of the process rather than a gap in the writing. What transfers is the shape of the ramp.
What Metal-Casting Safety Requirements Apply?
Printing a PLA pattern is printer work. Heating it and pouring metal is foundry work, and the difference between them is the entire safety argument. Molten aluminium and bronze destroy skin instantly and cannot be smothered. Kiln and furnace gases, including carbon monoxide from an improperly ventilated propane or natural gas burner, kill without warning. Wet metal on bare skin causes explosions. Read this section as the reason to use a foundry rather than a reason to be careful enough to do it yourself.
- Outdoors, always. Burn out and pour outside or in a purpose-built foundry space with real exhaust. Never in a garage with the door shut, never in a basement, never indoors near a house.
- Carbon monoxide control. Fuel-fired furnaces need combustion-rated ventilation. A propane burner running in a closed space is the classic fatal mistake.
- Fumes from the pattern. Burning polymer generates irritant smoke and fine particulate. The material is gone, the dust that carried it is not; treat burnout residue as a respiratory hazard and clean up wet rather than sweeping dry.
- PPE for pouring. Face shield, flame-resistant clothing, leather gauntlets, and closed footwear rated for molten metal contact. Splash gear is not optional for aluminium, which does not splash predictably.
- Dry everything. Every tool, every mould surface, every piece of equipment near the pour. Water and molten metal do not negotiate.
- Training and equipment. Have dry-pour practice, working tongs and adequate crucible handling, plus a second person present. A beginner alone with a lit furnace has no margin.
- Know your alloy. Zinc and magnesium alloys fume heavily and can ignite. Copper alloys need hotter, harder-to-control flame conditions. Both need a ventilated professional space, not a home shop.
The honest recommendation for most people reading this: print the pattern, then hand the burnout and pour to a qualified foundry. You keep the design freedom and the low tooling cost, and you avoid the two stages where serious injuries happen.
What Are the Main Advantages and Limitations?
The advantages are real and hard to get any other way. A pattern that would cost a wax injection die or a fixture to machine costs a few hours of filament, and that freedom is what lets you iterate on geometry before committing to metal. Detail reproduction is good, including undercuts and internal channels that sand casting cannot hold. No custom tooling, no minimum order, and short lead times for one-off parts, restoration work and prototypes.
The limitations are just as real, and nobody sells around them.
- Burnout is the weak link. PLA leaves ash and carbon char that can pit a surface, and one r/MetalCasting user reports never having fully cleared residue from the method.
- Layer lines transfer. FDM ridges show up in the metal, which is an open question in the hobby foundry community with no clean trick that works every time.
- Surface finish is as-cast. Rough by commercial standards, and no process removes the pits that bad burnout leaves.
- Dimensional accuracy is poor. Shrinkage plus pattern deviation plus shell distortion means functional fits need machining allowance and machining afterwards.
- Thermal limits. Low-melting alloys are comfortable; high-melting alloys and large parts are not.
- Slow iteration. Each cycle is print time, drying time, burnout time, pour time. Design changes happen at the speed of days.
- Porosity and dross. Gas absorption, turbulence and a dirty crucible all end up inside the part, and a cast part is rarely as strong as a machined one.
- Low volume only. Beyond a handful of pieces, a wax pattern or a foundry quote wins on time and money.
A common source of disappointment is comparing a hand-invested first attempt against a polished commercial casting. They are different products. The realistic goal is a dimensionally rough but recognisable metal part with the geometry you designed, ready for machining or for use where finish does not matter.
Lost PLA Casting vs. Other Metal-Part Methods
The right comparison is not which method is best, it is which one fits the part you are holding. Here is where lost PLA casting sits against the alternatives you are probably also considering.
| Method | Detail and complexity | Tolerances and finish | Tooling cost | Volume and lead time |
|---|---|---|---|---|
| Lost PLA casting | High; undercuts and internal channels | Coarse; machining needed for fits | Almost none beyond a printer | One-offs and small batches; days per cycle |
| Lost wax investment casting | Highest; the process industrial parts use | Best of the casting group | Injection tooling for volume, hand-built wax for one-offs | Commercial route, quoted lead times |
| Lost foam casting | Limited; no fine detail, thick walls only | Rough, roughly plus or minus half a millimetre at best | Cut foam by hand or CNC | Simple parts, cheap and forgiving of residue |
| Sand casting | Low; coarse features, generous draft | Rough | Pattern per part | Large and low-volume work |
| CNC machining | Limited by tooling reach and fixturing | Tight and repeatable | High setup cost, low marginal cost | Best once you need many identical accurate parts |
| Direct metal 3D printing | High, including internal channels | Tight, often as good as machined | Machine cost only | Small batches, hours per part, costly metal powder |
| Printed plastic part | High | Good within the printer’s capability, no heat or strength | None | Best when the part never needs to be metal |
The short version: lost PLA casting sits between sand casting and lost wax. It has far more geometric freedom than sand, far lower cost than wax, and worse finish than both. Choose it when the shape is complicated, the quantity is small, and the surface does not need to look finished. If the part needs to be accurate, watertight, or strong under load, machine it or print it in metal instead.
Is Lost PLA Casting Suitable for Your Project?
Run through these questions in order. If the first two fail, stop; nothing later will rescue the project.
- Does the geometry justify it? Undercuts, internal passages, complex ribs or a one-off shape that is expensive to machine. A simple block or bracket is cheaper to mill.
- Do you have safe access to a furnace? Either your own properly equipped setup with training, or a foundry that will quote the burnout and pour. No access, no project.
- How many parts? One to a handful. Beyond that, wax investment or CNC wins on time and cost.
- What alloy? Aluminium or a low-melting alloy for a first attempt; brass and bronze if your furnace can hold temperature and you accept tougher metal.
- What tolerances and finish do you need? If a press fit or a sealing surface matters, budget for machining after the pour. If it does not, plan to leave it as-cast.
- What is your budget and patience? Low cash cost, high time cost. Multiple dry cycles, an overnight burnout and a furnace session are normal before you hold a finished part.
- How mature is the design? Prototype it in plastic first if you can. Printing a PLA version costs an evening and saves a furnace run every time the geometry is wrong.
If most of those answers are comfortable, this is a good process for you. If the answer to access is no, the answer to accuracy is critical, and the quantity is above ten, pick a different route.
Frequently Asked Questions
Can any 3D printer make a pattern for lost PLA casting?
Yes. Any printer that produces a solid plastic part can make the pattern, because the PLA is only a temporary form that gets destroyed in the kiln. Print at a fine layer height, keep the part solid and fully supported, and design draft angles into vertical walls so the pattern releases cleanly from the investment.
What metal can be cast using a lost PLA pattern?
Aluminium is the most common, melting near 660°C and pouring around 700-750°C. Silicon bronze, bronze, brass and zinc alloys all work too, each needing a higher furnace temperature and more careful superheat control. Follow the alloy supplier’s pouring range rather than any general figure.
How hot does the furnace need to be to burn out PLA?
More than a kitchen oven can reach. The pattern first softens and drains at a lower temperature, then the remaining carbon char needs a much hotter stage with dwell time and plenty of air to oxidise away. Your investment’s own burnout schedule defines the final temperature, so follow the manufacturer data rather than a generic figure.
Does lost PLA casting produce good surface finishes and tolerances?
No, and this is where expectations need resetting. As-cast surfaces are rough and can be pitted by residue from incomplete burnout, and FDM layer lines usually show in the metal. Expect roughly 1.3% shrinkage in aluminium and add machining allowance on any face that needs to fit accurately.
Can lost PLA casting work for undercuts and internal channels?
Yes, and this is the strongest argument for the process. Because the pattern is destroyed rather than withdrawn, undercuts and internal passages cost nothing extra to make, something sand casting and CNC both struggle with. Keep channels of a sensible width so metal can flow through them and investment can be cleaned out afterwards.
Is lost PLA casting cheaper than CNC machining or metal 3D printing?
For one-off or very small batches, usually yes, because the only tooling cost is filament and printer time. Direct metal printing costs more per part but delivers tight tolerances in hours. CNC machining has a high setup cost and then becomes the cheapest option per part once you need many accurate pieces.
Conclusion
Start with two decisions: does the shape actually need this process, and can you reach a furnace safely. If the part has undercuts, internal passages or is a one-off with no affordable alternative, and a foundry will quote the burnout and pour, lost PLA casting is a genuinely good tool. Talk to that foundry before you print anything. Their constraints on shell thickness, burnout schedule, sprue sizes and alloy choice will shape your design far more than any printing setting will, and designing around them saves you the whole cycle.