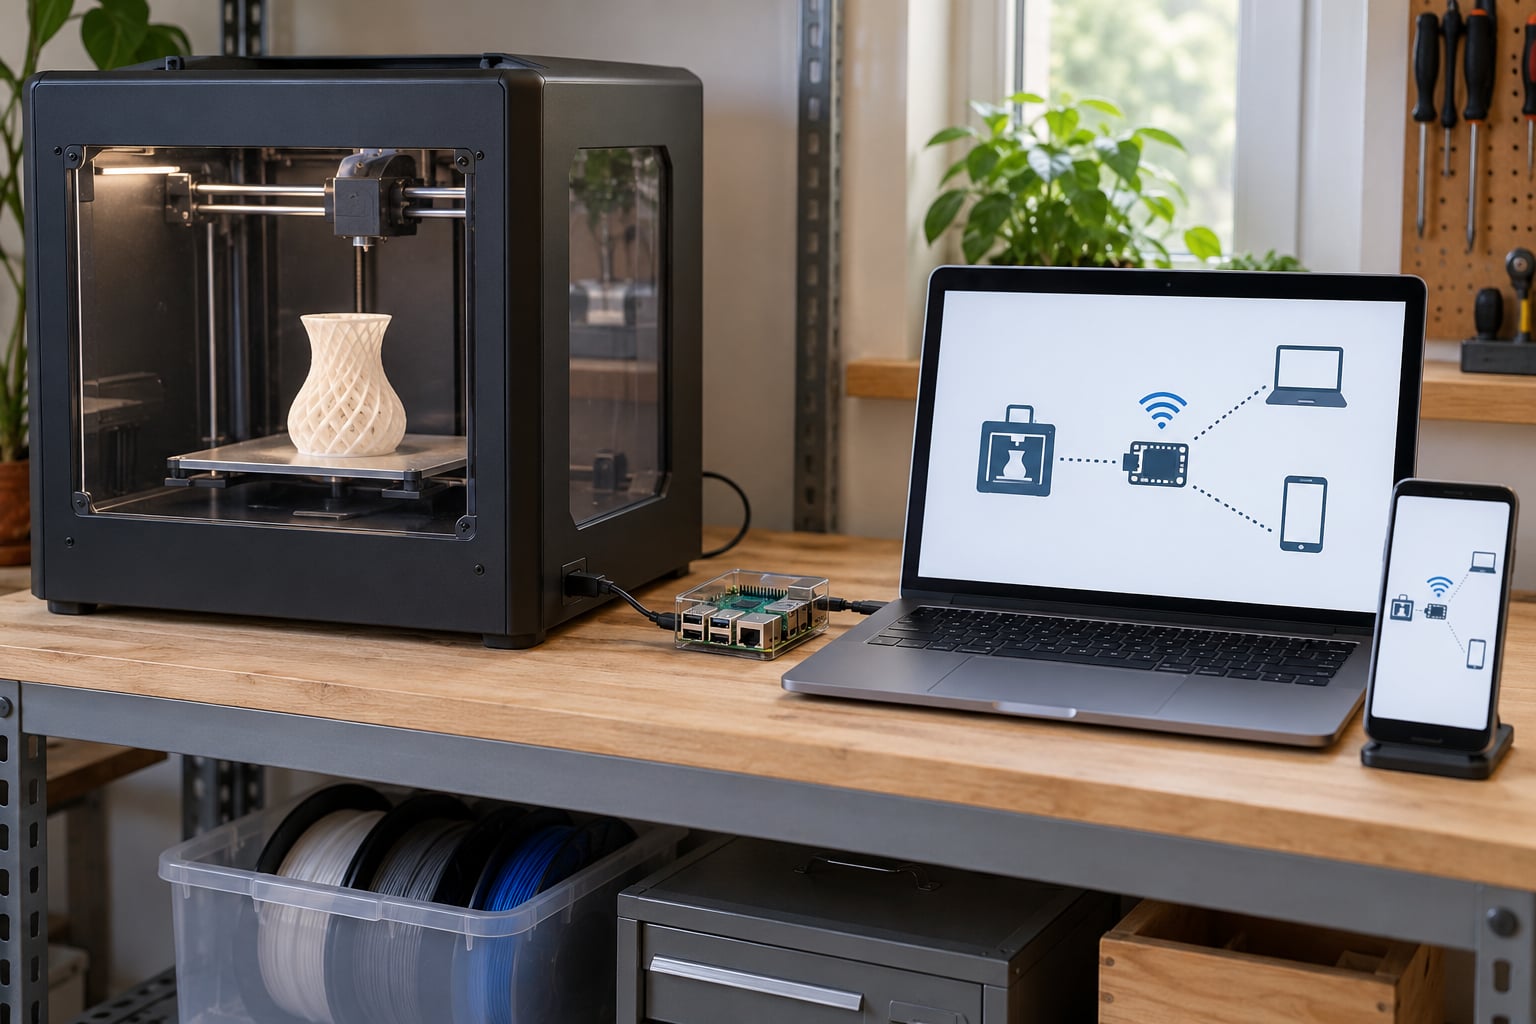
To set up remote monitoring for a 3D printer, you need three things: a small computer that stays next to the machine and talks to it over USB, a web interface on that computer such as OctoPrint or Klipper’s Mainsail, and a private tunnel such as Tailscale so you can reach the interface from your phone without exposing the printer to the open internet.
That is the whole idea, and it takes about an hour end to end for most printers. What makes it worth doing is what happens without it. A 22-hour print that loses bed adhesion at hour three looks fine from the doorway, and you find out the next morning when the part is a curled mess and the filament spool is half wasted.
This guide walks through the setup in six steps, from checking what your printer supports to running a test print that proves alerts and camera actually work. It also covers the four remote access routes people use, why the VPN route is the one to pick, and the specific fixes for the connection errors that trip up almost everybody at least once.
Table of Contents
- What You Need
- Step-by-Step: How to Set Up Remote Monitoring for a 3D Printer
- 1. Check Printer and Network Compatibility
- 2. Install and Sign In to the Monitoring Software
- 3. Connect the 3D Printer to the Monitoring Platform
- 4. Configure Print Status, Camera, and Notifications
- 5. Enable Secure Remote Access
- 6. Test the Setup with a Short Print
- Common Mistakes
- The printer shows as offline in the interface
- Status updates are partial or jumpy
- Alerts do not arrive
- Remote connections are refused or time out
- The data looks stale even at home
- The camera does not stream
- Wi-Fi drops the host during long prints
- Frequently Asked Questions
- Can you 3D print remotely?
- Do I need a Raspberry Pi to monitor my 3D printer remotely?
- Is it safe to leave a 3D printer printing unattended?
- Can I control multiple 3D printers at once?
- Why can’t I connect my OctoPrint server from outside my home network?
- What should I do when printer notifications stop arriving?
- Conclusion
What You Need
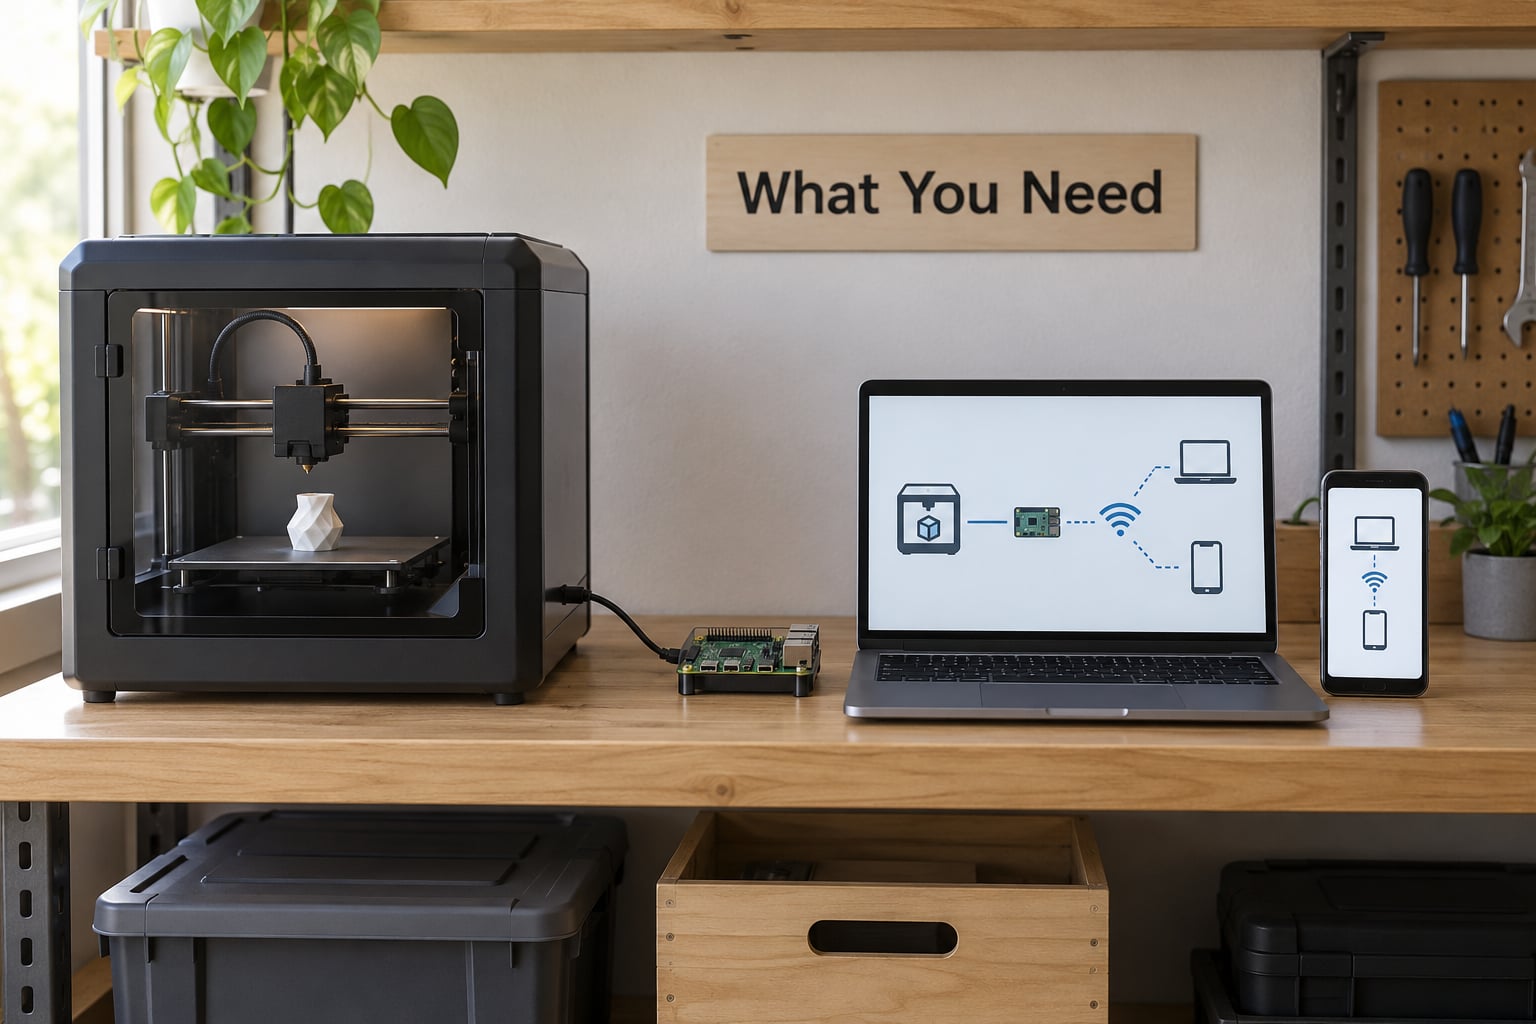
How to set up remote monitoring for a 3D printer comes down to a printer, a host computer, a network, and a monitoring interface. The printer is the machine you already own. The host computer is the piece most people are missing.
The critical distinction to understand first: monitoring on your local network and monitoring from across town are two different problems. Being able to open a web page at http://octopi.local while standing in the same room proves your setup is wired correctly. It says nothing about reaching it from a coffee shop, because your router does not forward traffic to internal devices by default. Half of the frustration in this topic comes from treating those two tests as the same thing.
Here is the full checklist before you start:
- The printer itself. Any printer with a USB data port can be monitored. The USB cable must be a data cable, not a charge-only cable, which is a surprisingly common reason nothing works.
- A host computer that stays on. A Raspberry Pi 4 or 5, an Orange Pi, an old mini PC, or a spare laptop. It runs the monitoring software continuously and must not sleep.
- A reliable microSD card. For a Pi, this is the component that actually fails. A high-endurance card rated for continuous write access is worth the difference over a cheap one.
- A camera, optional but recommended. A USB webcam is enough for a live feed and time-lapse. Many printers ship with a slot for one; check the camera icon in your printer’s menu before buying anything.
- A network connection. Ethernet is better than Wi-Fi for reliability. If the printer has no network port at all, the host computer supplies the network connection and the printer only needs USB.
- Your phone or laptop, plus an account with whatever service you pick. For the self-hosted route, that means an account with the VPN provider.
- A smart plug, optional. This is what lets the printer power itself off after a long print finishes so the heated bed and nozzle are not still warm and powered at 3am.
Worth noting: you do not need a camera, you do not need a smart plug, and you do not need any subscription to get a working setup. Those are upgrades on a working base.
Step-by-Step: How to Set Up Remote Monitoring for a 3D Printer
1. Check Printer and Network Compatibility
First, work out how your printer connects and what has to bridge it. Many enclosed printers now ship with built-in Wi-Fi, and those are the easiest case: the machine already has a network address and there is nothing to bridge. Connect it to your router, note the IP address from your router’s device list or the printer’s network settings screen, and move on.
Printers with only a USB port need the host computer in the middle. The host runs the monitoring software, the software opens a serial connection to the printer over USB, and the host joins your network on its own. Your phone never talks to the printer directly, it talks to the host. That indirection is exactly what makes secure remote access possible, because the host is a normal computer you can protect with a VPN.
To test basic network access, open the host’s web interface from a phone that is on your home Wi-Fi but not connected to the printer’s own network. If the page loads, the software and network are working and any failure is at the remote access layer. If it does not load, the problem is local and there is no point configuring alerts yet.
Also decide the software route now, because it determines the next step:
- OctoPrint works with nearly any printer and is the most forgiving option. It is the right first pick if you are not sure what your hardware supports.
- Klipper with Mainsail or Fluidd is the better choice on Voron, Sovol, Elegoo Neptune, Creality Ender and similar machines, and it gives you noticeably faster camera streams and more control over motion. It requires installing firmware, which is a bigger commitment.
- The manufacturer’s own app covers Bambu Lab, Prusa, Creality and Elegoo Centauri Carbon printers with no extra hardware at all. The trade-off is that it works with that brand’s printers and no others.
2. Install and Sign In to the Monitoring Software
Install the software on the host computer and create the account before you touch the printer. For OctoPrint on a Raspberry Pi, the OctoPi image is the shortest route: write it to the SD card with a card imaging tool, boot the Pi with the card and the printer connected, and the setup wizard appears on first startup over a network address shown on screen.
During setup, three settings matter more than the rest:
- Serial port and baud rate. Most printers use 115200, but some use 250000. Getting this wrong is the single most common reason the interface says the printer is offline while the printer itself is working fine.
- Printer profile. Selecting the correct profile sets the origin, size and axis limits so percentage progress and time estimates are accurate rather than made up.
- Authentication. Turn on a username and password during setup, not afterwards. The setup wizard is the moment when nothing is exposed yet, so it is the cheapest time to add credentials.
For Klipper, the order is: flash the firmware to the board, then install Moonraker, which is the API process that talks to the firmware, then add Mainsail or Fluidd as the web interface on top. Klipper has no setup wizard, so follow one reputable guide end to end rather than mixing instructions from several, because file paths and config keys differ between them.
Sign-in matters for the cloud routes too. A Bambu Lab or Creality Cloud account ties the printer to that vendor’s servers, which raises the privacy question that comes up repeatedly in maker communities: a third party can see your print history and could in principle send commands to the machine. Self-hosted OctoPrint and Klipper avoid that entirely, because the data never leaves your house unless you open a tunnel yourself.
3. Connect the 3D Printer to the Monitoring Platform
Connect the printer with the USB data cable, power it on, then add it in the software. In OctoPrint this is Settings, then Serial Port, then Baudrate, followed by the serial connection dropdown listing your printer’s port. Save, restart the connection, and the status should change from offline to operational within a few seconds.
For networked printers, enter the IP address or hostname in the printer’s network settings instead of using serial. Either approach works, and both can be used at once if you want a local USB connection and a network fallback.
Confirm live data is actually arriving rather than assuming it. Watch the nozzle and bed temperature readings for a minute or two. If they sit at a fixed value while the printer is idle and then move when you send a heat command, the connection is live. If the temperatures never change at all, the serial port is wrong or the interface is reading a cached value.
Run a short test extrusion after this. A 20mm line on a cold bed confirms the host can not only read the printer but also write commands to it, which is the difference between monitoring and control.
4. Configure Print Status, Camera, and Notifications
Now configure what you actually want to be told about. Start with the essentials: live layer progress, elapsed and estimated remaining time, and current nozzle and bed temperature. Add filament run-out state if your printer has a sensor, and filament usage if the interface estimates it, because running out on layer 2,100 of a big print is worth knowing about early.
For the camera, plug a USB webcam into the host rather than the printer. In OctoPrint, the webcam is set up under Settings, then Webcam, where you pick the capture mode and a snapshot resolution. Two settings matter for usefulness: set a reasonable snapshot interval so a time-lapse does not fill the storage card in one night, and turn off the automatic stream if nobody is watching, since a live stream is the most bandwidth-hungry thing on the network.
Notifications are where this setup pays for itself. Configure at least three:
- Print complete with estimated time and filament used.
- Print failed or stopped, which is the alert that saves filament.
- Printer offline or host unreachable, because a silently dead host is the failure mode that wastes the most time.
Send them somewhere you actually check. Push notifications on your phone are the default choice, email is the fallback when your phone silences the app, and webhook or Discord and Telegram integrations are useful if you run several printers. For failure detection, Obico (formerly The Spaghetti Detective) analyses camera frames against what the current layer should look like and can pause a print that has turned into spaghetti, and OctoEverywhere, the service formerly known as OctoPi, provides a similar hosted relay with time-lapse and a phone app. Both are current names; older tutorials referencing The Spaghetti Detective or OctoPi are describing older versions of the same tools.
5. Enable Secure Remote Access
This is the step that makes remote monitoring remote, and it is the one to get right. There are four routes, and only three of them are reasonable.
Port forwarding on your router is the traditional answer: forward a port from your public IP to the host, then reach the interface at your external address. It works, and it puts an unauthenticated-ish web server on the open internet where scanners find it within hours. The host will be probed by automated traffic whether or not you are using it.
A mesh VPN such as Tailscale or ZeroTier is the route the maker communities actually recommend, and the reason is simple. You install a client on the host and on your phone, both join a private encrypted network, and you reach the host by its private address. Nothing about the interface is published to the internet, and the port forwarding is not needed. The printer is invisible from outside unless you have given someone your Tailscale account access. Setup is short: install Tailscale on the Pi, install it on your phone, sign in with the same account on both, then open the host’s Tailscale IP in your phone browser. If you prefer not to manage a private network, Tailscale also offers a sharing feature that gives a second person, or your own other devices, access without an account.
The manufacturer’s cloud relay is the path of least resistance for vendor-native printers, and it requires no networking work at all. Sign in to the app, bind the printer, done. The cost is the brand lock-in and the fact that a vendor outage or an account problem takes your monitoring away from you.
A commercial VPN on your router covers the whole house in one subscription and works for the host and every other device. Less setup per device, but your whole network is inside the same trust boundary, so pick that only if you already want that.
Whichever route you use, finish with the security basics: change default credentials to something long, enable two-factor authentication on any account that offers it, keep the host’s operating system and the monitoring software updated, and use HTTPS if the software supports it. Most importantly, never expose the raw serial port, the camera stream or a Klipper Moonraker port to the public internet. Anyone with access to a Klipper API can move the toolhead, and the port is authenticated far more weakly than most people assume.
6. Test the Setup with a Short Print
Do not find out whether your monitoring works at 2am on the first night of a long job. Print a calibration cube or a 20 minute test model first, and verify each part of the chain while you watch.
Work through the list in order:
- Live updates. The progress percentage should advance layer by layer and match what the printer’s own screen shows. If it jumps in large steps or freezes while the printer moves, you have a status polling interval set too high. Lower it in the software’s advanced settings.
- Temperatures. Compare the reported nozzle temperature with the printer’s own display during a hot-end soak. A reading of 205 when the printer says 210 is a sensor difference; a reading stuck at 25 means the connection is not live.
- Camera. The feed should be a few frames behind reality, not minutes. Set a snapshot resolution you can actually load on a phone over cellular data.
- Alerts. Turn your phone to cellular, leave the house, and confirm the app still streams. Then cancel the print deliberately and confirm the failure alert arrives. Deliberately triggering it once is worth far more than assuming it works.
- Reconnection. Power-cycle the host mid-print. A correct setup recovers and reports the printer back online on its own; if it needs a manual restart every time, your SD card or power supply is suspect.
- False alarms. Watch one full print start to finish. A notification system that fires at random trains you to ignore it, which defeats the point.
If all six pass, the setup is finished and the smart plug step is optional from here.
Common Mistakes
Almost every remote monitoring problem falls into one of seven buckets, and each has a specific fix.
The printer shows as offline in the interface
The host cannot open the serial connection. Check that the printer is powered on before the software tries to connect, that the USB cable is a data cable, and that the baud rate matches your printer’s manual. On Linux, confirm the port path is stable by giving the serial device a fixed name with a udev rule, since /dev/ttyUSB0 can point at a different device after a reboot. If the printer resets mid-print and drops the connection, that is usually a power supply undervoltage or a heating fault drawing more current than it delivers, not a software problem at all.
Status updates are partial or jumpy
The host is connected but reporting stale data. Increase the status refresh interval slightly, and check that no other tool is polling the printer at the same time, since two programs sharing one serial port produce exactly this symptom. In Klipper setups, Moonraker’s telemetry interval is the control and the usual fix is raising it, not lowering it.
Alerts do not arrive
Test each channel separately from the software’s notification settings. Push notifications on iOS and Android are silently suppressed when the app lacks notification permission, which is the most common cause. Email alerts need working outbound SMTP from the host, and a home network that blocks port 25 will cause the same symptom. Confirm the alert triggers from the interface first, then confirm delivery to the device.
Remote connections are refused or time out
From a phone on cellular, you are testing the remote path directly, which is the right way to diagnose this. If it fails at home but works off-site, the router is the problem: a guest network, client isolation, or a firewall on the access point is blocking device-to-device traffic. If it fails everywhere, the tunnel is not up. On Tailscale, check the status indicator on both the host and the phone; a host that shows as needing login is the usual culprit, and re-authenticating fixes it. If you chose port forwarding instead, confirm you are using your current public IP, because many residential connections change it on every reconnect and a stale address is the classic reason a forward that used to work stops working.
The data looks stale even at home
Clear the browser cache and hard-reload, then check the host’s clock. Software that caches aggressively can display an old status page for hours. Timestamps that are hours out are a time zone or clock problem, and that also breaks scheduled prints and time-lapse sequencing.
The camera does not stream
Check the camera is plugged into the host rather than the printer, then confirm the host sees it as a video device. Some USB cameras need a UVC-compatible kernel driver, and a handful of models are simply not supported on current Raspberry Pi OS images. A feed that works locally but not over cellular is almost always bandwidth, so drop the snapshot resolution and the stream quality before changing anything else.
Wi-Fi drops the host during long prints
Wireless drops out on 2.4 GHz networks crowded by neighbouring routers, and a power-on resumption on the printer is a common and hard-to-diagnose cause. Put the host on Ethernet, move the printer or router antenna away from metal shelving, and set the router band to 5 GHz for the host. This is the single biggest reliability upgrade most people can make.
Frequently Asked Questions
Can you 3D print remotely?
Yes, you can start, pause, stop and monitor a print remotely, but the printer should be physically supervised near home. Remote control means sending commands to a machine that is already running, not leaving a printer alone in an empty building overnight. Most people use it to check progress from work, catch a failure in the first layers, and stop a job that is going wrong.
Do I need a Raspberry Pi to monitor my 3D printer remotely?
Not necessarily, but you do need something that stays on and stays connected. A Raspberry Pi, an Orange Pi, a mini PC or an old laptop all work, and any of them can run OctoPrint or host Klipper. If your printer has built-in Wi-Fi and a vendor app, you need no extra hardware at all, though you are then tied to that brand’s cloud.
Is it safe to leave a 3D printer printing unattended?
It is common and generally reasonable for a short period, with precautions. Keep the printer away from flammables, never leave it running in an unoccupied building overnight, and use filament with flame-retardant characteristics for overnight jobs. A smoke alarm in the room is cheap insurance, and a smart plug that cuts power after the print finishes prevents a hot bed and nozzle sitting powered for hours.
Can I control multiple 3D printers at once?
Yes, and this is how small print farms operate. OctoPrint handles multiple printers from one server with a dashboard showing each machine, and Klipper’s Moonraker can do the same. The pattern that works for remote multi-printer access is a mesh VPN such as Tailscale on every host, with a dashboard on top, so you get one secure entry point instead of many forwarded ports.
Why can’t I connect my OctoPrint server from outside my home network?
In most cases the software is fine and the network path is the problem. Test from a phone on cellular, because home Wi-Fi proves only the local path. If it fails everywhere, confirm the tunnel is authenticated on both devices, and check the Tailscale status indicator on the host. If you are using port forwarding instead, your public IP address has probably changed since you set it up.
What should I do when printer notifications stop arriving?
Work through it in two stages. First, trigger a test alert from the software’s notification settings to find out whether the failure is in the software or in delivery. If the software reports sending successfully, check phone notification permissions and your email spam folder. If the software reports no attempt at all, the host itself has probably lost network or power, which the offline alert would have caught had it been working.
Conclusion
Start with one thing tonight: flash OctoPrint onto a Raspberry Pi, connect the printer with a known-good USB data cable, and watch the temperatures respond on the web interface from your phone on home Wi-Fi. That single test takes twenty minutes and tells you whether your printer and your network are ready for everything that follows.
Then add remote access the safe way, with a mesh VPN such as Tailscale on the host and your phone, rather than forwarding a port. Your printer stays invisible to the open internet, and the setup takes a few minutes instead of an evening of firewall troubleshooting.
Before you trust any of it with a long or expensive job, run a short test print and confirm the live feed, the temperature readings, the camera and the failure alert all work from off-site. Once that test passes, remote monitoring for a 3D printer is done, and you can start overnight jobs without checking on them every twenty minutes.