Vapor smoothing an ABS print means suspending it above acetone in a container that is closed but never sealed, so the vapour softens the outer skin until the layer lines melt into a glossy shell. Learning how to vapor smooth ABS safely is mostly about the setup: the right container, gloves that actually resist acetone, real ventilation, and a cooling phase most people skip. A full run takes 20 to 40 minutes plus hours of curing, and the skill is moderate.
That last part matters more than it sounds. Acetone’s flash point sits near -18 C, which means it gives off ignitable vapour at any indoor temperature you would ever work in. Nothing about this technique is difficult chemistry, but every failure comes back to a hard rule: the vapour must never be trapped, never meet a spark, and never reach your face.
Before the equipment list, three rules cover most of the risk. Never seal the chamber, because concentrated acetone vapour inside a closed box can sit in the explosive range. Keep every ignition source out of the workspace, including pilot lights and space heaters. Ventilate with an extract fan that pulls air out of the room, not a recirculating fan that pushes it back at you.
Table of Contents
- What You Need to Vapor Smooth ABS Safely
- Step-by-Step
- How to Vapor Smooth ABS Safely in a Controlled Chamber
- Cool the Part Gradually
- Inspect and Repeat the Cycle
- Common Mistakes
- Frequently Asked Questions
- Is vapor smoothing ABS safe for home workshops?
- What temperature should I use when vapor smoothing ABS?
- Can I vapor smooth a printed ABS part without a dedicated chamber?
- How long does ABS vapor smoothing take?
- Does vapor smoothing make ABS parts waterproof or stronger?
- Can I use acetone instead of vapor smoothing for ABS?
- Conclusion
What You Need to Vapor Smooth ABS Safely
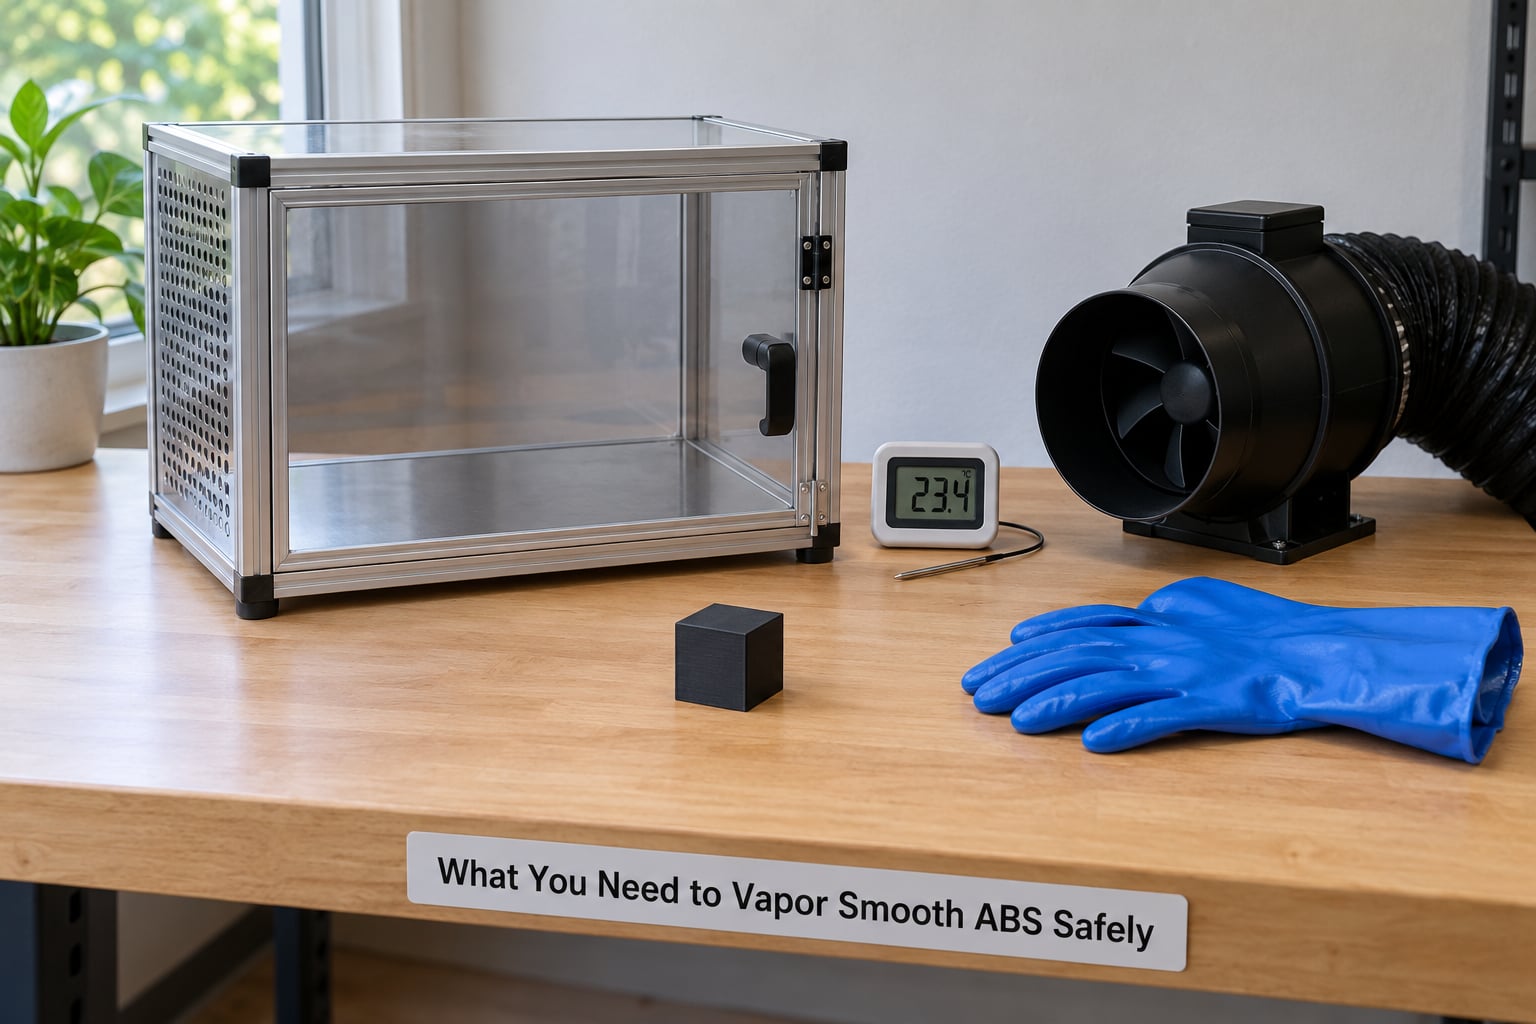
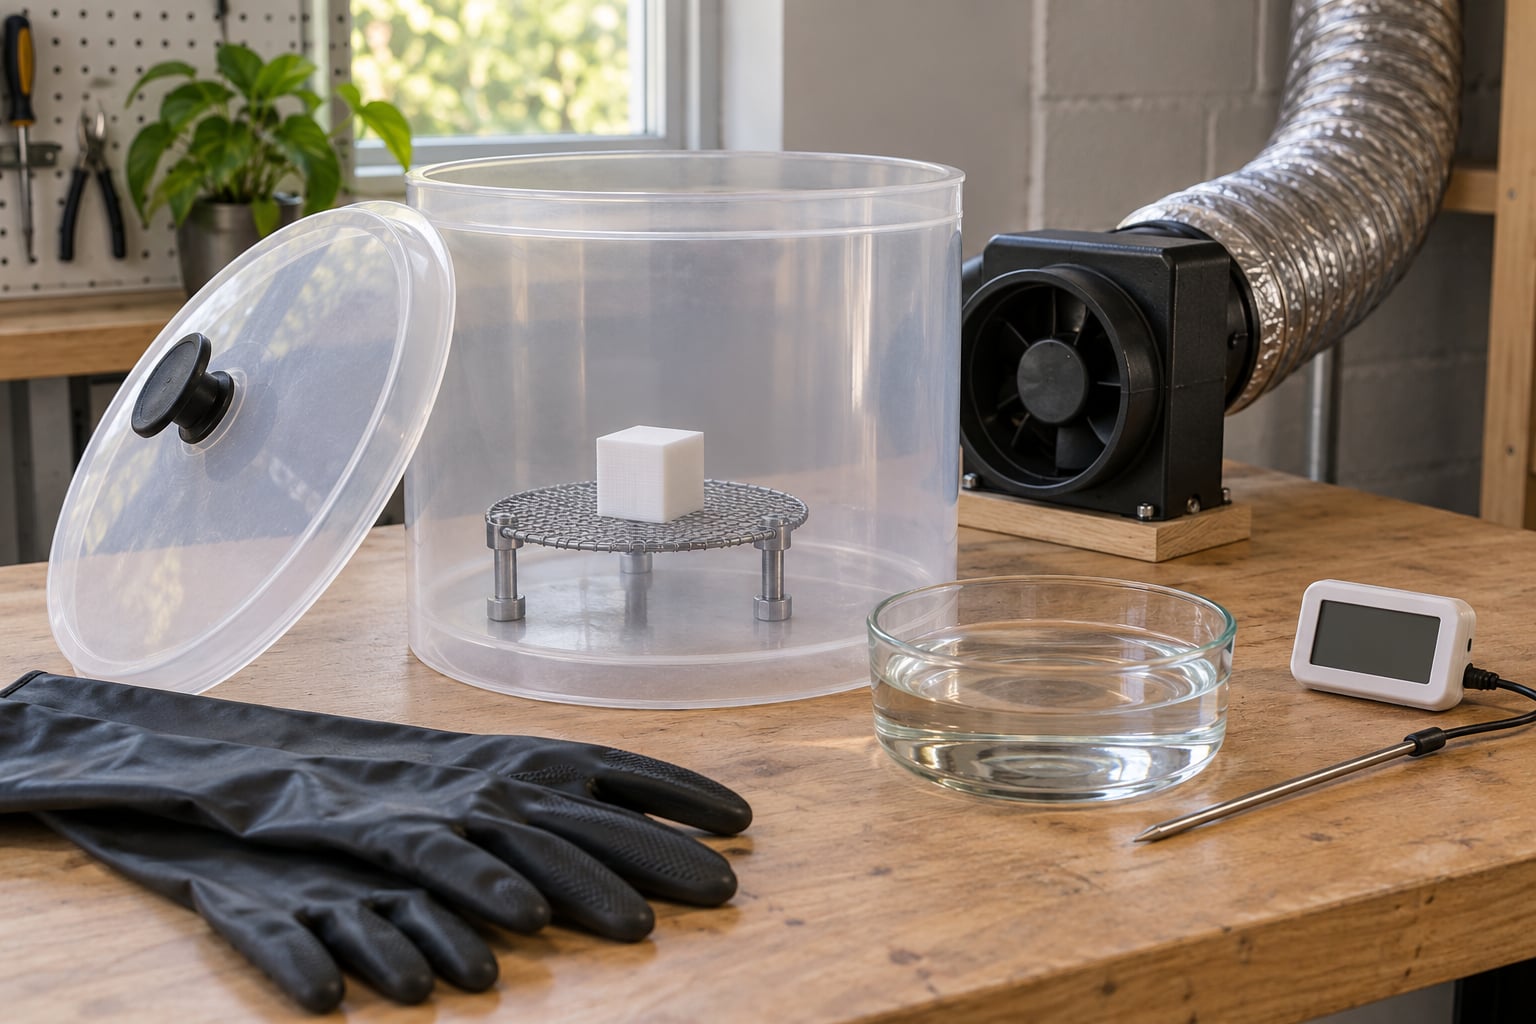
The single most important purchase is the container. It has to be a material acetone cannot touch, and it has to vent. A polypropylene tub, a glass jar with a loose lid, or a purpose-built smoothing chamber all work. An ABS or ASA container does not, and neither does anything made from those plastics, because acetone dissolves them just as readily as it dissolves your print.
What sits under the part matters too. A raised metal platform keeps the print above any liquid, and a small metal or glass dish to hold the acetone goes underneath that. Never let liquid acetone touch the part directly; a droplet leaves a permanent crater and a foggy ring that no amount of sanding fixes.
- Container: polypropylene tub or glass jar, lid loose or unsealed. A gasket-lid clamp jar is the one thing you must not use.
- Platform: a rack, mesh, or perforated metal sheet that holds the part 3 to 5 cm above the acetone.
- Acetone: hardware store acetone and nail polish remover are the same solvent, so either works. Keep it in its original container.
- Thermometer: a digital probe or a thermometer rated well above the temperatures you will use, readable through the chamber wall.
- PPE: splash goggles, a chemical glove that is not nitrile (see the note below), and an organic vapour respirator if your room has no extract fan.
- Ventilation: a window cracked open plus a fan, or an extract fan ducted outside.
- Test prints: at least three small ABS coupons of different wall thickness, plus one sacrificial coupon you do not mind ruining.
On gloves, most people get this wrong. Nitrile feels like the chemical glove everyone owns, but permeation data does not recommend it for acetone; it breaks down quickly. Neoprene and natural rubber hold roughly ten minutes of breakthrough time, which is fine for placing and removing a part but not for a spill. For sustained contact, a laminated or butyl glove is the right pick. Buy the laminated ones.
The respirator is worth a sentence of detail. An NIOSH-approved organic vapour cartridge means the cartridge is rated for organic vapours, not that it filters everything. It will not supply oxygen, and it will not protect against vapour concentrations high enough to overwhelm it, which is why ventilation comes first and the respirator is the second layer.
Finally, know which filaments respond. This saves people from ruining a roll of the wrong plastic.
| Filament | Acetone vapour response | Verdict |
|---|---|---|
| ABS | Melts and fuses cleanly at the surface | Use it |
| ASA | Same response as ABS, slightly slower | Use it |
| HIPS | Softens and smooths well | Use it |
| PLA | No response at any exposure | Skip it |
| PETG | No response | Skip it |
| PVB | No response, may cloud | Skip it |
| Polycarbonate | Crazes and cracks before it smooths | Skip it |
| Nylon | No response | Skip it |
| TPU | No response, can go tacky | Skip it |
Isopropyl alcohol will not smooth PLA either. Nothing short of a solvent the plastic actually dissolves will, so if you have a PLA part in hand, sand and prime it.
Step-by-Step
Work cold first. The unheated method is slower but far easier to control, and it is the version worth learning before you add heat. Read these steps through once, then run the whole workflow on a test coupon.
1. Dry the part completely. ABS holds moisture, and water inside the chamber turns into vapour that interferes with the finish. A warm oven or a hair dryer on low for an hour is enough.
2. Finish the surface first. Acetone flows, so it magnifies everything you leave behind. Sand to at least 220 grit, fill remaining gaps, and scrape off seam lines and support scars. Smoothing will not hide a bad seam; it will make it shinier.
3. Set up the chamber away from ignition sources. Do this on a non-porous surface, with the extract fan running and the window open, before the acetone comes out of the bottle.
4. Add acetone to the dish. A shallow layer of roughly 5 mm is plenty. More acetone fills the chamber faster than it needs to and pushes concentration toward the vapour’s explosive range.
5. Place the part on the raised platform. Give it clearance on every side, and leave enough gap that you can lift it out without tilting it into the liquid.
6. Close loosely and start the clock. The lid rests on. It is not screwed, clamped, or taped shut.
How to Vapor Smooth ABS Safely in a Controlled Chamber
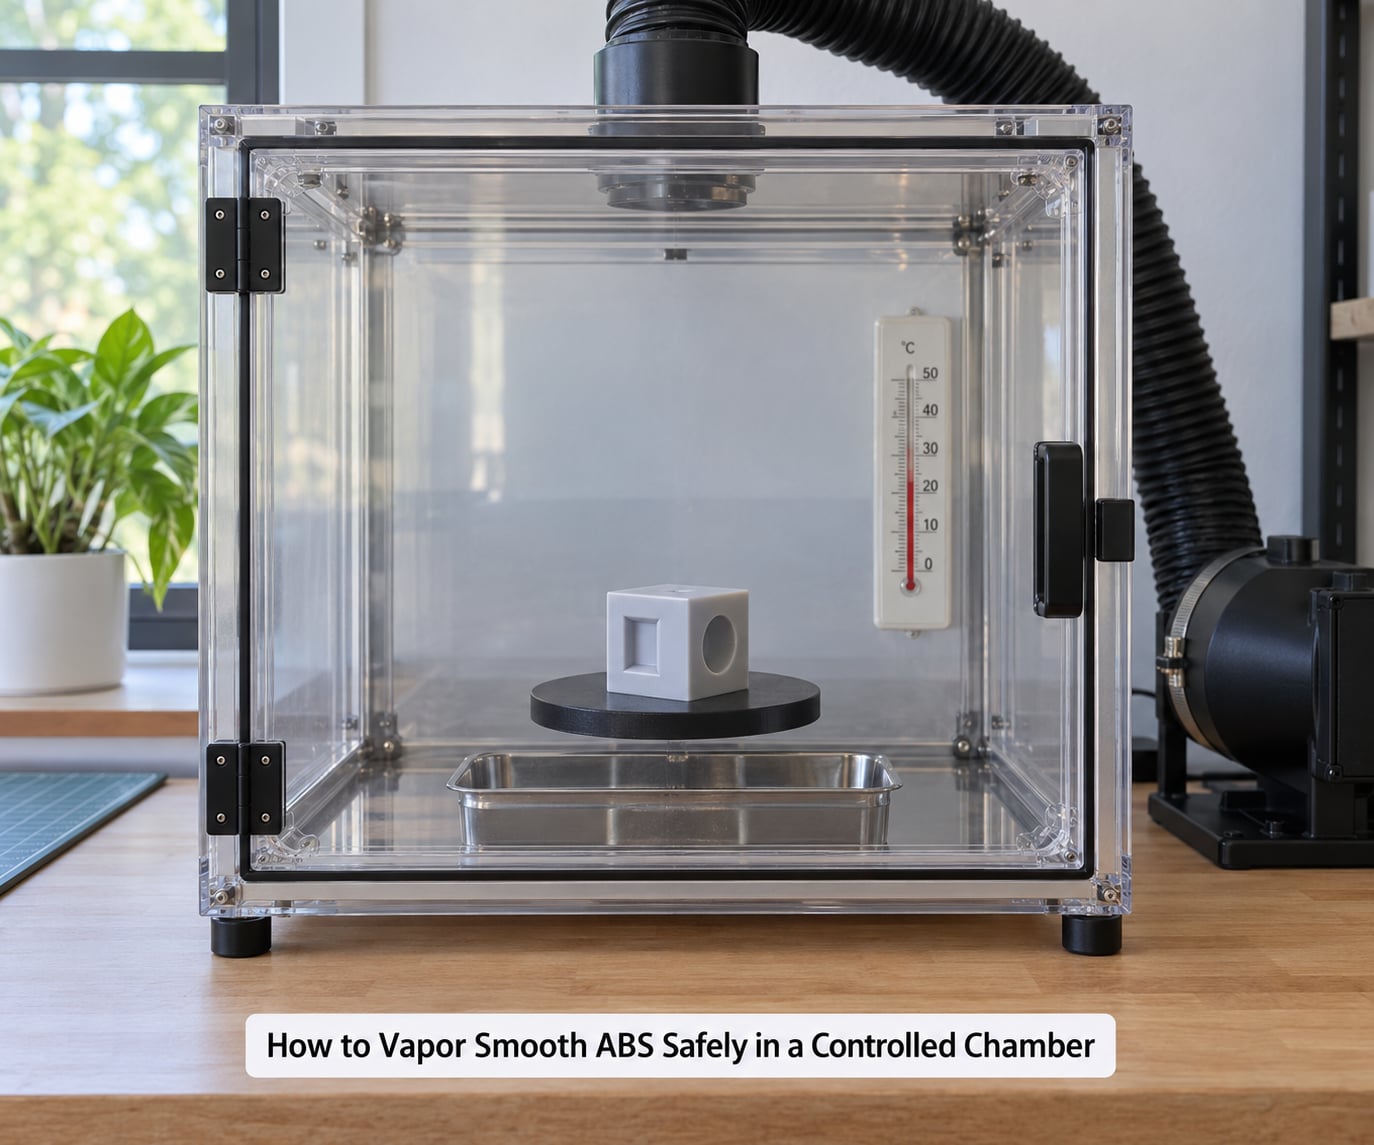
The word doing the work here is controlled. Uncontrolled means a sealed jar on a warm shelf with no thermometer and no idea what is happening inside.
Start with a short test cycle on the sacrificial coupon. Check it at ten minutes, then every five minutes after that, lifting the lid only briefly. What you are watching for is layer lines softening and the surface going from matte to a uniform sheen.
Warmth accelerates the whole process. A chamber at ambient temperature can take an hour or two; warmed to roughly 60 to 80 C it finishes in minutes, which is far too fast to react to. If you add heat later, treat the first run as unknown and check more often.
Two practical notes from people who have done this a lot. Keep the fan ducted outside or well away from the chamber, since a fan motor sitting in the vapour stream is a problem nobody needs. And if your cosplay armour carries LEDs or a control board, keep that electronics out of the chamber entirely, not just away from the acetone pool, because vapour travels.
Nobody working in a home workshop measures parts per million of acetone, so use the symptom rule instead. If you notice a sharp sweet smell at the doorway, a headache, or nausea, ventilation is inadequate. Shut the chamber, open the window fully, and step out. Acetone is colourless and you will smell it before you feel it.
Cool the Part Gradually
The most common way to ruin a good run is to pull the part out and drop it on a cold bench. ABS that has just been softened is still relaxing internally, and a thermal shock cracks it or bows it along the same direction it came off the plate.
Leave the part in the chamber and let everything come down together. Open the lid a crack rather than fully, and give it at least an hour. A part removed at room temperature and left in still-moving air will finish without warping.
Then do not touch it. The surface feels firm long before it is finished off-gassing, and a fingerprint at that stage stays for the life of the part. Leave the part alone for several hours, ideally overnight, before sanding, priming, or fitting anything to it. Parts that still smell of acetone days later are simply still releasing solvent, not a failed run.
Inspect and Repeat the Cycle
Judge the result on four things: whether the layer lines have closed, whether the gloss is even across all faces, whether any sharp detail has rounded off, and whether the part has changed shape.
If the print still shows layer lines after a full cycle, the usual cause is not enough vapour concentration. Add acetone in small increments to the existing dish rather than starting fresh, and run again. If the surface went patchy and dull, you pushed it too far, and further exposure will only make it worse. Sand back lightly and accept the result.
Detail loss is not a tuning failure, it is chemistry. Engraved text, thin fins, and crisp edges are the first things to go. Fill them with epoxy or filler before smoothing, sand them back flush after, and you keep features the solvent would otherwise eat.
Times vary by chamber volume, wall thickness, temperature and filament brand. Treat any published number as a starting checkpoint, not a setting to copy, and run one more coupon before you commit a part you care about.
Common Mistakes
Sealing the chamber. The single most dangerous error. A lid that clamps or a rubber gasket traps vapour inside its explosive range. Rest the lid on and walk away.
Using an ABS or ASA container. It looks like the right shape and it dissolves. The container gets sticky and cloudy long before the print does, and you have lost both.
Heating inside the chamber. A hot plate under the box is fine. A stove, a candle warmer, or an open coil inside it is not, and that warning comes up in nearly every forum thread on this topic because people try it.
Liquid touching the print. A five millimetre pool is vapour, not a bath. Direct contact craters the surface permanently.
Nitrile gloves for handling. They fail against acetone faster than most people expect. Laminated or butyl gloves for spills, neoprene or natural rubber for quick handling.
Recirculating the air. A standard desk fan moves contaminated air toward your face. You want air leaving the room.
Cooling too fast. Cracks, bows, and a warped part that still looks glossy. See the cooling section above.
Smoothing fit-critical parts. Vapor smoothing changes dimensions slightly and rounds edges. Gaskets, threaded fits, snap-together assemblies, and anything that has to press into a hole should be sanded and primed instead.
Expecting coating. Vapor smoothing fuses the print’s own outer layer. It is not a clear coat, and it will not hide pinholes or a bad first layer.
One more that comes up: using acetone to weld two ABS parts together. Same solvent, different goal. Solvent welding wets the mating faces and presses them together; smoothing works on a surface exposed to vapour. Do not try to weld inside a chamber.
Frequently Asked Questions
Is vapor smoothing ABS safe for home workshops?
It is safe when the chamber vents, the workspace ventilates, and no ignition source is nearby. It is not safe in a sealed jar, a closed spare room, or anywhere near a pilot light or space heater. Ventilation is the whole ballgame: an extract fan pulling air out of the room, gloves that resist acetone, and splash goggles whenever the bottle is open.
What temperature should I use when vapor smoothing ABS?
Start at room temperature, where a run takes one to two hours and is easy to control. Warmth speeds it up sharply, so if you move to a warm chamber around 60 to 80 C, check the part every few minutes instead of every ten. Many people never need heat at all once they learn to watch the surface rather than the clock.
Can I vapor smooth a printed ABS part without a dedicated chamber?
Yes, and most first runs should. A glass jar or polypropylene tub with a loose lid works, provided the part sits on a raised platform above a shallow dish of acetone. The material matters more than the shape: anything made from ABS or ASA will be dissolved by the solvent, and any jar with a sealing gasket is unsafe because it traps vapour.
How long does ABS vapor smoothing take?
At room temperature, usually one to two hours for a full gloss. Warmed, it can finish in 20 to 40 minutes, which is fast enough that you can overshoot in seconds. Treat times as checkpoints and check early. Filament brand, wall thickness and chamber volume all shift the result, so run a cheap coupon before a part you care about.
Does vapor smoothing make ABS parts waterproof or stronger?
It closes the surface layer lines, which makes parts easier to wipe clean and slightly tougher against handling, but it does not make them waterproof or load-bearing. Vapour only affects the outer skin. If you need real strength or a sealed joint, use solvent welding or a printed-in mechanical fit instead of smoothing.
Can I use acetone instead of vapor smoothing for ABS?
A damp cloth or paper towel wiped across sanded ABS gives a quick, semi-gloss surface without any chamber, and it is the technique most often recommended in cosplay forums. The trade-off is inconsistent coverage on curved or detailed areas. Either way, wear gloves and ventilate, and let the part off-gas for hours before handling it.
Conclusion
The safest first action is the cheapest one: run the entire workflow once on a small ABS coupon in a ventilated workspace before you put a part you care about inside. Loose lid, glass or polypropylene container, part raised above a shallow dish, extract fan running, laminated gloves on, and a walk-away cooling period before you touch it.
Once that one run works, the technique stops being a chemistry problem and turns into a timing one. Watch the surface, not the timer, and raise your own checkpoints as your chamber and filament prove themselves.