Yes, you can 3D scan an object with a phone and get a model good enough to print, put in a game, or drop into AR. Most apps work by photogrammetry, which means they rebuild the shape from dozens of overlapping photos, and a few newer iPhones add a LiDAR depth sensor that measures distance directly. A first scan takes about 15 minutes once you know the routine, and the hardest part is honestly lighting, not software.
The workflow below is the one I keep coming back to: pick an object with texture, give it soft light from several directions, walk around it in three rings, then clean up the mesh before you export. Skip any one of those and the app will still produce a model, just a bad one.
Table of Contents
- What You Need
- How to 3D Scan an Object With a Phone: Step by Step
- 1. Choose a Phone Scanning App
- 2. Prepare the Object You Want to 3D Scan
- 3. Set Up Lighting and Camera Controls
- 4. Capture the First Photos and All Angles
- 5. Process the Scan and Build the 3D Model
- 6. Inspect, Repair, and Export the Model
- Common Mistakes
- Frequently Asked Questions
- Can I really 3D scan an object with just my phone?
- Which phone scanning app is best for beginners?
- What kinds of objects can I scan with a phone?
- How many photos do I need for a 3D scan?
- Can I 3D print a model made with a phone?
- Why does my phone scan have holes or missing surfaces?
- Conclusion: Start With a Clean Capture
What You Need
Surprisingly little. Grab these five things and you are ready:
- A phone. Any recent iPhone or Android phone with a decent rear camera does the job. A dedicated depth sensor helps with featureless objects but is not required.
- A scanning app. One that supports object photogrammetry and lets you export a mesh, not just a video preview.
- An object with texture. Matte, slightly rough surfaces with visible detail in every direction scan far better than smooth, shiny, or clear ones.
- Soft, even lighting. A window on an overcast day, or two lamps with diffusing material. This matters more than the app you pick.
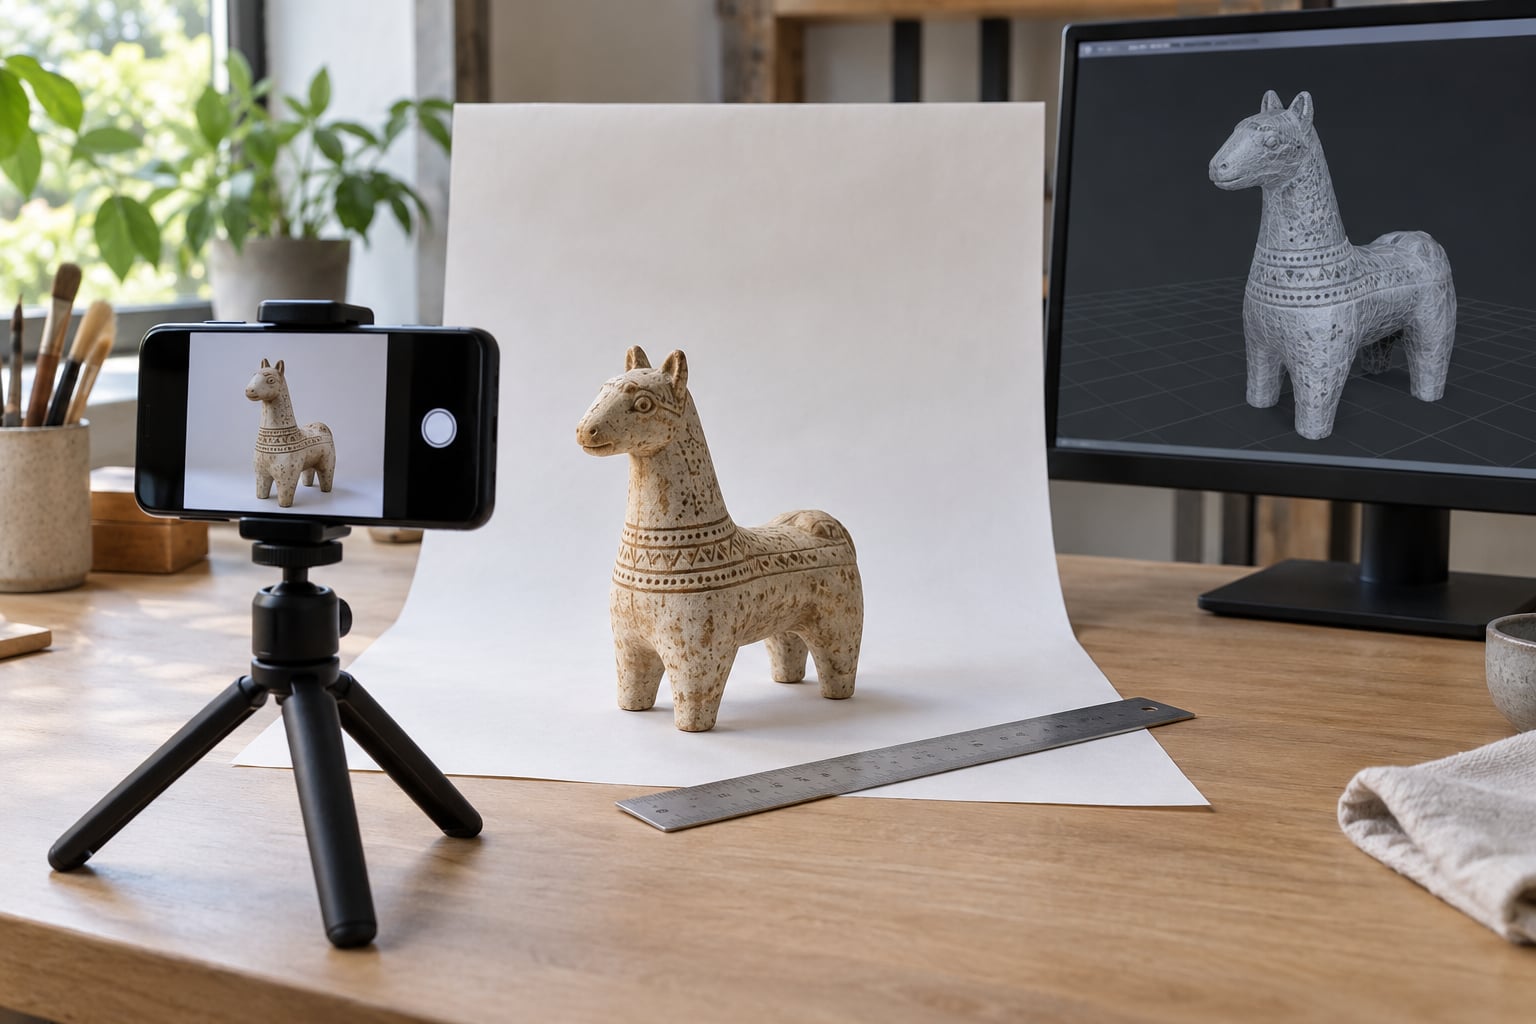
- A plain surface and a ruler. A sheet of paper or matte board, plus a ruler or a printed scale bar. The ruler is what stops your model coming out the wrong size.
Give the object a minute of prep too. Dust off loose powder, pull it away from walls so it can cast a shadow, and clear anything reflective within reach of the camera.
How to 3D Scan an Object With a Phone: Step by Step
1. Choose a Phone Scanning App
Install the app before you touch the object, because capture quality depends on it more than anything except light. Look for four things: object mode (not room or face mode), photo or video capture, automatic mesh generation, and export to STL or OBJ.
Scaniverse is the common starting point because it is free and processes on the phone itself, so your photos never leave the device. KIRI Engine does the best job on trickier objects, with AI object masking that separates the subject from a busy background. RealityScan is another free option that handles textured surfaces well. Polycam is the go-to for rooms and for LiDAR iPhones, though its free tier limits exports, so check what you can actually save before you spend an hour capturing.
Menus and labels differ between apps and between iOS and Android, so treat the names below as landmarks rather than exact tap targets.
2. Prepare the Object You Want to 3D Scan
Photogrammetry works by finding distinctive features in each photo and matching them across shots. A flat white mug gives it almost nothing to match, which is why smooth objects come back as holes or melted blobs.
Place the object on a plain, non-reflective background and keep it still. Wipe off dust and fingerprints, and if the surface is glossy, a light coat of matte scanning spray or even a thin layer of chalk dust gives the software something to grip. Do not move the object once capture starts, not even to check the screen.
3. Set Up Lighting and Camera Controls
Set up soft light coming from at least two directions, roughly 45 degrees above and to each side. Uneven light creates shadows that the software bakes into the model, and shadows are the number one cause of that chewed-up, lumpy look.
Where your phone allows it, lock focus and exposure before you start so every frame shares the same brightness. Keep the object filling most of the frame, and step back far enough that the whole object stays visible. You are looking for a surface with no hot spots, no hard shadow edges, and no glare.
4. Capture the First Photos and All Angles
Start low and work up, in three rings around the object. The bottom ring covers the base and lower sides, the middle ring circles at object height, and the top ring looks down from above at about 45 degrees. Do the top ring last so you are not reaching over the lights.
On every ring, keep roughly 60 to 80 percent of each photo overlapping the previous one. That overlap is what gives the software enough shared detail to solve for camera position. For a small object, 50 to 100 photos is a normal target.
Turn the object over or lift it for the underside, and get down low enough to photograph any recessed area. A capture is complete when every part of the object appears in at least three photos, with the previous photo still visible at the edge of the frame when you raise the camera.
5. Process the Scan and Build the 3D Model
Open the app, import the photos, and isolate the object if the app offers an automatic mask. On-device apps like Scaniverse begin reconstructing immediately; cloud-based apps upload first, so check your connection and privacy settings before a long capture.
The app matches features across photos, works out where the camera stood for each shot, triangulates those matches into a point cloud, and then fits a mesh over the top. Processing takes anywhere from a minute on a recent phone to several hours in the cloud. If a high or medium quality setting is offered, pick it for textured objects and low for a quick test.
6. Inspect, Repair, and Export the Model
Orbit the finished model and look for problems before it leaves the app. Watch for holes, floating geometry outside the subject, spiky noise, and areas that look stretched or dented. Most apps offer a cleanup pass that removes disconnected pieces and smooths the surface, which fixes most of what beginners complain about.
Check the scale against your ruler before exporting. If the model is off, set the real-world length rather than eyeballing it in the slicer later. Then export as STL for 3D printing, or as OBJ or PLY when you plan to remesh in a program like Blender.
If the mesh has open holes, a slicer will either refuse the file or print a broken shell, so run it through your printer’s repair tool, or in MeshLab, before slicing. Plenty of people also treat the raw scan as a reference model and rebuild clean geometry by hand, which produces a much stronger part than a thin scanned shell.
Common Mistakes
Almost every bad phone scan comes from one of a handful of causes. Read the symptom, find the row, fix that one thing on the next pass.
| What the model looks like | What caused it | How to fix it |
|---|---|---|
| Melted or lumpy surfaces | Harsh, uneven light and hard shadows | Add a second light source and kill every hard shadow |
| Holes or missing sides | Not enough overlap, or too few angles on that face | Retake with 60 to 80 percent overlap and a dedicated ring per side |
| Ghosted or doubled edges | Background or nearby objects in frame | Move to a plain background and use object masking |
| Blurry, smeared texture | Camera movement or a missed focus lock | Move slower, tap to lock focus, and clean the lens |
| Pointless white blob | Surface has no texture, or is shiny, clear, or very dark | Add matte spray, or scan only the parts with visible detail |
| Model is the wrong size | Photogrammetry has no absolute scale | Include a ruler or scale bar, then set the true length on export |
| Curved or banana-shaped base | Tracking drift, often from a spinning turntable | Orbit by hand with the object completely still |
| Floating scraps around the model | Cluttered surroundings captured by accident | Clear the area, then use the isolation or cleanup step |
Two habits fix most of the table above. Photograph the object rather than spinning it on a turntable, because a rotating object breaks feature tracking and drags the whole model sideways. And if a scan is going wrong, delete it and start again rather than trying to repair your way out of a bad capture.
Undercuts and thin features deserve their own warning. Chair legs, wire frames, handles, and anything with a smooth curve of its own often disappear or come out as disconnected fragments, because the camera can never see straight into those gaps. If that part matters, scan the object for reference and model the geometry yourself.
On accuracy, a phone scan typically lands within a few millimeters of the real thing, which is fine for display pieces, custom parts, and game assets. It is not a measurement tool, and it will not hold a tight engineering tolerance.
Frequently Asked Questions
Can I really 3D scan an object with just my phone?
Yes. A modern phone camera plus a photogrammetry app is enough to build a textured 3D model of most everyday objects. Phones with a LiDAR or depth sensor handle featureless and shiny subjects a little better, but the sensor is a bonus rather than a requirement. Expect accuracy within a few millimeters, which suits printing display pieces and custom parts rather than precision measurement.
Which phone scanning app is best for beginners?
Scaniverse is the easiest starting point because it is free and processes everything on the phone. KIRI Engine handles difficult objects better, especially shiny or featureless ones, thanks to automatic object masking. RealityScan is another solid free option for textured subjects. Whichever you pick, confirm it exports STL or OBJ, since some free tiers only save a preview format.
What kinds of objects can I scan with a phone?
Matte, textured objects work best: ceramic figurines, stone statues, shoes, brackets, toys, and anything with a rough or slightly dusty surface. Shiny chrome, mirrors, clear plastic, glass, very dark objects, and smooth featureless shapes are the hardest. Thin parts and deep undercuts also tend to vanish, so scan those as a reference and remodel them by hand.
How many photos do I need for a 3D scan?
For a small object, 50 to 100 photos is a sensible target. The count matters far less than the overlap, so keep each new photo about 60 to 80 percent the same as the one before it and work in three rings: low, level with the object, then a high ring looking down at roughly 45 degrees. More photos taken badly will not rescue a scan with poor overlap.
Can I 3D print a model made with a phone?
Yes, after a few fixes. Export as STL, set the real-world scale using a ruler you photographed, then check the mesh for holes and stray geometry. A scanned shell is often thin and hollow, so add a small wall thickness in your slicer or reinforce it. For a part that has to hold load, remodel the scan in a mesh editor or CAD program instead of printing it raw.
Why does my phone scan have holes or missing surfaces?
Holes almost always mean the software had too few overlapping views of that area. It happens when photos skip between angles, when the object rotates during capture, or when a side was never photographed from enough low and high angles. Retake the capture in three steady rings, keep 60 to 80 percent overlap, and make sure the object stays completely still.
Conclusion: Start With a Clean Capture
Learning how to 3D scan an object with a phone comes down to three habits: install an app that exports a real mesh, light the object softly from more than one direction, and walk around it in three steady rings with 60 to 80 percent overlap. Get those right on a matte, textured object and the model builds itself. Set the scale with a ruler before you export, run the cleanup pass, and your first scan is a usable 3D file. The first dozen scans will be uneven, so pick something simple, not a chrome mug.