To make 3D prints watertight you have to close every hole in the mesh before it reaches the slicer, and the fix depends on what kind of damage you found. A boundary edge from a missed face needs a different repair than duplicate geometry, a flipped normal or a shell intersecting itself. This workflow walks through inspection, repair in the source CAD file or in Blender 4.2 or newer, automatic STL repair for small defects, and final validation in a mesh checker and your slicer.
The whole process takes 15 minutes on a clean model and closer to an hour on a scanned or sculpted mesh. Getting it wrong is expensive in a quiet way, because a model with a stray hole often slices and prints without complaint, then fails weeks later when it is full of water.
Table of Contents
- What You Need
- Step-by-Step: How to Make 3D Prints Watertight
- Inspect the Mesh and Locate Defects
- Fix the Model in the Original CAD Software
- How to Make 3D Prints Watertight in Blender 4.2+
- Use an STL Repair Tool for Small or Complicated Defects
- Remove Self-Intersections and Internal Surfaces
- Export with Settings That Preserve the Surface
- Validate Watertightness Before and After Slicing
- Common Mistakes
- Tips for Preventing Watertightness Problems
- Frequently Asked Questions
- Is a watertight 3D model also waterproof?
- Can I make an STL watertight without Blender?
- Why does my slicer say the model is not watertight?
- Should I repair the STL or change the original CAD file?
- How do I fix an intentional hole without ruining the print?
- Conclusion
What You Need
Watertight geometry means one thing precisely: every edge is shared by exactly two faces, every vertex is shared by a connected set of faces, and there are no gaps anywhere in the surface. A closed shell that water cannot escape from. That is a different claim from waterproof, which adds pressure, temperature and time.
Before you repair anything, find out where the file came from. If you still have the original parametric CAD model, every fix below happens there and the STL stays a disposable export. If all you have is an STL or 3MF, you are working on a frozen mesh and every repair is permanent damage you cannot easily undo.
- The source file — the original CAD document if it exists, otherwise the STL or 3MF you intend to print.
- Blender 4.2 or newer — for manual mesh repair with Select All by Trait, Merge by Distance, normals recalculation and hole filling.
- An STL repair tool — Repair STL or Meshmixer, both free, for hole detection and automatic fixes on small defects.
- A mesh checker — Blender’s own statistics panel is enough, but a dedicated checker gives clearer boundary edge output.
- A slicer — PrusaSlicer, OrcaSlicer or Cura. All three flag non-manifold geometry before they slice.
Step-by-Step: How to Make 3D Prints Watertight
Nine fixes cover nearly every broken model you will meet. Work through them in order, from the source file outward, and check the mesh after each one rather than repairing everything and hoping.
Use this table to jump straight to the repair for what you are seeing.
| Symptom in the mesh checker | Likely cause | Fix |
|---|---|---|
| Open edges, boundary edge count above zero | A face is missing | Close open surfaces, or fill the hole |
| Non-manifold edges | An edge shared by three or four faces | Merge duplicate geometry, dissolve the extra faces |
| Loose faces outside the model | Stray triangle from a failed boolean | Delete loose geometry |
| Inverted shading on part of the surface | Flipped face normals | Recalculate normals outside |
| Zero thickness, geometry inside a cavity | Internal shell or intersecting solids | Remove internal faces and self-intersections |
| Large hole, no sensible fill | Missing chunk rather than a missing face | Bridge the edge loop or rebuild in CAD |
Inspect the Mesh and Locate Defects
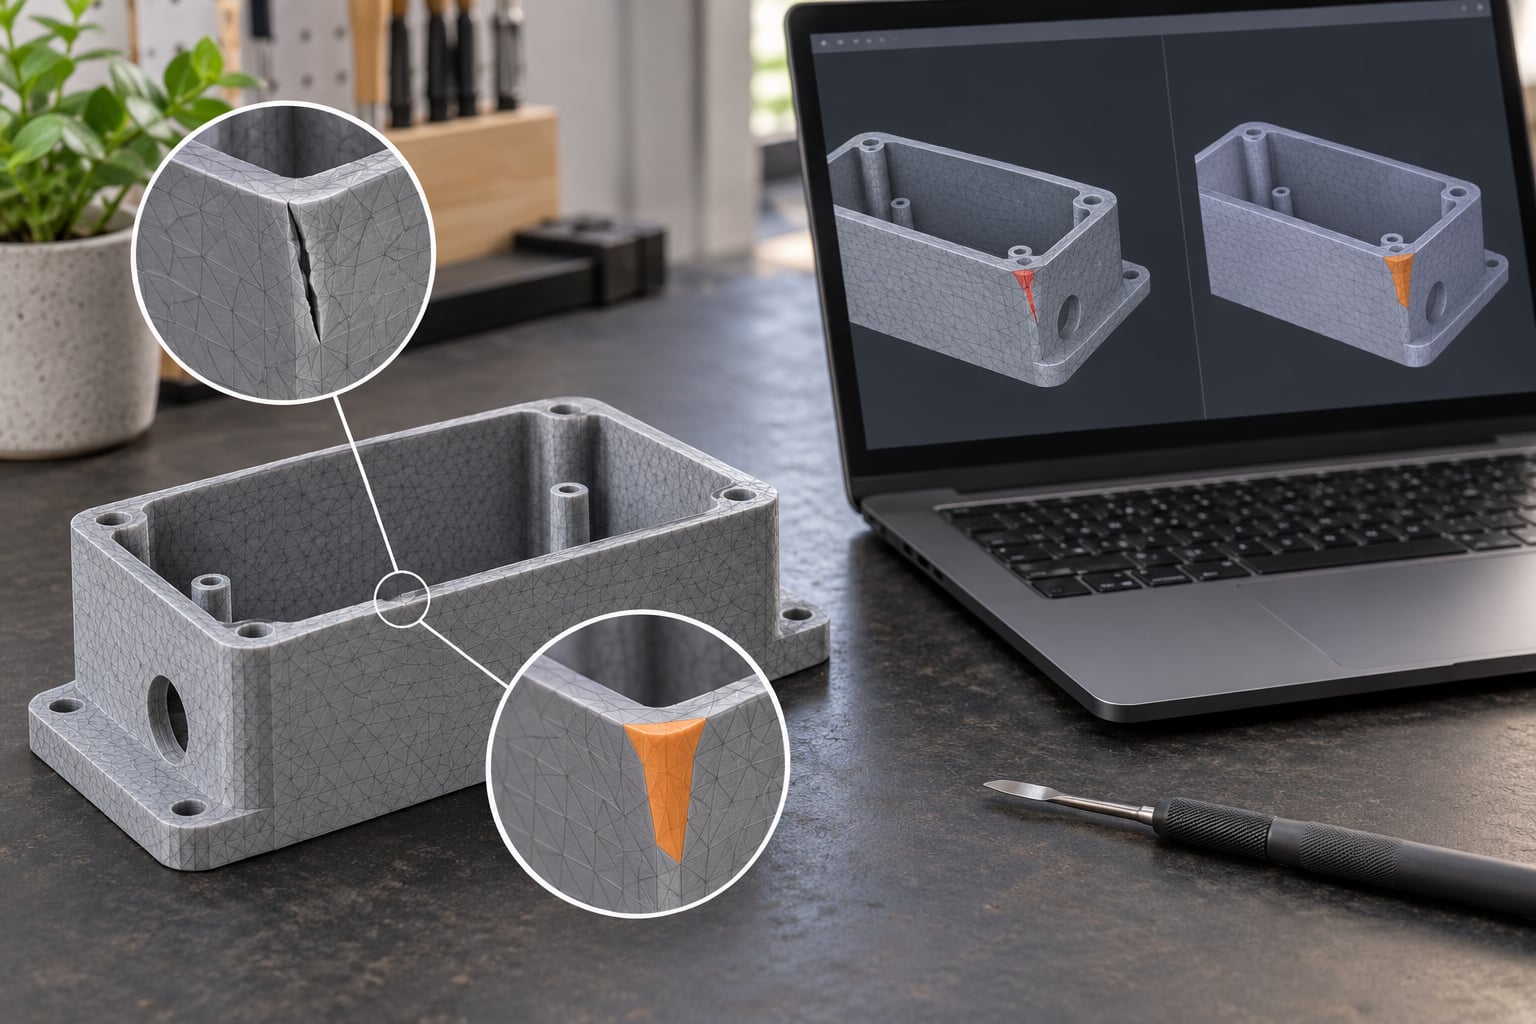
Start by establishing a baseline, because an automatic repair applied to a mesh you have not measured will change geometry you did not intend to change. Import the file into Blender and press N to open the sidebar, then choose the wrench icon and the Statistics tab. It reports vertices, edges, faces, loose geometry, and whether the mesh is manifold.
Switch the viewport shading to Wireframe, or leave Solid on and press Z then M to overlay faces so every triangle is drawn. Orbit around the model and look for wireframe lines that break into a single dangling strand at their endpoint. That strand is a boundary edge, and it is usually where the hole is.
Zoom in on anything that looks off and check it against the checker output. A model can report three manifold violations, all clustered within 2 mm of each other, which usually means one failed boolean rather than three unrelated problems.
Fix the Model in the Original CAD Software
If the parametric model still exists, this is the right place to repair. A parametric edit leaves the model editable, so later changes will not break the seal again.
Close open surfaces in the source by checking for suppressed or failed features, untrimmed surface bodies that never became solids, and shells too thin for the kernel to close. Remove duplicate geometry, which usually comes from an overlapping copy or a leftover construction body. Correct face orientation by rebuilding the solid from a sketch rather than reversing faces one by one.
Apply your intended wall thickness here too. A 0.4 mm wall in CAD is well inside the range where export and repair tools start creating problems; 1.2 mm or more is far safer. Then export a fresh STL with the settings covered in step six.
How to Make 3D Prints Watertight in Blender 4.2+
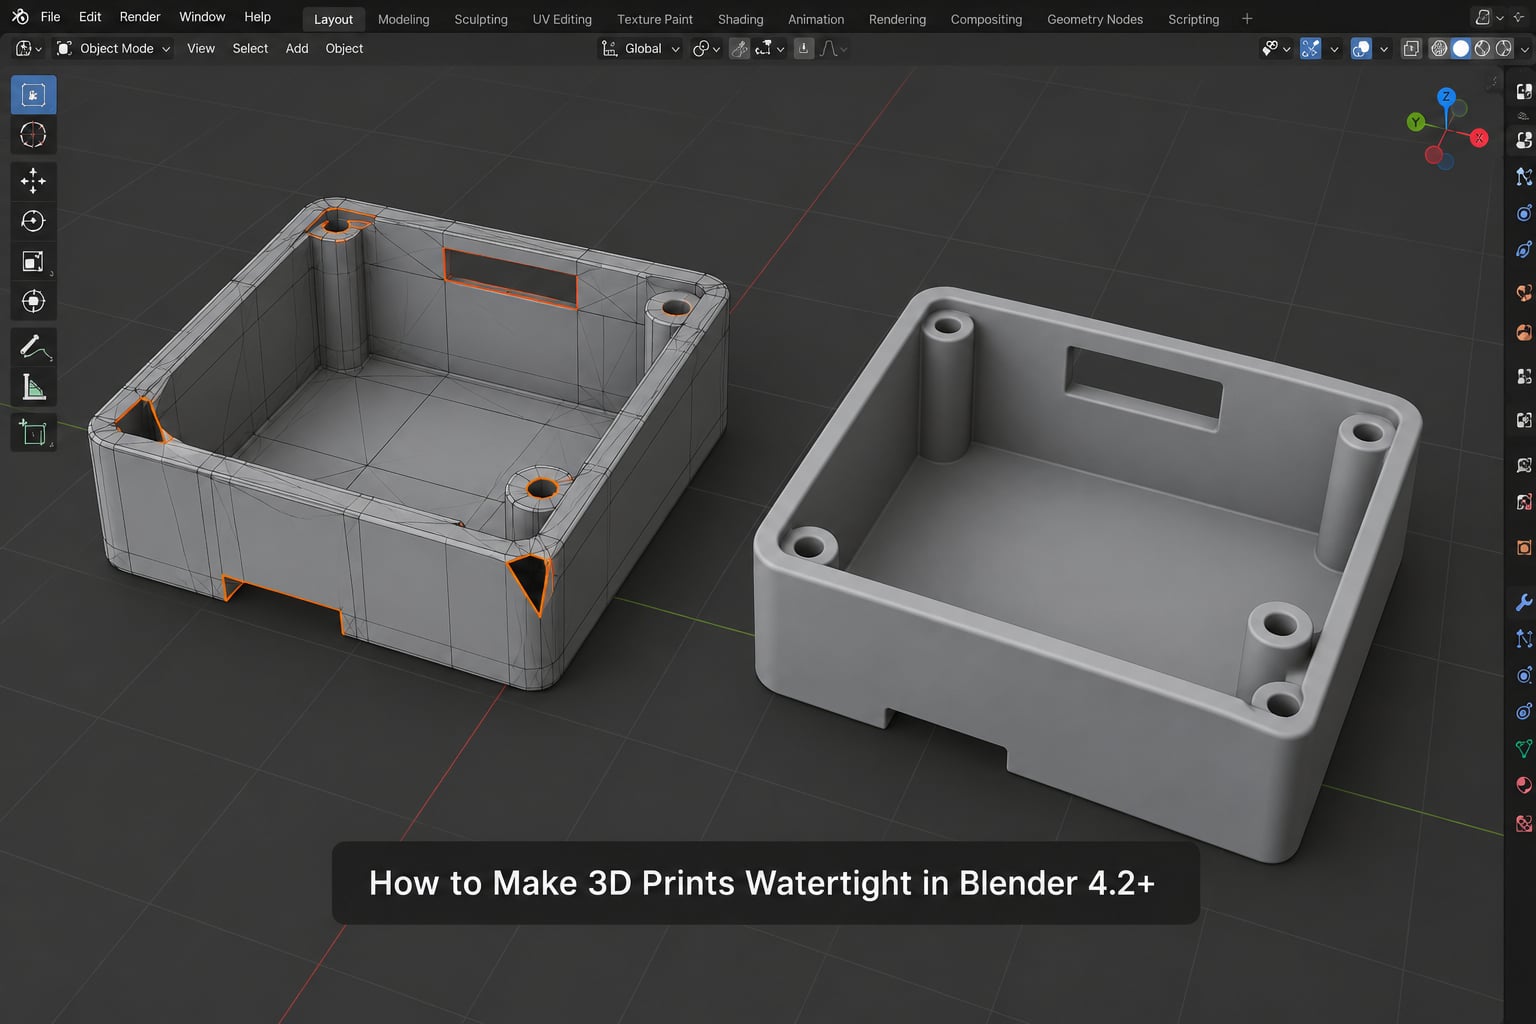
Tab into Edit Mode and use Select, then All by Trait, then Non Manifold. Blender selects every edge and vertex that breaks the two-faces-per-edge rule, which gives you an exact list rather than a visual guess.
Fix 1 closes open surfaces. With the boundary edges selected, press F to fill. That works for a missing face whose shape is flat or gently curved.
Fix 2 merges duplicate vertices. Separate the non-manifold vertices only, then Mesh, Clean Up, Merge by Distance with a threshold near 0.0001 m. Duplicates often come from a triangulated import, where two faces that share a position do not share an index.
Fix 3 recalculates face orientation. With everything selected, Mesh, Normals, Recalculate Outside. Do this after merging, not before, since merging can leave a few faces stale.
Fix 4 removes loose geometry. A loose face sitting half a millimetre off the surface usually came from a failed boolean. Select it by trait, then X to delete. Mesh, Clean Up, Delete Loose also catches leftover edges and vertices.
Fix 5 fills small holes. After the boundary selection from earlier, F fills anything with three or four edges. Larger loops refuse to fill, which is the tool telling you the repair would be a guess.
Fix 6 bridges bigger loops. Mesh, Edge, Bridge Edge Loops in Blender 4.2 connects two parallel boundary loops across a genuine gap. For a curved wall, this traces the missing band far better than a flat fill.
Fix 7 dissolves duplicate and internal faces. If an edge is shared by four faces, two solids are overlapping there. Select the internal faces and press X, or use Mesh, Clean Up, Merge by Distance with a larger threshold on the shell itself.
Watch for non-manifold vertices specifically. Blender reports these separately, and they are the most commonly missed problem because the surface looks closed from every angle while still not being manifold.
Where a gap is a real design feature, such as a vent or a cable channel, add a small amount of geometry to bridge it rather than reaching for a broad fill across a whole region. Broad fills flatten detail you will regret losing.
Use an STL Repair Tool for Small or Complicated Defects
Automatic repair is the right choice for pinholes under about half a millimetre, for models too dense to select edges by hand, and for a one-off check before you slice. It is the wrong choice for a model with a large missing chunk, because the tool will produce a plausible surface that is not the surface you designed.
In Repair STL, open the file and look at the number of boundary edges it reports before you touch anything. Fill holes, then run a normal repair to make face orientation consistent, then remove duplicate faces. Repair STL shows you the affected regions so you can confirm each change landed where you expected.
Meshmixer takes a different approach. After import, use Edit, then Analyze to see the problematic areas, and Edit, then Select to isolate one connected component so you can tell a real shell from a stray fragment. Its automatic repair is aggressive on thin walls, so check wall thickness afterwards.
Inspect the repaired result every time. Thin features get bridged over, intentional openings get closed, and a snapped-off detail can come back as a lump.
Remove Self-Intersections and Internal Surfaces
Fix 8 is the one most models skip. Two solids that pass through each other create a surface that looks closed from outside but has geometry crossing in the middle. The result is usually reported as non-manifold, and slicers handle it unpredictably. Select the intersecting shells separately and delete the leftover body, or cut the model apart along the intersection plane if the overlap was unintentional.
Geometry sitting inside an enclosed cavity matters just as much. Many kernels and repair tools treat an internal shell as a separate closed volume, and some slicers will fill the cavity solid or leave a void that prints as trapped air.
The rule is to keep cavities you designed and remove only what got there accidentally. An intended internal chamber, such as a hollow electronics enclosure, should stay as a separate shell with its own wall thickness. An accidental leftover body from a boolean should go entirely.
Recheck wall thickness after the cleanup. Removing an internal face often thins the wall at that junction, and a wall that drops below roughly 0.8 mm will print as a fragile line even though the mesh reports watertight.
Export with Settings That Preserve the Surface
Mesh density cannot repair a missing face. A finer tessellation makes the surface smoother, not more closed, so crank the resolution only after the geometry is sound.
Confirm the units before exporting. A model built at the wrong scale imports either microscopic or enormous, and both produce confusing results in the checker. Apply transforms where the tool expects them, then export with an n-gon or triangulation setting you understand.
Avoid export options that merge separate shells into one object or split a single shell into several. Either behaviour changes the part count, and a repair tool that sees one body where you meant two will weld them together.
Match the surface density to the real dimensions of the part. A 200 mm enclosure and a 20 mm clip do not need the same deviation setting.
Validate Watertightness Before and After Slicing
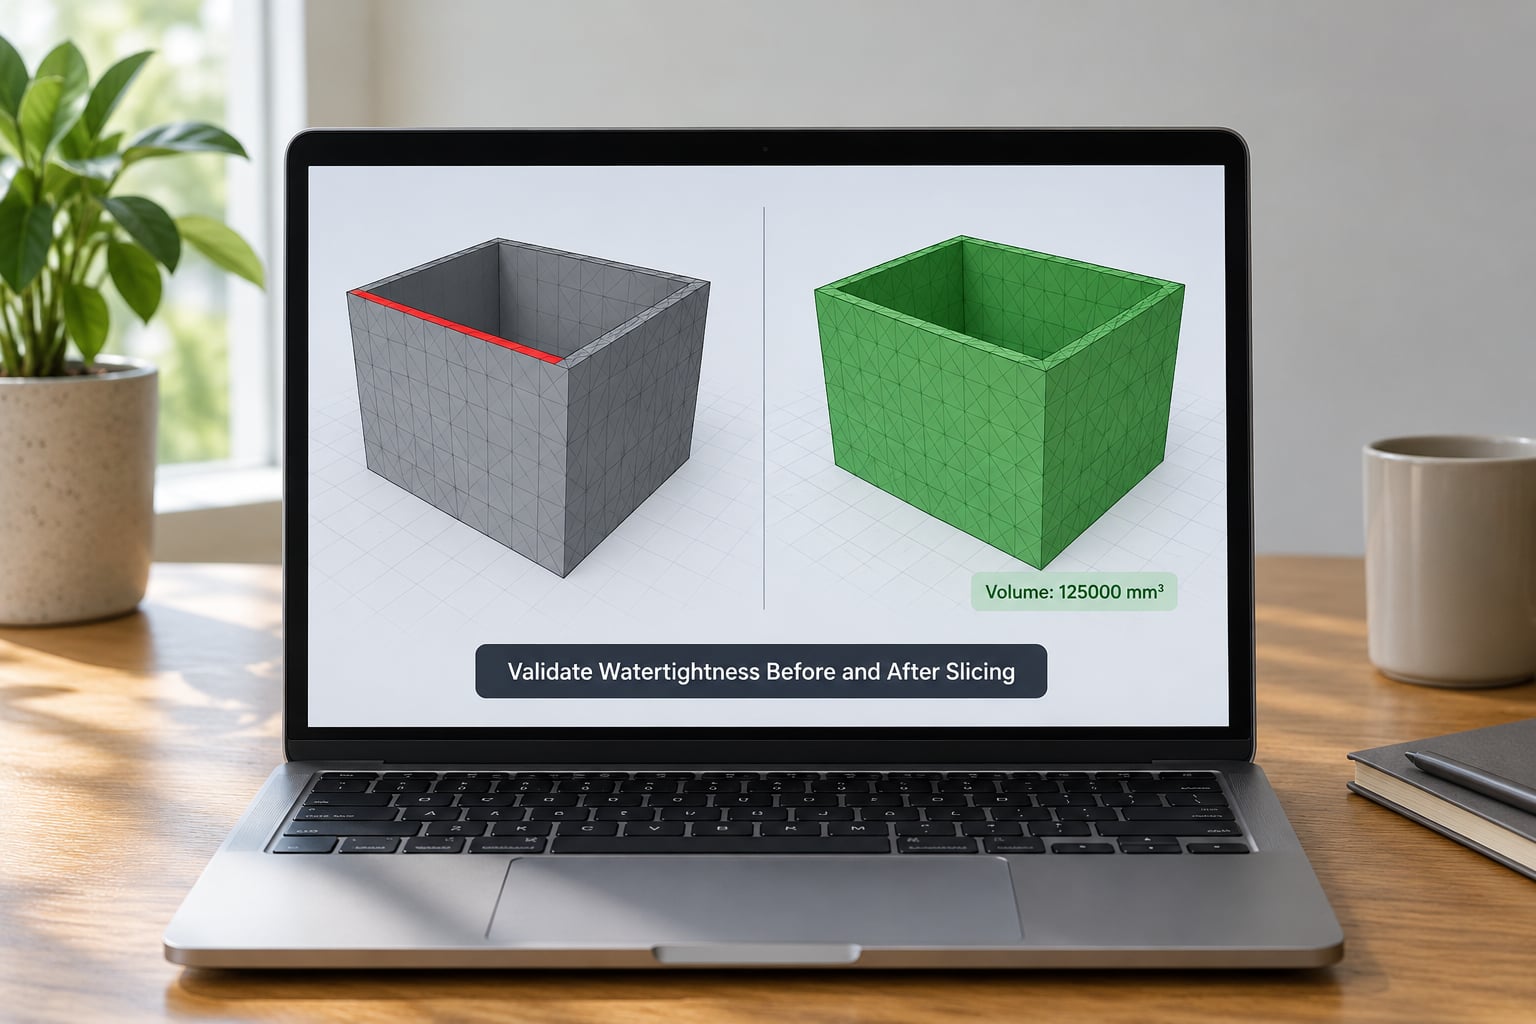
Validate in three places. First, in the mesh checker, confirm that boundary edge count is zero, non-manifold count is zero, and the reported volume is plausible for the part’s outer dimensions.
Second, reopen the exported STL in a fresh Blender session. Reopening catches export problems that the in-session statistics hide, because the file you validated is not always the file that was written.
Third, load it into PrusaSlicer, OrcaSlicer or Cura. All three print a non-manifold warning on load, and the preview is worth studying. Slice the model and step through the cross-section viewer looking for pinholes in the wall, gaps at the seam and voids in the infill.
Fix 9 ties the whole chain together. If the checker passes but the slicer still warns, the problem is usually on export, so re-export from the source with different settings rather than repairing the STL again.
Common Mistakes
Running the automatic repair repeatedly on the same file makes it worse, because each pass bridges more geometry and removes more detail. Save a fresh copy before every repair so you can compare and roll back.
Filling every boundary edge indiscriminately closes your vents, cable channels and mounting slots. Select the region, not the whole model.
Flipping every normal in a model with real inverted faces hides the symptom. Recalculate Outside once, then investigate what left the face reversed.
Ignoring internal shells is the mistake that survives to the print. A model can pass every surface check and still trap a void you will find at the bottom of a container.
Inconsistent units produce confusing repair results, because the merge threshold you set is in metres and the model may not be.
Checking from one angle is unreliable. Non-manifold problems hide on the underside and inside corners, so rotate the model through at least a full pass before declaring it clean.
Treating a green slicer preview as a full geometry audit misses every issue the slicer quietly tolerates, including internal faces and thin walls that will print as gaps.
Tips for Preventing Watertightness Problems
Plan wall thickness in CAD, not in the slicer. A 1.2 mm minimum gives export tools room to work and survives a 0.4 mm nozzle.
Keep the master model clean. Every repaired STL you go on to treat as the real file makes the next edit harder, because you have lost the parametric history that made the last fix easy.
Version your files with a naming convention that includes the date and the repair stage, such as enclosure_v3_repaired. It costs nothing and prevents editing the wrong copy.
Run a preflight check in the slicer as a habit, before you scale a model up. Repairing a defect at 20% scale takes seconds; repairing it after a four-hour print has already failed takes much longer.
Build a small test vessel with a known wall count and print it before committing to a real part. Fill it, leave it overnight, and look for dampness on a dry tissue underneath.
Frequently Asked Questions
Is a watertight 3D model also waterproof?
No. Watertight describes geometry: a closed shell with no holes. Waterproof describes performance over time, temperature and pressure. A mesh can be perfectly watertight and still fail as a physical part, because thin walls print with gaps, layers bond weakly, and PLA softens near 60 C. Always treat watertight mesh validation and waterproof performance as two separate checks.
Can I make an STL watertight without Blender?
Yes, for small defects. Repair STL and Meshmixer both detect boundary edges and non-manifold geometry, fill small holes, fix normals and remove duplicate faces without any 3D modelling experience. Blender becomes necessary when the automatic result is wrong, when a large chunk of surface is missing, or when self-intersections and internal shells need selective cleanup.
Why does my slicer say the model is not watertight?
Your slicer found an edge that is not shared by exactly two faces, or a face with no neighbour. That usually means a missing face, duplicate overlapping geometry, a failed boolean that left a stray body, or two shells intersecting. The slicer is reading the mesh, not the model intent, so it reports a geometry problem rather than telling you which feature caused it.
Should I repair the STL or change the original CAD file?
Change the CAD file whenever it still exists. A parametric edit stays editable, so the next dimension change does not break the seal again, and you can raise wall thickness at the source. Repairing the STL is a fallback for scanned, sculpted or otherwise origin-less meshes where no parametric history survives.
How do I fix an intentional hole without ruining the print?
Do not fill it. An intentional hole is part of the design, so leave its boundary edges in place and instead prevent the repair tools from touching that region. Work on a duplicate, repair only the defects you selected, and re-check that the opening survived. Most tools have a per-region or per-component selection mode for exactly this case.
Conclusion
Start by inspecting the mesh, not by clicking repair. Load the model into Blender 4.2 or newer, turn on the face overlay, and list every boundary edge and non-manifold vertex you can find. Fix the source CAD model wherever possible, close open surfaces, merge duplicates, recalculate normals and clear internal shells. Then re-export the STL with surface-preserving settings and confirm zero boundary edges in a mesh checker and zero warnings in your slicer before the print starts.